Desserts · Part 1 of 3: Ingredients
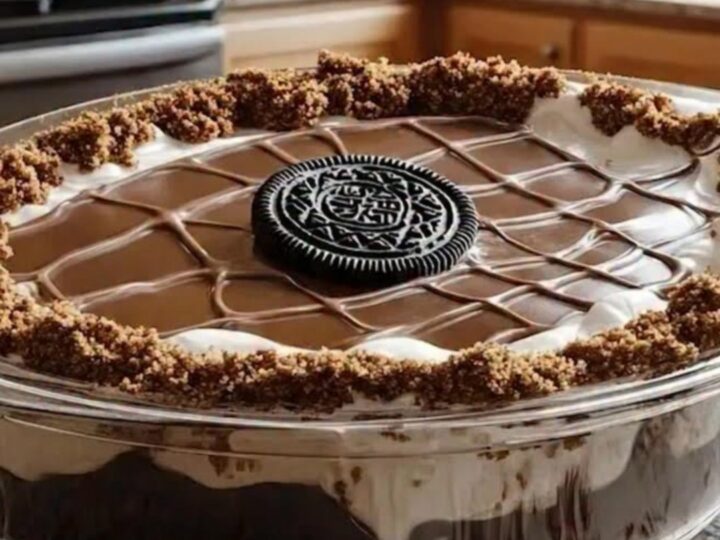
Chilled Oreo and Chocolate Ganache Layer Cake
- Prep
- Cook
- Total
- Serves
- 8
Discover the art of creating a sophisticated chilled dessert that balances deep cocoa notes with a light, airy cream finish. This recipe transforms simple staples into an elegant centerpiece, perfect for impressing guests or satisfying a refined sweet tooth.
By following precise temperature and layering techniques, the result is a beautifully structured cake that offers a clean, professional presentation every time you scoop or slice it. The contrast between chilled, dense ganache, rich chocolate cake, and fluffy cream creates an exceptional textural experience.
This chilled Oreo and chocolate ganache cake showcases the harmony of contrasting temperatures and textures. The foundation is a rich chocolate cake, which provides a sturdy yet moist base that anchors the entire dish. This is topped with a generous layer of freshly whipped cream, delivering pure dairy lightness to offset the dark cocoa intensity.
A silky chocolate ganache crowns the dessert, setting into a delicate glaze that yields cleanly under a spoon. Finished with crushed cookies around the perimeter and a cookie center, it is visually stunning and deeply satisfying.
Ingredients
Base
- 1 layer chocolate cake, store-bought or made ahead
Cream Layer
- 1 1/2 cups heavy cream, chilled
Ganache
- 6 oz semisweet chocolate, finely chopped
- 1/2 cup heavy cream
Garnish
- 6 whole chocolate sandwich cookies, crushed or whole
Why this recipe works
The method relies on careful temperature control to ensure that each distinct layer retains its identity. Chilling the cream thoroughly before whipping ensures that fat globules trap air efficiently, yielding a stable structure that can support the weight of the ganache.
Spreading this cream tightly against the walls of the glass dish creates an impermeable barrier that keeps the poured ganache from seeping downward into the cake layer.
Emulsifying warm cream with chocolate creates a stable suspension that retains a glossy sheen even after extended refrigeration. When poured lukewarm, the ganache flows evenly across the cold cream without melting it, cooling rapidly upon contact to form a distinct, glossy boundary.
This balanced layering allows every spoon scoop to capture cake, fluffy cream, and rich ganache in equal measure without muddling.
Notes and substitutions
The choice of chocolate determines the overall balance of the ganache. Using a semisweet chocolate with around sixty percent cocoa solids provides an ideal harmony between rich cocoa depth and gentle sweetness. Finely chopping the chocolate allows it to melt evenly in the warm cream without requiring excess heat, preventing the delicate cocoa fats from breaking or scorching.
Equipment selection plays an essential role in creating sharp, clean visual layers. An eight-inch square glass dish allows the contrasting strata of dark cake, white cream, and dark ganache to remain clearly visible from the outside. An offset spatula makes leveling the cream simple, while a small piping bag or parchment cone provides the precision needed to pipe the delicate grid pattern over the top.
- semisweet chocolate: bittersweet chocolate for a more intense flavor profile
- heavy cream: whipping cream with at least 30 percent milk fat
Equipment
- 8-inch square glass dish
- electric hand mixer
- mixing bowls
- small saucepan
- piping bag
- offset spatula
Up next · Part 2 of 3
3 steps · 10 min of cooking · what to look for at each stage
Step-by-step instructions (Part 2)