Appetizers · Part 3 of 3: Tips & recipe card
Cheesy Ham-Stuffed Pull-Apart Bread for Easy Sharing Tips, FAQ & printable recipe

- Prep
- Cook
- Total
- Serves
- 8
Tips for success
For an extra layer of flavor, brush a small amount of garlic butter into the crevices before adding the ham and cheese. You can combine melted butter with minced garlic and a pinch of dried parsley to create an aromatic base that permeates the bread as it warms. This small addition makes a significant difference in the overall depth of flavor and creates a professional, bakery-quality finish for your appetizer.
If you prefer a spicier profile, consider adding a few red pepper flakes to the parmesan cheese topping before baking. The heat from the flakes complements the salty ham and creamy mozzarella, providing a nice contrast to the richness of the bread.
This variation is particularly popular if you are serving the bread during a casual party or a game-day gathering where bold, savory flavors are highly appreciated by guests.
Variations
- Italian Style: Replace the ham with pepperoni slices and use a blend of mozzarella and provolone. Sprinkle with Italian seasoning and serve with a side of warm marinara sauce for dipping instead of the white sauce.
- Breakfast Version: Use cooked, crumbled breakfast sausage instead of ham and add a layer of shredded cheddar cheese. This version is perfect for a brunch appetizer and pairs well with a side of maple syrup or hot sauce.
Storage and make-ahead
- Fridge
- Store in an airtight container for up to 3 days.
- Freezer
- Not recommended, as the texture of the bread and the cheese will suffer upon thawing.
- Reheat
- Reheat in a 350°F oven for 10 minutes until warmed through and the crust is crisp again.
If you have leftovers, allow the bread to cool completely for no more than 2 hours before wrapping it tightly in plastic wrap or placing it in an airtight container. Keep the container in the refrigerator to maintain the quality of the cheese and ham.
It is best to consume the bread within 2 days of baking to ensure the crust remains as pleasant as possible, though it can be safely stored for up to 3 days if properly sealed.
You can prepare the bread up to the point of adding the butter and parmesan several hours in advance. Keep the stuffed, unbaked loaf covered in the refrigerator until you are ready to bake.
When ready to serve, remove it from the refrigerator about 20 minutes before baking to take the chill off, then brush with butter, sprinkle with parmesan, and bake as directed. This makes hosting much easier by reducing last-minute preparation time.
Serving ideas
Serve this pull-apart bread hot, directly from the oven, as it is designed to be enjoyed while the cheese is still gooey and stretchy. Place it on a large wooden board or a decorative platter to encourage guests to pull off their own pieces. Having a few small napkins nearby is recommended, as the buttered crust and melted cheese can be a bit messy to eat by hand, which is part of the fun of this dish.
Accompany the bread with a small bowl of creamy dipping sauce placed directly on the serving platter. The contrast between the warm, savory bread and the cool, creamy sauce adds another dimension to the experience.
You can also serve it alongside a crisp green salad if you want to turn this into a more substantial meal, though it stands perfectly well on its own as a hearty appetizer for any social event or casual gathering.
Frequently asked questions
Can this be made with a different type of bread?
How can the bread be prevented from getting too dark in the oven?
Is it necessary to use a specific type of ham?
Cheesy Ham-Stuffed Pull-Apart Bread for Easy Sharing

Ingredients
- 1 loaf unsliced sourdough bread
- 8 oz deli ham, thinly sliced
- 1 cup shredded mozzarella cheese
- 4 tbsp unsalted butter, melted
- 1/4 cup grated parmesan cheese
- 1/2 cup creamy white dipping sauce, store-bought or made ahead
Instructions
- Using a serrated knife, cut the bread loaf into a crosshatch pattern, ensuring the knife reaches deep but does not cut all the way through the bottom crust. This technique creates individual pull-apart pockets for the fillings.
- Carefully tuck thin slices of ham and generous pinches of mozzarella cheese into every crevice of the scored bread. Ensure every section has a balance of ham and cheese for consistent flavor in every bite.
- Brush the top of the bread with melted butter and sprinkle with parmesan cheese. Bake at 375°F (190°C) on a parchment-lined sheet for 25 minutes until the cheese is bubbling and the crust is golden. Serve immediately with the creamy dipping sauce.
Estimated nutrition per serving
- Calories
- 320
- Protein
- 14.5 g
- Carbohydrates
- 35 g
- Fat
- 13 g
- Fiber
- 2 g
- Sugar
- 2 g
- Sodium
- 680 mg
Next recipe
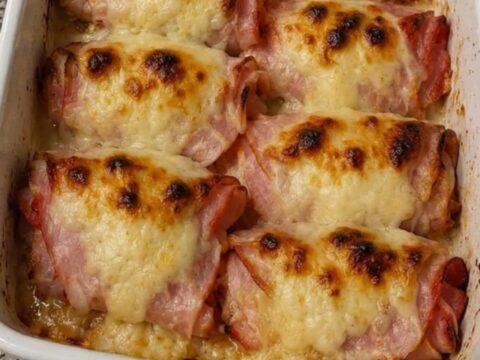
Cheesy Baked Ham and Cheese Rolls for an Easy Appetizer
See the recipe → →This recipe is based on a short cooking video and is published under the pen name Clara Weller. It was checked before publication, but errors can slip through. Nutrition, when shown, is an estimate. Read more in our editorial policy and on our food safety page.
More recipes to try

Creamy Garlic Butter Shrimp Bites for Quick Appetizers
Total time: 20 min
Cheesy Bacon Beef Crescent Rolls for a Quick Savory Treat
Total time: 35 min
Easy Baked Ham and Cheese Sliders for a Crowd
Total time: 35 min
Creamy Hot Sausage Beer Cheese Dip
Total time: 30 min
Loaded Bacon Chicken Alfredo Stuffed Breadstick Bombs
Total time: 40 min