Dinner · Part 2 of 3: Instructions
Cheesy Ground Chicken and Bell Pepper Subs Step-by-step instructions
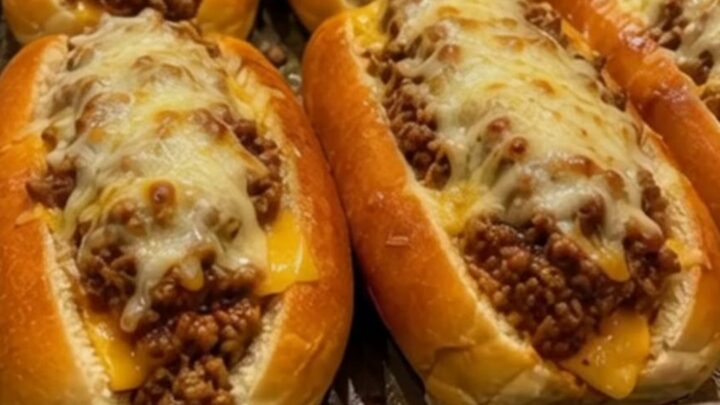
- Prep
- Cook
- Total
- Serves
- 6
Before you start
Prepare all ingredients before beginning the cooking process. Dice the bell peppers into uniform, bite-sized pieces to ensure even cooking. Measure out the tomato sauce and shred the mozzarella cheese if it is not already pre-shredded.
Having the rolls sliced and ready on the baking sheet will streamline the assembly phase, allowing for a quick transition from the stovetop to the broiler once the filling is ready.
Ingredients at a glance (5)
- 1 lb ground chicken
- 2 cups bell peppers, diced
- 1/2 cup savory tomato sauce
- 6 brioche rolls
- 1 1/2 cups shredded mozzarella cheese
Instructions
Browning and Simmering
- Cook the chicken and peppersHeat a large skillet over medium-high heat. Add the ground chicken and cook, breaking it into smaller pieces with a spatula, until browned and no longer pink. Add the diced bell peppers and continue to sauté until the peppers are tender. Stir in the savory tomato sauce and let the mixture simmer for 5 minutes until well combined.Look for The chicken is fully browned and the sauce has slightly thickened.Safe temperature 165°F (74°C) internal temperature (poultry)Tip Ensure the chicken is cooked through to reach an internal temperature of 165°F (74°C).
The chicken is fully browned, the peppers are soft, and the sauce is incorporated. The mixture should appear thick, savory, and aromatic, with no excess liquid pooled at the bottom of the skillet.
Assembly
- Assemble the subsPreheat the broiler in the oven. Slice the brioche rolls open and arrange them on a baking sheet. Spoon the cooked chicken and pepper mixture generously into each roll. Top each sandwich with an even amount of shredded mozzarella cheese.Look for The rolls are filled and each is topped with a layer of cheese.Tip Do not overstuff the rolls to ensure they remain easy to handle.
The rolls are arranged on the baking sheet and filled evenly with the chicken mixture. Each sub is topped with a generous layer of cheese, ensuring the surface is well covered for a consistent melt.
Broiling
- Broil and servePlace the baking sheet under the broiler for 1 to 2 minutes. Watch closely to ensure the cheese melts rapidly and becomes golden and bubbly without burning the rolls. Remove from the oven immediately once the cheese is perfectly melted and serve while warm.Look for The cheese is bubbling and golden brown.Tip Keep a close eye on the broiler, as cheese can burn very quickly.
The cheese is completely melted, bubbling across the entire surface of the subs, and shows attractive golden brown spots. The edges of the brioche rolls are toasted and crisp, indicating they are ready to serve.
Common mistakes
Avoid overcrowding the skillet when browning the chicken, as this can cause the meat to steam rather than develop a nice color.
Be cautious when using the broiler; it is a powerful heating element that can turn cheese from perfectly melted to burnt in seconds.
Always monitor the oven during the final step. Additionally, ensure the chicken mixture is not overly liquid before filling the rolls, as excess moisture can make the brioche soft.
How to tell it’s done
The ground chicken is fully cooked when it reaches an internal temperature of 165°F (74°C). Use a meat thermometer to verify this in the thickest part of the meat mixture.
The cheese is done when it is completely melted, bubbling, and shows light golden brown spots on the surface. The rolls should be lightly toasted and warm to the touch.
- Poultry: 165°F (74°C) in the thickest part
- Ground meat: 160°F (71°C) in the thickest part
Up next · Part 3 of 3
2 variations · storage & make-ahead · 3 answers · printable card
Tips, FAQ & printable recipe (Part 3)← Back to the ingredients (Part 1)