Appetizers · Part 2 of 3: Instructions
Cheesy Beef Bacon Bread Rolls Step-by-step instructions
- Prep
- Cook
- Total
- Serves
- 8
Before you start
Before beginning, ensure that the oven is fully preheated to 375°F (190°C) to guarantee an even rise for the dough. Prepare your workspace by lightly flouring the counter to prevent the pizza dough from sticking.
Make sure the beef bacon is already cooked, crumbled, and completely cooled, as adding hot bacon to the dough can cause it to become gummy and difficult to seal effectively. Have your baking sheet ready with parchment paper to avoid any sticking during the baking process.
Ingredients at a glance (3)
- 1 lb pizza dough, store-bought or made ahead
- 8 oz mozzarella cheese, cubed or shredded
- 1/2 lb beef bacon, cooked and crumbled
Instructions
Dough Preparation
- Prepare the DoughDivide the pizza dough into eight equal portions. Roll each piece into a small, flat circle on a lightly floured surface to prepare for the filling.Look for The dough pieces should be uniform in size.Tip Use a bench scraper for cleaner cuts if the dough is sticky.
The dough should be divided into eight uniform pieces. Each piece must be soft and pliable enough to be pressed into a flat circle without snapping back. If the dough feels too tight or resistant, let it rest for a few more minutes, as this will relax the gluten and make the shaping process significantly smoother and more consistent.
Filling and Sealing
- Assemble the RollsPlace a generous amount of mozzarella cheese and crumbled beef bacon into the center of each dough circle. Fold the edges of the dough over the filling and pinch them tightly to seal, ensuring no cheese leaks out during baking.Look for Ensure the dough is sealed completely to prevent cheese from leaking.Tip Do not overfill, or the dough may tear while baking.
The rolls should be completely enclosed with no visible holes or weak spots in the dough. When finished with this phase, you should have eight neatly formed, sealed balls of dough. Check that each one is tightly pinched, as this is the most critical step to ensure the cheese stays inside the roll during the high-heat baking process.
Baking to Perfection
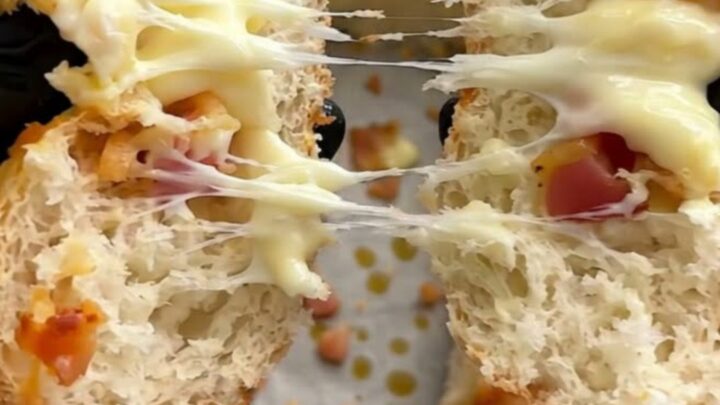
- Bake the RollsArrange the stuffed rolls on a parchment-lined baking sheet. Preheat the oven to 375°F (190°C) and bake for 20 minutes until the crust is golden brown and the cheese is bubbling inside. Let the rolls rest for 5 minutes before serving.Look for The rolls should be golden brown and the cheese should be melted.Tip Serve warm for the best cheese pull experience.
The rolls should emerge from the oven with a uniform golden-brown crust. The aroma of baked bread and savory bacon should be present, and the cheese should appear soft and melted when the rolls are slightly pressed.
After the required resting time, the rolls should be warm, firm on the outside, and ready to be pulled apart to reveal the melted interior.
Common mistakes
A common mistake is failing to seal the dough properly, which allows the mozzarella to escape onto the baking sheet. Take the time to pinch the edges of the dough firmly to create a secure, airtight pocket. Another error is overstuffing the rolls, which can lead to tearing during the baking process.
Start with a modest amount of filling and adjust as you become more comfortable with the dough's elasticity. Finally, avoid using cold dough directly from the refrigerator; letting it rest at room temperature for 15 minutes makes it much easier to stretch and shape.
How to tell it’s done
The rolls are finished when the exterior reaches a deep golden brown color and the crust feels firm to the touch. You should be able to see slight signs of cheese bubbling out from the seams.
Because the dough is the primary component being cooked, it should sound hollow when tapped lightly. Ensure the rolls have rested for at least 5 minutes, as this allows the melted cheese inside to stabilize slightly, making them easier to handle without the filling running out immediately.
Up next · Part 3 of 3
2 variations · storage & make-ahead · 3 answers · printable card
Tips, FAQ & printable recipe (Part 3)← Back to the ingredients (Part 1)