Appetizers · Part 3 of 3: Tips & recipe card
Cheesy Baked Ham and Cheese Rolls for an Easy Appetizer Tips, FAQ & printable recipe

- Prep
- Cook
- Total
- Serves
- 8
Tips for success
To add extra flavor, consider adding a thin layer of mustard or a light spread of herb-infused butter on the ham before adding the cheese.
This adds a subtle complexity that balances the saltiness of the ham and the richness of the melted cheese. Just be sure to keep the layer thin to avoid making the rolls soggy during the baking process.
If you want to achieve a more intense golden-brown crust, you can place the baking dish under the broiler for the last thirty seconds of cooking. Watch it extremely closely, as the cheese can go from perfectly golden to burnt in a matter of moments. This step is optional but adds a wonderful depth of flavor to the final appetizer.
Variations
- Spicy Ham Rolls: Add a pinch of crushed red pepper flakes or a thin slice of pickled jalapeño inside each roll before baking to add a spicy kick that cuts through the richness of the melted cheese.
- Herbed Ham Rolls: Sprinkle a teaspoon of dried Italian seasoning or finely chopped fresh parsley over the cheese before baking to introduce an aromatic herbal note that enhances the overall flavor profile of the dish.
Storage and make-ahead
- Fridge
- Store in an airtight container in the refrigerator for up to 3 days.
- Freezer
- Freezing is not recommended as the texture of the ham and the quality of the melted cheese will degrade significantly.
- Reheat
- Reheat in a preheated oven at 350°F (175°C) for 5-8 minutes until warmed through and the cheese is soft.
Store any leftover rolls in an airtight container once they have cooled to room temperature. It is important not to leave them out for more than two hours to ensure food safety.
They can be kept in the refrigerator for up to three days, though they are best enjoyed fresh to maintain the ideal texture of the ham and the crispness of the cheese.
You can assemble the rolls several hours in advance and keep them in the refrigerator, covered with plastic wrap. When you are ready to bake, simply remove them from the fridge and place them directly into the preheated oven.
You may need to add an extra minute or two to the total baking time to account for the chilled starting temperature of the rolls.
Serving ideas
These rolls are best served warm, shortly after they come out of the oven. Arrange them on a platter or serve them directly from the ceramic baking dish for a rustic presentation. They pair excellently with a side of dipping sauce, such as a honey mustard or a spicy ranch, which can complement the savory profile of the ham and cheese.
Because these are individual portions, they are perfect for casual entertaining. You can set them out as part of a larger appetizer spread or serve them alongside a fresh green salad for a light meal.
The ease of picking them up with a fork or by hand makes them a versatile choice for any social occasion where finger foods are preferred.
Frequently asked questions
Can these rolls be made in an air fryer?
What is the best type of cheese to use for a good pull?
How can the rolls be kept from unrolling?
Cheesy Baked Ham and Cheese Rolls for an Easy Appetizer

Ingredients
- 8 slices deli ham
- 2 cups shredded cheese
Instructions
- Lay out the ham slices on a clean surface. Place a generous portion of shredded cheese at one end of each ham slice. Carefully roll up each slice tightly, ensuring the cheese is contained within the ham roll.
- Arrange the prepared rolls seam-side down in a baking dish. Top the rolls with the remaining shredded cheese. Place the dish into a preheated oven at 375°F (190°C) and bake until the cheese is melted and bubbling.
- Remove the baking dish from the oven carefully. Allow the rolls to rest for five minutes before serving to let the cheese set slightly. Serve warm directly from the baking dish for the best experience.
Estimated nutrition per serving
- Calories
- 210
- Protein
- 14.5 g
- Carbohydrates
- 2 g
- Fat
- 16 g
- Fiber
- 0 g
- Sugar
- 0.5 g
- Sodium
- 650 mg
Next recipe

Creamy Garlic Butter Shrimp Bites for Quick Appetizers
See the recipe → →This recipe is based on a short cooking video and is published under the pen name Clara Weller. It was checked before publication, but errors can slip through. Nutrition, when shown, is an estimate. Read more in our editorial policy and on our food safety page.
More recipes to try

Cheesy Bacon Beef Crescent Rolls for a Quick Savory Treat
Total time: 35 min
Easy Baked Ham and Cheese Sliders for a Crowd
Total time: 35 min
Creamy Hot Sausage Beer Cheese Dip
Total time: 30 min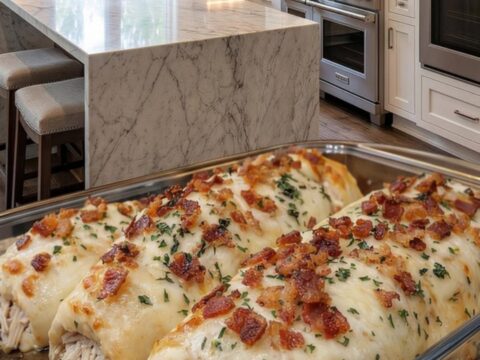
Loaded Bacon Chicken Alfredo Stuffed Breadstick Bombs
Total time: 40 min
Cheesy Hot Crab Dip: The Ultimate Party Appetizer
Total time: 35 min