Appetizers · Part 2 of 3: Instructions
Cheese-Stuffed Pickled Jalapeños: Tangy, Creamy, Make-Ahead Step-by-step instructions
- Prep
- Cook
- Total
- Serves
- 8
Before you start
Before starting, put on a pair of disposable gloves to protect your hands from the jalapeño oils. Have a large bowl of cold water ready for soaking the cored peppers. You’ll also need a large pot for the brine, clean glass mason jars with lids, and a piping bag or zip-top bag for the filling.
Measure out all the ingredients before you begin: the jalapeños, salt, vinegar, water, garlic, labneh, yogurt, feta, and olive oil. If you’re using a piping bag, fit it with a plain tip and have it ready to fill.
Ingredients at a glance (9)
- 1 lb fresh jalapeño peppers
- 1 tbsp kosher salt
- 1 cup white vinegar
- 2 cups water
- 3 cloves garlic, smashed
- 1/2 cup labneh
- 1/2 cup süzme yogurt
- 1/2 cup crumbled feta cheese
- 1 cup extra-virgin olive oil
Instructions
Pickle and Prep
- Core and Soak the JalapeñosWearing gloves, cut the stems off the jalapeños and slice each pepper lengthwise. Use a small spoon or a coring tool to remove the seeds and membranes, creating a clean cavity for the filling. Place the cored peppers in a large bowl and cover with cold water. Soak for 1 hour to tame the heat and crisp the flesh.Look for The peppers are bright green, hollow, and crisp after soaking.Tip Use a paring knife to trim any remaining white pith for a milder pepper.
- Make the Pickling BrineIn a large pot, combine the white vinegar, water, kosher salt, and smashed garlic. Bring to a boil over high heat, stirring until the salt dissolves. Boil for 2 minutes, then remove from heat and let cool slightly while you prepare the jars.Look for The brine is clear and fragrant with garlic and vinegar.Tip Use a non-reactive pot (stainless steel or enamel) to avoid off-flavors.
- Pack the Peppers in JarsDrain the soaked jalapeños and pat them dry. Pack the peppers snugly into clean glass mason jars, layering with the smashed garlic from the brine. Pour the hot brine over the peppers, covering them completely. Seal the jars and let them cool to room temperature, then refrigerate for at least 24 hours to develop the pickled flavor.Look for The peppers are submerged in brine and the jars are sealed.Tip Leave 1/2 inch headspace to allow for expansion during pickling.
After this phase, the jalapeños are bright green, crisp, and sour from the brine, with a faint garlic aroma. The jars are sealed and the peppers are fully submerged in the pickling liquid.
Check that the jars are properly sealed and that no peppers are sticking out above the brine—if they are, add a little more brine or press them down. The peppers should be cool and ready for the next step after at least 24 hours in the fridge.
Creamy Filling
- Drain the Pickled PeppersAfter the peppers have pickled, remove them from the jars and drain them well. Pat them dry with paper towels to remove excess brine, which helps the cheese filling adhere.Look for The peppers are slightly translucent from the brine and dry to the touch.Tip Reserve the pickling liquid for another use or discard.
- Mix the Cheese FillingIn a mixing bowl, combine the labneh, süzme yogurt, and crumbled feta cheese. Using a spatula, whip the mixture until smooth and creamy, with no large lumps. The filling should be thick enough to pipe.Look for The filling is smooth, white, and holds its shape when lifted.Tip If the filling seems too loose, add a little more feta or yogurt to thicken.
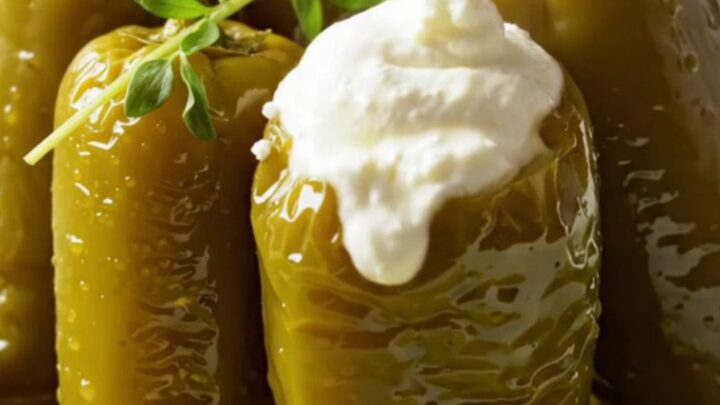
- Pipe the Filling into the PeppersTransfer the cheese mixture to a piping bag fitted with a plain tip, or use a zip-top bag with a corner snipped. Pipe the filling generously into each pickled jalapeño cavity, mounding it slightly above the opening. Arrange the filled peppers snugly in a clean glass jar or serving dish.Look for Each pepper is filled to the top with a creamy crown of cheese.Tip Work in batches to keep the peppers from drying out.
The cheese filling is smooth, thick, and holds its shape when scooped. The pickled peppers are drained and dry, with no excess brine pooling in the cavities. As you pipe the filling, each pepper should be generously stuffed, with a small mound of cheese crowning the top. The peppers should be arranged snugly in the jar, and the filling should look creamy and inviting, not runny or grainy.
Oil and Chill
- Submerge in Olive OilPour the extra-virgin olive oil over the stuffed peppers, covering them completely. Gently tap the jar to release any air bubbles. The oil preserves the peppers and adds richness.Look for The peppers are fully submerged in golden oil with no air pockets.Tip Use a good-quality olive oil for the best flavor.
- Chill and ServeCover the jar and refrigerate for at least 2 hours to let the flavors meld. Serve chilled or at room temperature, allowing the oil to come to room temperature for the best texture. The peppers are ready to eat.Look for The oil is slightly cloudy from the cold, and the peppers are firm.Tip For a stronger flavor, let the peppers sit in the oil overnight.
The stuffed peppers are fully submerged in golden olive oil, with no air bubbles trapped around them. The oil should be clear and fragrant, and the peppers should be completely covered. After chilling, the oil may become slightly cloudy from the cold, but that’s normal. The peppers should be firm to the touch and the cheese filling set, ready to serve straight from the jar or at room temperature.
Common mistakes
One common mistake is not wearing gloves when handling jalapeños, which can lead to burning hands and accidental eye contact. Another is over-soaking the peppers, which can make them waterlogged and less crisp; stick to the 1-hour soak.
When filling the peppers, avoid overfilling them to the point where the cheese spills out and makes a mess in the oil. Also, be sure to pack the peppers snugly in the jar so they don’t float up above the oil, which can cause them to discolor and spoil faster.
How to tell it’s done
The peppers are done when they are crisp-tender and have absorbed the pickling brine, taking on a slightly translucent look. The cheese filling should be smooth and creamy, with no lumps, and it should hold its shape when piped.
After chilling in the olive oil, the peppers should be firm but give slightly when bitten, and the oil should be fragrant and golden. There is no protein to cook, so no internal temperature is needed; the dish is ready to serve once it has chilled for at least 2 hours.
Up next · Part 3 of 3
4 variations · storage & make-ahead · 5 answers · printable card
Tips, FAQ & printable recipe (Part 3)← Back to the ingredients (Part 1)