Dinner · Part 2 of 3: Instructions
Cheese-Stuffed Bacon-Wrapped Meatloaf Step-by-step instructions
- Prep
- Cook
- Total
- Serves
- 6
Before you start
Before starting, ensure that all ingredients are measured and ready to go. Take the meat mixture out of the refrigerator about 20 minutes before shaping to make it easier to work with.
Preheat your oven to 375°F (190°C) and prepare a baking sheet with a piece of parchment paper to prevent sticking and simplify cleanup. Have your meat thermometer handy, as it is the most reliable way to ensure the meatloaf is cooked to a safe internal temperature without overcooking it.
Ingredients at a glance (3)
- 2 lb meatloaf mixture
- 8 oz cheese, cubed
- 1 lb bacon slices
Instructions
Shaping the meat base
- Prepare the meat basePlace the meatloaf mixture into a large mixing bowl. Mix until just combined. Form the meat into a rectangular loaf shape on a piece of parchment paper.Look for The mixture should be uniform and easy to handle without being over-mixed.Tip Keep the meat cold until ready to shape to ensure a better texture.
The meat should be shaped into an even, uniform rectangle. It should feel firm but pliable, and the seasoning should be distributed evenly throughout the mixture.
Ensure there are no large air pockets trapped inside the meat, as these can cause the loaf to crack or fall apart during the baking process.
Stuffing and bacon wrapping
- Stuff and wrap the loafPress the cubed cheese into the center of the meatloaf, then fold the meat over the cheese to seal it completely. On a separate surface, weave the bacon slices together to create a flat bacon mat. Carefully lift and drape the bacon weave over the meatloaf, tucking the ends underneath.Look for The bacon should cover the entire loaf snugly to hold the shape during cooking.Tip Weaving the bacon ensures that the entire loaf is evenly crusted and stays moist.
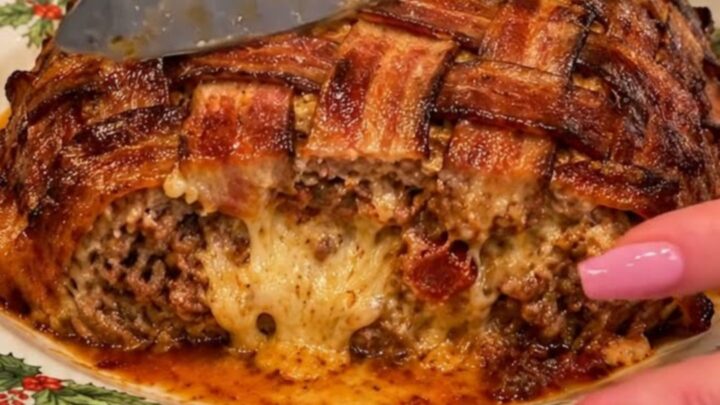
The cheese should be completely enclosed within the meat, with no visible gaps. The bacon weave should be secure and cover the entire top and sides of the loaf. The bacon should look like a neat, continuous mat that fits snugly over the meat without sagging or leaving large areas of the meat exposed.
Baking and resting
- Bake to perfectionTransfer the bacon-wrapped loaf to a baking sheet lined with parchment paper. Bake in a preheated oven at 375°F (190°C) until the bacon is crispy and the internal temperature reaches 160°F (71°C) for the ground meat. Remove from the oven and let it rest for at least 10 minutes before slicing.Look for The bacon should be golden brown and crispy, and the cheese should be bubbling inside.Safe temperature 160°F (71°C) internal temperature (ground meat)Tip Use a meat thermometer to ensure the center is fully cooked to safe temperatures.
The finished loaf should be deeply browned and crispy on the surface. The internal temperature must be verified at 160°F (71°C). Once removed from the oven, the loaf should sit undisturbed for at least 10 minutes, allowing the internal structure to firm up, which makes slicing much easier and cleaner.
Common mistakes
A common mistake is using a mixture that is too lean, which results in a dry loaf. Another error is failing to seal the edges of the meatloaf properly, which allows the cheese to leak out during baking.
Ensure the bacon is woven tightly enough to hold the shape, but do not stretch the slices too thin, as they may tear. Finally, ignoring the resting time will cause the juices to run out immediately upon slicing, leading to a loss of moisture and flavor.
How to tell it’s done
The meatloaf is done when the bacon is crispy and golden brown on the outside. Most importantly, the internal temperature of the meat must reach 160°F (71°C) when checked with a meat thermometer at the thickest part of the loaf.
The cheese should be fully melted and slightly oozing at the edges. Always let the meatloaf rest for 10 minutes after removing it from the oven to allow the juices to redistribute, ensuring every slice stays intact and moist.
- Ground meat: 160°F (71°C) in the thickest part
Up next · Part 3 of 3
2 variations · storage & make-ahead · 3 answers · printable card
Tips, FAQ & printable recipe (Part 3)← Back to the ingredients (Part 1)