Dinner · Part 1 of 3: Ingredients
Cast-Iron Garlic Butter Lobster Tails in 10 Minutes
- Prep
- Cook
- Total
- Serves
- 4
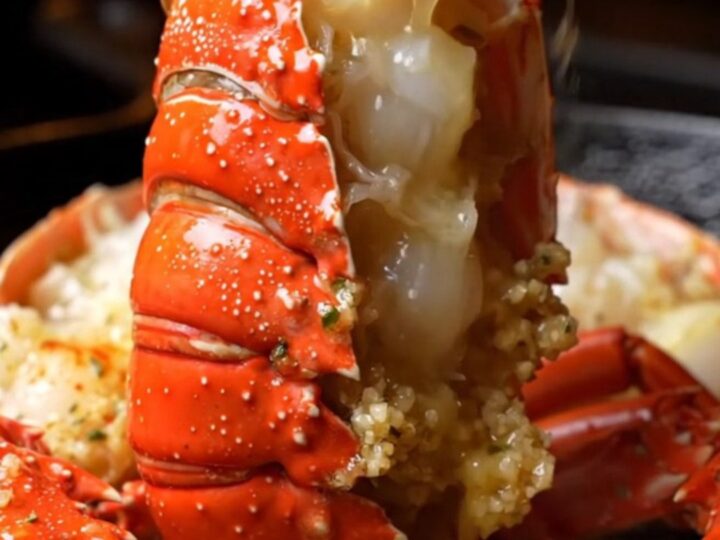
Imagine tender, sweet lobster tail meat that has been seared to a golden crust in a screaming-hot cast-iron skillet, then bathed in a foaming butter sauce infused with roasted garlic, lemon, and smoked paprika. This method delivers restaurant-quality lobster tails in your own kitchen, and the entire process takes less than ten minutes. The secret lies in the two-step cooking: a quick sear locks in flavor, then a hot oven finish ensures the meat stays succulent, never rubbery.
This recipe transforms simple lobster tails into a showstopping main course with minimal effort. The method is straightforward: butterfly the tails, sear them flesh-side down in a cast-iron skillet, then flip and bake while basting with a fragrant garlic butter. The result is lobster meat that is tender, juicy, and infused with the flavors of garlic, lemon, and smoked paprika.
Whether served as the centerpiece of a romantic dinner or a festive celebration, these cast-iron garlic butter lobster tails are sure to impress. The entire dish comes together in under 10 minutes, making it an ideal choice for a quick yet luxurious meal. The cast-iron skillet ensures even heat distribution and a beautiful crust, while the butter sauce adds richness and depth.
Ingredients
- 4 Maine lobster tails (about 5 oz each)
Garlic Butter
- 1 stick unsalted butter, melted
- 6 cloves garlic, minced
- 1 tsp smoked paprika
- 1 tbsp fresh lemon juice
- 2 tbsp fresh parsley, chopped
Why this recipe works
The two-step cooking method—searing first, then baking—is the key to perfectly cooked lobster tails. Searing the flesh-side down in a hot cast-iron skillet creates a flavorful Maillard crust that locks in natural juices. This initial blast of high heat also gives the meat a beautiful golden color and a slight caramelization that enhances its sweetness.
After flipping, the oven finish at 425°F (220°C) gently cooks the meat through without overcooking, ensuring it remains tender and succulent. The butter basting adds moisture and flavor, coating the meat in a rich, garlicky sauce that seeps into every crevice.
Butterflying the tails—cutting the shell and lifting the meat onto the top—exposes the flesh to direct heat, allowing it to cook evenly and quickly. This technique also creates a natural 'boat' for the garlic butter, so the sauce surrounds the meat as it bakes.
The combination of cast-iron heat and butter basting mimics the effect of a professional steakhouse, delivering a dish that is both impressive and foolproof. The result is lobster that is never rubbery, always buttery, and ready in minutes.
Notes and substitutions
For the best results, use cold-water lobster tails, such as Maine or Canadian, which have sweeter, more tender meat. If using frozen tails, thaw them overnight in the refrigerator before cooking. The size of the tails will affect cooking time; adjust the baking time accordingly, aiming for an internal temperature of 140°F (60°C).
A cast-iron skillet is ideal for this recipe because it retains heat well and creates a beautiful sear. If you don't have one, a heavy stainless-steel skillet will work, but avoid nonstick, which won't get as hot.
The garlic butter is the flavor backbone of this dish. Use fresh garlic for the best aroma, and mince it finely so it melts into the butter. Smoked paprika adds a subtle smoky depth, while fresh lemon juice brightens the richness. If you prefer a spicier kick, add a pinch of cayenne pepper. Chopped parsley adds color and freshness at the end. You can prepare the butter mixture ahead of time and keep it in the refrigerator, but bring it to room temperature before using so it pours easily.
- smoked paprika: regular paprika or a pinch of cayenne for heat
- fresh lemon juice: bottled lemon juice, though fresh is brighter
- unsalted butter: salted butter; reduce added salt elsewhere
- Maine lobster tails: any cold-water lobster tails (such as Canadian or Australian)
Equipment
- Cast-iron skillet (12-inch)
- Kitchen shears
- Small bowl
- Pastry brush or spoon
- Instant-read thermometer
Up next · Part 2 of 3
6 steps · 8 min of cooking · what to look for at each stage
Step-by-step instructions (Part 2)