Desserts · Part 2 of 3: Instructions
Cashew Butter Toffee Dark Chocolate Bars Step-by-step instructions
- Prep
- Cook
- Total
- Serves
- 12
Before you start
Before starting, make sure the cashews are roasted and the toffee brittle is at room temperature so it chops cleanly. Line a metal tray with parchment paper, leaving some overhang on the sides for easy lifting. Have a box grater ready for the chocolate.
If the chocolate is very firm, it will grate more easily; if it's warm, chill it for a few minutes. Set up a double boiler or have a microwave available for melting. The steps are straightforward, but having everything prepped and within reach makes the process smooth and enjoyable.
Ingredients at a glance (3)
- 1 1/2 cups roasted jumbo cashews
- 8 oz golden amber butter toffee brittle
- 12 oz 70% dark Belgian chocolate, grated
Instructions
Prepare the Fillings
- Chop the cashews and toffeePlace the roasted cashews on a cutting board and chop them into coarse pieces with a sharp chef's knife. Cut the toffee brittle into small, bite-sized chunks, about 1/4 inch across. Set both aside.Look for Cashews are roughly chopped; toffee is in small, even bits.Tip Keep the toffee pieces fairly small so they distribute evenly through the chocolate.
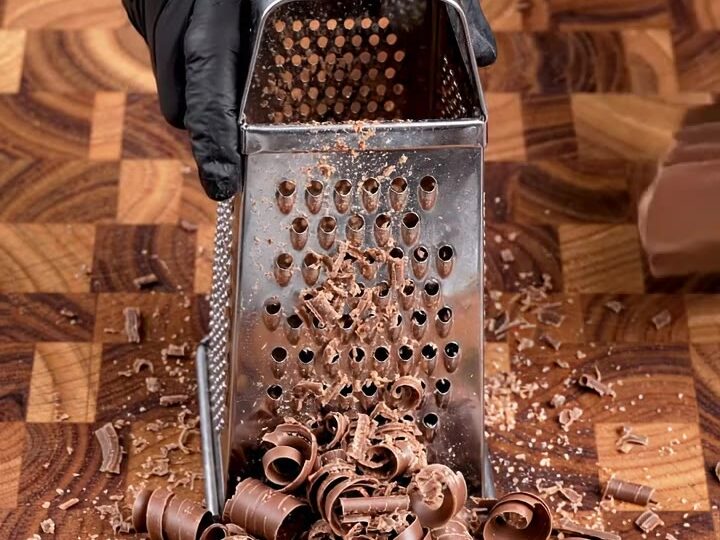
- Grate the chocolateUsing a box grater, grate the block of dark chocolate into a large bowl. You'll get a pile of fine chocolate curls and shavings. This will melt quickly and evenly.Look for The chocolate is finely grated into light, airy curls.Tip If the chocolate softens, chill it for 10 minutes before grating.
At the end of this phase, you should have a cutting board with coarsely chopped cashews and small toffee bits, and a bowl of finely grated chocolate. The cashews should be in roughly 1/4-inch pieces, and the toffee should be in similar small chunks.
The chocolate should be light and fluffy, not melted. Everything is ready for the next step, and your workspace is organized with the tray lined and waiting.
Melt and Assemble
- Melt the chocolateMelt the grated chocolate in a heatproof bowl set over a pot of simmering water, stirring occasionally, until smooth and glossy. Alternatively, microwave in 30-second bursts, stirring between each.Look for The chocolate is completely melted and shiny.Tip Do not let any water touch the chocolate or it will seize.
- Spread toffee on trayLine a metal tray with parchment paper. Spread the chopped cashews and toffee pieces evenly over the bottom of the tray in a single layer.Look for The nuts and toffee cover the tray evenly.Tip Make sure the layer is not too thick—about 1/4 inch works best.
- Pour and swirl chocolatePour the melted chocolate over the cashew-toffee layer. Use a spatula to spread it into an even layer. Then, with a knife or spatula, gently swirl the chocolate to create a marbled effect with the toffee.Look for The chocolate covers the nuts and toffee; swirls are visible.Tip Don't overmix—just a few strokes for a marbled look.
The chocolate is fully melted and glossy, with no lumps. The tray is covered with an even layer of cashews and toffee. When you pour the chocolate, it should spread easily and cover the filling completely. The swirling creates a marbled pattern, with ribbons of toffee visible in the chocolate. The surface should be smooth and even, and the chocolate should be thick enough to hold the bars together.
Chill and Slice
- Chill until setRefrigerate the tray for at least 1 hour, or until the chocolate is completely firm. Once set, lift the slab out using the parchment paper and place on a cutting board.Look for The chocolate is solid and no longer sticky to the touch.Tip Chilling overnight gives a cleaner cut.
- Slice into barsUsing a sharp chef's knife, slice the slab into thick bars, about 2 inches wide. Lift one bar and snap it in half to reveal the layered cross-section of crunchy toffee, nuts, and rich dark chocolate.Look for The bars are neat and the snap is clean.Tip For clean cuts, warm the knife under hot water and dry it before slicing.
The chocolate is completely firm and no longer tacky. When you lift the slab, it holds its shape. Slicing produces clean edges, and the bars snap crisply in half, revealing a cross-section with distinct layers of chocolate, toffee, and cashews. The bars are thick and substantial, with a glossy finish. They are ready to serve or store.
Common mistakes
One common mistake is overheating the chocolate, which can cause it to seize or become grainy. Always melt gently, using a double boiler or short microwave bursts, and stir frequently. Another pitfall is chopping the toffee too large, which makes it hard to slice the bars cleanly—aim for small, uniform pieces.
If the chocolate is too thin when poured, it may not fully coat the nuts and toffee; make sure the layer is even and thick enough to hold everything together. Finally, don't skip the chilling step—it's essential for a clean cut and a satisfying snap.
How to tell it’s done
The bars are done when the chocolate is completely set and firm to the touch. This typically takes at least 1 hour in the refrigerator, but overnight is even better for a cleaner cut. When you lift the slab using the parchment, it should hold its shape without bending.
Slicing into bars should produce a clean snap—if the chocolate feels soft or bends, it needs more chilling. The cross-section should show distinct layers of chocolate, toffee, and nuts, with the toffee visibly swirled into the chocolate. The bars should be thick, about 2 inches wide, and have a glossy sheen on the surface.
Up next · Part 3 of 3
4 variations · storage & make-ahead · 5 answers · printable card
Tips, FAQ & printable recipe (Part 3)← Back to the ingredients (Part 1)