Desserts · Part 1 of 3: Ingredients
Cashew Butter Toffee Dark Chocolate Bars
- Prep
- Cook
- Total
- Serves
- 12
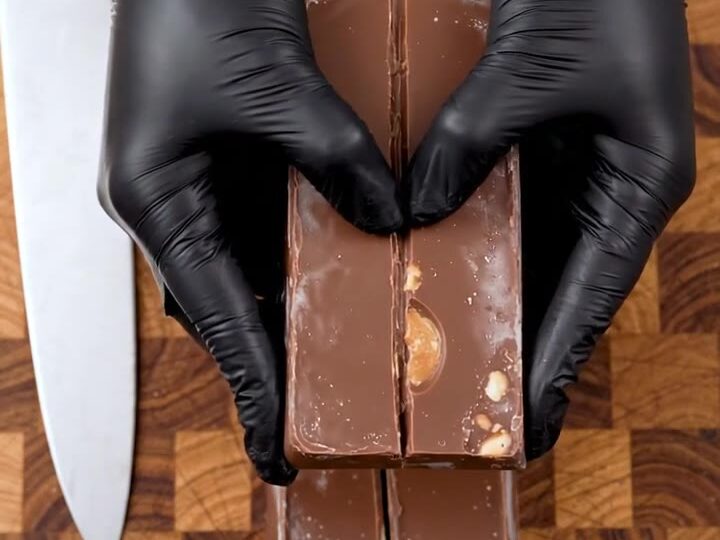
These dark chocolate bars are a study in contrast: a thick, glossy slab of 70% Belgian chocolate hiding a crunchy, buttery toffee and roasted cashew center. The first bite gives a clean snap, then the toffee shatters and the nuts release their warm, toasted flavor.
It's a candy bar that feels both rustic and refined, made entirely without an oven. The process is almost meditative—chopping, grating, melting, swirling—and the result is a tray of thick bars that look like they came from a boutique chocolatier.
There is something deeply satisfying about making candy at home, and these cashew butter toffee dark chocolate bars deliver that joy with minimal effort. The video shows a straightforward technique: chop roasted jumbo cashews and golden amber toffee brittle, grate a block of dark chocolate, melt it, pour it over the nuts and toffee, swirl, and chill.
The result is a thick, rustic slab that you slice into generous bars, each one packed with crunchy bits and rich, bittersweet chocolate. Because there is no baking involved, the bars come together in about twenty minutes of active time, plus a chill in the fridge. They make a wonderful gift, a weekend project, or simply a way to elevate your dessert game with homemade candy that looks and tastes impressive.
Ingredients
- 1 1/2 cups roasted jumbo cashews
- 8 oz golden amber butter toffee brittle
- 12 oz 70% dark Belgian chocolate, grated
Why this recipe works
The combination of textures is what makes these bars so compelling. The roasted cashews provide a soft crunch, the toffee brittle adds a shattering snap, and the dark chocolate brings a smooth, creamy melt. Each bite offers a different ratio of these elements, keeping the palate engaged from start to finish.
The dark chocolate, at 70%, has enough bitterness to balance the sweetness of the toffee, so the bar never feels cloying. Instead, it tastes sophisticated and deeply chocolatey, with the toffee and nuts playing supporting roles rather than overwhelming the chocolate.
The method is intentionally simple, letting the quality of the ingredients shine. Grating the chocolate rather than chopping it ensures it melts quickly and evenly, reducing the risk of scorching. Pouring the melted chocolate over the nuts and toffee, rather than mixing them in, creates a layered structure that shows off the cross-section when you snap a bar.
The swirling step is more than decorative—it slightly folds the toffee into the chocolate, so every bite has a hint of buttery toffee flavor. This technique is forgiving and accessible, making it a great entry point for homemade candy.
Notes and substitutions
For the best flavor, use a high-quality dark chocolate with at least 70% cacao. Belgian chocolate is a classic choice, but any good bittersweet bar will work. The roasted jumbo cashews add a buttery, rich note; if you prefer, you can substitute roasted almonds or pecans. The golden amber butter toffee brittle is a store-bought candy that you can find in the baking aisle or near the chocolate chips. If you want to make your own toffee, that works too—just make sure it is fully set and brittle before chopping.
The equipment needed is minimal: a chef's knife, a box grater, a metal tray lined with parchment, and a heatproof bowl for melting. A rubber spatula helps spread the chocolate evenly. If you don't have a box grater, you can chop the chocolate finely with a knife, but grating gives a more uniform melt. The tray size will affect the thickness of the bars—a larger tray gives thinner bars, while a smaller tray yields thicker ones. Aim for about 1/4-inch thickness for a good balance of chocolate to filling.
- roasted jumbo cashews: roasted almonds or pecans
- golden amber butter toffee brittle: store-bought toffee bits or homemade toffee
- 70% dark Belgian chocolate: bittersweet or semisweet chocolate (60-70%)
Equipment
- Chef's knife
- Cutting board
- Box grater
- Parchment-lined metal tray
- Mixing bowl
- Rubber spatula
Up next · Part 2 of 3
7 steps · 5 min of cooking · what to look for at each stage
Step-by-step instructions (Part 2)