Appetizers · Part 2 of 3: Instructions
Caramelized Pear Walnut Honey Gorgonzola Puff Pastry Squares Step-by-step instructions
- Prep
- Cook
- Total
- Serves
- 8
Before you start
Before starting, ensure the puff pastry is thawed but still cold. If it's not, place it in the refrigerator for at least 30 minutes. Preheat the oven to 400°F (200°C) and line a baking sheet with parchment paper.
Wash and dry the pears, then slice them lengthwise into thin, even slices, keeping the stem end intact. Chop the toasted walnuts into small pieces. Grate the aged Gouda on the large holes of a box grater. Measure out the blue cheese, honey, and fresh rosemary. Have all ingredients and equipment ready before assembling.
Ingredients at a glance (7)
- 1 sheet puff pastry, thawed
- 3 firm ripe pears (such as Bosc or Anjou)
- 1 1/2 cups shredded aged Dutch honey Gouda
- 1/2 cup crumbled creamy blue cheese (such as Gorgonzola)
- 1/2 cup toasted walnuts, chopped
- 1/4 cup wildflower honey, warmed
- 1 tbsp fresh rosemary, finely chopped
Instructions
Prep and Assemble
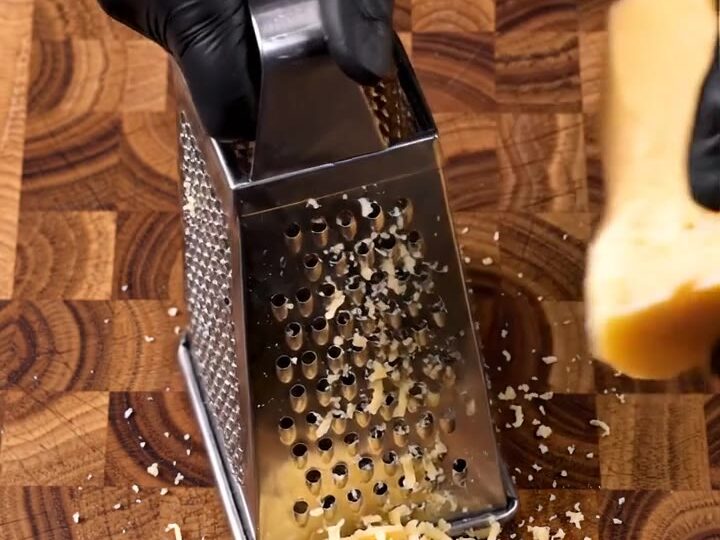
- Prep the Pears, Walnuts, and CheesePreheat the oven to 400°F (200°C). Line a baking sheet with parchment paper. Slice the pears lengthwise into thin, even slices, about 1/8-inch thick, keeping the slices attached at the stem to form a fan shape. Chop the toasted walnuts into small, uniform pieces. Grate the aged Gouda on the large holes of a box grater into a fresh pile.Look for Pears are thinly sliced and still attached at the stem; walnuts are finely chopped; Gouda is freshly grated.Tip Use a sharp knife and slice slowly for even, thin pear slices that fan neatly.
- Assemble the Pastry BasePlace the thawed puff pastry sheet on the prepared baking sheet. Gently score a 1-inch border around the edges without cutting through. Scatter the shredded Gouda evenly over the pastry, leaving the border clean. Crumble the blue cheese over the Gouda, distributing it evenly.Look for Cheeses form an even layer over the pastry, with the border visible.Tip Scoring the border helps the pastry puff up around the filling for a beautiful edge.
- Arrange the Pears and ToppingsArrange the fanned pear slices over the cheese in a single layer, overlapping slightly. Scatter the chopped walnuts and fresh rosemary over the pears. Drizzle the warm honey evenly over the top, including the border if desired.Look for Pears are evenly placed, walnuts and rosemary scattered, honey drizzled over everything.Tip Warm the honey slightly to make it easier to drizzle evenly.
By the end of this phase, you should have a baking sheet lined with parchment paper, the puff pastry placed on it, and the cheeses scattered over the base. The pears are fanned and arranged on top, with walnuts, rosemary, and honey drizzled over.
The pastry should look vibrant with the golden pears, white and blue cheese, and dark green rosemary. The honey should be evenly distributed, and the border of the pastry should be clean and visible.
Bake to Golden Perfection
- Bake the PastryBake the pastry in the preheated oven for 20 to 25 minutes, until the pastry is puffed and golden brown and the cheese is melted and bubbly. The edges should be deeply golden and crisp.Look for Pastry is puffed, golden, and crisp; cheese is melted and bubbling.Tip Rotate the baking sheet halfway through for even browning.
- Cool Slightly and SliceRemove the pastry from the oven and let it cool on the baking sheet for 5 minutes. Using a sharp knife, slice into 8 squares. Lift out a warm flaky portion to serve.Look for Pastry has cooled slightly and slices cleanly into squares.Tip Letting it rest helps the cheese set slightly, making slicing easier.
The pastry should be puffed and golden brown, with the edges crisp and the cheese melted and bubbling. The pears should be tender and slightly caramelized, and the honey should be glossy and sticky. The aroma of roasted pears, toasted walnuts, and melted cheese should fill the kitchen. The pastry should be firm to the touch and easily lift from the parchment paper. Let it cool for 5 minutes before slicing.
Slice and Serve
- Serve WarmServe the pastry squares warm, with an extra drizzle of honey if desired. The contrast of warm, flaky pastry, melted cheese, sweet pears, and crunchy walnuts is best enjoyed right away.Look for Squares are warm, flaky, and fragrant with honey and rosemary.Tip For a cleaner slice, use a serrated knife.
The pastry should be sliced into 8 neat squares, with clean edges and visible layers of cheese, pear, and walnuts. The squares should be warm, flaky, and fragrant with honey and rosemary. When lifted, a portion should hold together, with the cheese slightly stretchy and the pears tender. Serve immediately, with an extra drizzle of honey if desired, to enjoy the full contrast of textures and flavors.
Common mistakes
One common mistake is using pears that are too ripe, which can turn mushy during baking. Another is overloading the pastry with cheese, which can make it soggy. Be sure to leave a clean border around the edges so the pastry can puff up properly.
Slicing the pears too thick can result in undercooked fruit, so aim for thin, even slices. Also, avoid opening the oven door during baking, as this can cause the pastry to deflate. Finally, do not skip toasting the walnuts—raw walnuts are less flavorful and lack the necessary crunch.
How to tell it’s done
The pastry is done when it is puffed and deeply golden brown, with the edges crisp and the cheese melted and bubbly. The pears should be tender and slightly caramelized, and the honey should be glossy and sticky. If you insert a knife into the center, it should come out clean.
The internal temperature of the pastry should be at least 200°F (93°C) to ensure the cheese is fully melted and the pastry is cooked through. Let it cool for 5 minutes before slicing to allow the cheese to set slightly.
Up next · Part 3 of 3
4 variations · storage & make-ahead · 5 answers · printable card
Tips, FAQ & printable recipe (Part 3)← Back to the ingredients (Part 1)