Desserts · Part 2 of 3: Instructions
Caramelized Pear Tart with Honey Walnut and Rosemary Step-by-step instructions
- Prep
- Cook
- Total
- Serves
- 8
Before you start
Thaw the puff pastry sheet in the refrigerator overnight, or at room temperature for about 40 minutes, until it is pliable but still cool. Set the oven rack to the middle position and preheat the oven to 400°F (200°C). Line a baking sheet with parchment paper. Have a sharp chef's knife, a box grater, a wooden cutting board, a pastry brush and a small bowl ready. Wash and dry the pears, then have the walnuts, rosemary, honey and butter within reach so that the assembly moves quickly and the pastry stays cold while you work.
Ingredients at a glance (8)
- 1 sheet puff pastry, thawed (store-bought or made ahead)
- 1 cup finely grated hard pale cheese, such as Parmesan
- 3 ripe pears, such as Bosc or Anjou, peeled, cored and cut into thin wedges
- 1/2 cup walnut halves
- 2 sprigs fresh rosemary
- 2 tbsp honey, warmed for drizzling
- 1 egg beaten with 1 tbsp water, for brushing (optional)
- 1 tbsp unsalted butter, melted
Instructions
Prepare and spread the base
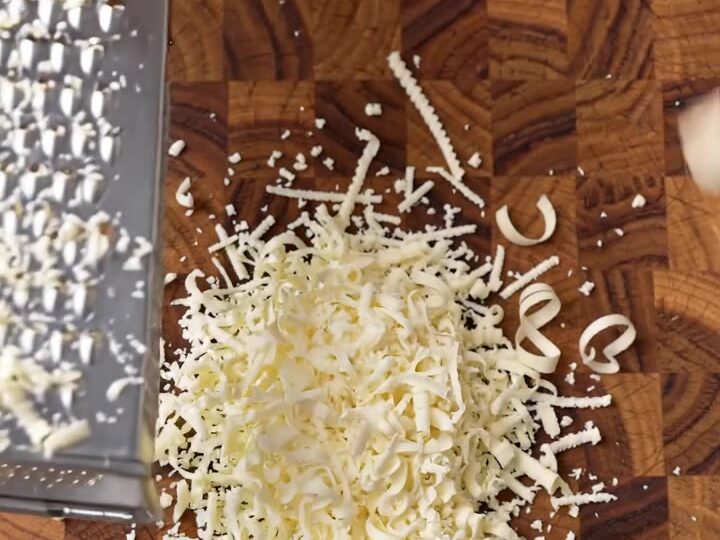
- Prepare the pears and cheesePlace the puff pastry sheet on the wooden cutting board. Peel, core and slice the pears into thin, even wedges. Grate the hard cheese over a box grater until you have fine shreds. Pick the rosemary leaves from the sprigs and set the walnut halves aside.Look for Pear wedges are thin and even, and the cheese falls in fine, fluffy shreds.Tip Toss the pear slices with a squeeze of lemon juice to keep them from browning while you work.
- Spread the cheese baseSpread the grated cheese evenly over the pastry sheet, leaving a small border of about one inch around the edge. Scatter a few rosemary leaves over the cheese so their fragrance spreads through the crust.Look for The cheese covers the pastry in an even, lightly mounded layer.Tip Press the cheese gently into the surface so it stays in place during baking.
At the end of this phase the pastry sheet is laid flat on the cutting board, covered in an even layer of finely grated cheese with a clean one-inch border around the edge. The pears are sliced into thin, uniform wedges and sit ready on the board, and the rosemary leaves are scattered lightly over the cheese.
The aroma is fresh and herbal with a faint dairy note. Before moving on, check that the cheese is evenly spread and the pear slices are all about the same thickness, so that they bake at the same speed and look neat once fanned.
Fan the pears and tuck walnuts
- Arrange the pears and walnutsTransfer the pastry to the parchment-lined baking sheet. Fan the pear wedges in overlapping rows across the cheese, radiating from the center. Tuck the walnut halves between the pear slices, then brush the pastry border with the melted butter and egg wash.Look for Pear slices fan outward in neat rows with walnuts tucked between them.Tip Keep the pear wedges close together so the tart looks full and round once baked.
- Bake until golden and caramelizedSet the oven to 400°F (200°C) and bake the tart on the middle rack for 25 to 30 minutes. Check it near the end: the pastry should be deep golden and puffed, and the pear edges should be tender and caramelized.Look for Pastry is puffed and golden, and the pear edges look browned and sticky.Tip If the border browns too quickly, tent it loosely with foil for the last few minutes.
At the end of this phase the pastry sits on the parchment-lined baking sheet, the pear wedges fan out in overlapping rows from the center, and the walnut halves are tucked between the slices. The pastry border has a light, glossy brush of melted butter and egg wash.
The surface looks organized and colorful, with pale golden pear flesh and the deep brown of walnuts. Before the oven, check that no pear slice overlaps the border and that the pastry is still cool and firm, because chilled pastry rises higher and holds its shape better during baking.
Bake and finish with honey
- Finish with honey and restRemove the tart from the oven and let it rest for about 10 minutes on the baking sheet. Warm the honey briefly, then drizzle it over the pears and walnuts for a glossy finish. Slice and serve with a cake server.Look for Honey coats the pears in a light, glossy sheen.Tip Warm the honey for a few seconds so it spreads and drizzles more easily.
At the end of this phase the tart has baked until the pastry is deep golden and fully puffed around the edges, and the pear tips have darkened into caramelized, slightly sticky edges. The kitchen smells of toasted butter, roasted fruit and nuts.
The honey, warmed briefly, has been drizzled over the pears and walnuts and has settled into a glossy sheen. Before serving, check that the center of the pastry is no longer pale and that the pears feel tender when pierced with a knife tip, then let the tart rest so that the slices hold their shape neatly.
Common mistakes
The most common problem is a soggy base. This usually happens when the pastry was warm when the cheese went on, or when very juicy pears were used without draining them. Keep the pastry cold until it goes into the oven, and pat the pear wedges dry before fanning them.
Another frequent error is overcrowding the pears so tightly that they steam instead of caramelizing. Leave a small gap between slices so the heat reaches the edges. Finally, do not drizzle the honey before baking, since it will burn and turn bitter. Add it only after the tart has come out and rested, when it will shine rather than scorch.
How to tell it’s done
The tart is done when the pastry is deep golden on the top and underside, the edges have risen into distinct layers, and the pears show darkened, sticky caramelized edges with tender centers. A knife tip should slide through a pear wedge with almost no resistance. The cheese base should look set and lightly browned where it peeks between the fruit. Because the tart contains no raw meat or eggs, no internal temperature is required. For a crisper base, check the underside of the pastry: it should be golden rather than pale.
Up next · Part 3 of 3
4 variations · storage & make-ahead · 5 answers · printable card
Tips, FAQ & printable recipe (Part 3)← Back to the ingredients (Part 1)