Dinner · Part 2 of 3: Instructions
Brown Sugar Honey Hickory Beef Short Ribs: 5-Ingredient Crockpot Dinner Step-by-step instructions
- Prep
- Cook
- Total
- Serves
- 4
Before you start
Before you start, make sure you have a 6-quart slow cooker and a sturdy pair of tongs or a carving fork. Pat the short ribs dry with paper towels if they're wet from the package—this helps the seasonings stick.
Slice the onions into thick rings or half-moons. Measure out the brown sugar, smoked paprika, and BBQ sauce so everything is ready to go. There's no need to sear the meat first; the slow cooker will develop plenty of flavor on its own.
Ingredients at a glance (5)
- 4 lb bone-in English-cut beef short ribs
- 1/4 cup dark brown sugar, packed
- 2 tbsp smoked paprika
- 2 medium yellow onions, sliced
- 1 1/2 cups honey-hickory barbecue sauce
Instructions
Layer and Sauce
- Layer the Ribs and SeasoningsPlace the beef short ribs in the bottom of a 6-quart slow cooker, arranging them in a single layer as much as possible. Sprinkle the dark brown sugar and smoked paprika evenly over the ribs, then scatter the sliced yellow onions on top. Use your hands to rub the seasonings gently into the meat so every surface is coated.Look for The ribs should be well coated with the brown sugar and paprika, and the onions should cover the top.Tip If the ribs are too large to fit in a single layer, overlap them slightly; they will shrink as they cook.
- Pour the BBQ Sauce Over EverythingSqueeze the honey-hickory barbecue sauce generously over the entire surface of the ribs and onions. Use a spatula to spread it into an even layer, making sure the sauce reaches the edges and drips down between the ribs. There's no need to stir—the slow cooker will do the work.Look for The ribs and onions should be completely coated in a glossy layer of BBQ sauce.Tip Don't skip the sauce on the sides; it will create a rich glaze as it reduces.
At the end of this phase, the ribs are nestled in the slow cooker with the brown sugar, paprika, onions, and BBQ sauce covering every surface. The sauce should be thick and glossy, and the onions should be scattered evenly. The raw meat will look dark and well coated—this is exactly what you want before the long cook.
Slow Cook to Tender
- Cover and Cook on LowCover the slow cooker with the lid and set it to cook on low heat for 8 to 10 hours, or until the meat is fork-tender and falling off the bone. Do not open the lid during cooking, as this releases heat and extends the cooking time. The sauce will bubble gently and the onions will caramelize into the glaze. Let it rest for 3 minutes before slicing.Look for The meat should be so tender that a fork slides in with no resistance.Safe temperature 145°F (63°C) internal temperature (steaks, chops and roasts)Tip If you're short on time, cook on high for 5 to 6 hours, but low heat gives the most tender result.
- Check the Meat for DonenessAfter 8 hours, use a carving fork to test the short ribs. The meat should be so tender that it nearly slips off the bone when lifted. If it still resists, cover and cook for another 30 to 60 minutes. Insert an instant-read thermometer into the thickest part of the meat, avoiding the bone; it should read at least 145°F (63°C).Look for The meat should pull apart easily with a fork and the internal temperature should be at least 145°F (63°C).Safe temperature 145°F (63°C) internal temperature (steaks, chops and roasts)Tip Let the ribs rest for at least 3 minutes before serving to allow the juices to redistribute.
After 8 to 10 hours, the kitchen smells incredible—sweet, smoky, and rich. The sauce is bubbling gently around the edges, and the onions have melted into a caramelized jam.
When you press a fork into the meat, it should slide in with no resistance, and the meat should be pulling away from the bone. The sauce has thickened and darkened slightly.
Lift and Glaze
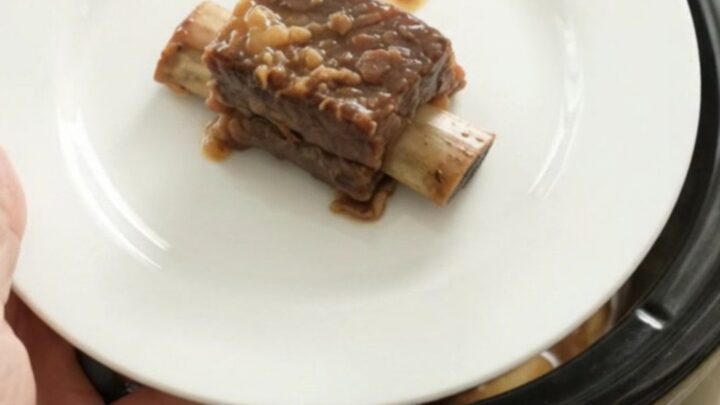
- Lift the Ribs Out GentlyUsing a carving fork or tongs, carefully lift the short ribs out of the slow cooker, letting any excess sauce drip back into the pot. The meat is very tender, so support each rib with the fork to prevent it from breaking apart. Transfer the ribs to a serving plate or cutting board.Look for The ribs should hold their shape but be clearly fall-apart tender.Tip If you prefer, you can remove the bones before serving—they should slide out cleanly.
- Spoon the Glaze Over the MeatSpoon some of the caramelized onion and BBQ sauce mixture from the slow cooker over the ribs. The sauce should be thick, glossy, and bubbling. Serve immediately while hot, with extra sauce on the side if desired.Look for The glaze should coat the back of a spoon and cling to the meat.Tip For a thicker sauce, transfer it to a small saucepan and simmer for a few minutes to reduce.
The ribs come out of the slow cooker in one piece but are so tender they tremble. The glaze clings to the meat, glossy and dark. When you spoon the sauce over the top, it's thick and coats the back of the spoon. The onions are soft and sweet, almost dissolved into the sauce. The meat is steaming and ready to serve.
Common mistakes
The biggest mistake is lifting the lid to peek. Every time you open the slow cooker, heat escapes and adds 20 to 30 minutes to the cooking time.
Another common error is using boneless, thin-cut ribs and cooking them for the full 10 hours—they'll become dry and stringy. Stick to bone-in English-cut ribs for best results. Also, don't skip the onions; they add moisture and sweetness that balance the sauce.
How to tell it’s done
The short ribs are done when they are fork-tender and the meat easily pulls away from the bone. Insert an instant-read thermometer into the thickest part of the meat, avoiding the bone; it should read at least 145°F (63°C).
For the most tender result, cook until the meat is almost falling apart—this is usually around 8 to 10 hours on low. Let the ribs rest for at least 3 minutes before serving to allow the juices to redistribute.
- Steaks, chops and roasts: 145°F (63°C) in the thickest part, then a 3-minute rest
Up next · Part 3 of 3
4 variations · storage & make-ahead · 5 answers · printable card
Tips, FAQ & printable recipe (Part 3)← Back to the ingredients (Part 1)