Desserts · Part 2 of 3: Instructions
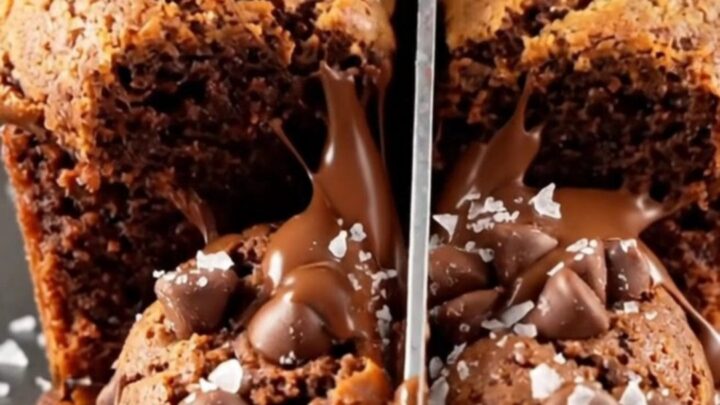
Brown Butter Brookie Cups: Fudgy Brownie & Cookie Bites Step-by-step instructions
- Prep
- Cook
- Total
- Serves
- 12
Before you start
Preheat the oven to 350°F (175°C). Lightly grease a 12-cup muffin tin or line it with paper liners. Gather all ingredients and measure them out. Ensure the butter for the cookie dough is softened to room temperature.
Have a small saucepan ready for browning the butter, along with two mixing bowls, a whisk, and a rubber spatula. The brownie batter and cookie dough come together quickly, so having everything in place makes the process smooth.
Ingredients at a glance (14)
- 1/2 cup unsalted butter
- 1/4 cup unsweetened cocoa powder
- 1/2 cup light brown sugar, packed
- 1/4 cup granulated sugar
- 1 large egg
- 1 tsp vanilla extract
- 1/2 cup all-purpose flour
- 1/4 tsp salt
- 1/4 cup unsalted butter, softened
- 1/2 cup light brown sugar, packed
- 3/4 cup all-purpose flour
- 1/4 tsp baking soda
- 1/2 cup semi-sweet chocolate chips
- Flaky sea salt, for sprinkling, to taste
Instructions
Brown Butter & Brownie Batter
- Brown the ButterIn a small saucepan, melt 1/2 cup butter over medium heat. Cook, swirling occasionally, until the butter turns golden brown and smells nutty, about 3–4 minutes. Remove from heat and let cool slightly.Look for The butter will foam and then turn a deep amber color with a nutty aroma.Tip Watch closely—butter can go from browned to burnt quickly.
- Make the Brownie BatterIn a mixing bowl, whisk the browned butter with cocoa powder, brown sugar, granulated sugar, egg, and vanilla until smooth and glossy. Stir in flour and salt until just combined.Look for The batter will be thick and shiny.Tip Do not overmix—stop when no streaks of flour remain.
- Fill the Muffin TinSpoon about 1 tablespoon of brownie batter into each cup of a 12-cup muffin tin, spreading it evenly over the bottom.Look for The batter should cover the bottom of each cup in a thin layer.Tip Use a small cookie scoop for even portions.
The butter will foam and turn a deep amber color, filling the kitchen with a nutty aroma. The brownie batter should be thick, glossy, and smooth, with the sugar dissolved.
When spooned into the muffin tin, it should hold its shape without spreading too much. The cookie dough should be soft but not sticky, with chocolate chips evenly distributed.
Cookie Dough & Assembly
- Make the Cookie DoughIn another bowl, cream the softened butter and brown sugar until light and fluffy. Add flour and baking soda, mixing until a soft dough forms. Fold in the chocolate chips.Look for The dough will be thick and slightly crumbly but hold together when pressed.Tip For easier scooping, chill the dough for 10 minutes.
- Top with Cookie DoughScoop a heaping tablespoon of cookie dough and gently press it on top of each brownie layer, covering the surface completely.Look for Each cup should be filled to the rim with dough.Tip Press the dough lightly so it adheres to the brownie layer.
The cookie dough will be slightly crumbly but press together easily. When placed on top of the brownie layer, it should cover the surface completely. The cups will look full but not overflowing. The raw dough should feel cool and slightly firm to the touch, ready for the oven.
Baking & Finishing
- Bake the Brookie CupsBake at 350°F (175°C) for 15 minutes, until the edges are caramelized and deep golden brown. The centers will look slightly soft but will set as they cool.Look for The edges will be crisp and the tops lightly browned.Safe temperature 160°F (71°C) internal temperature (egg dishes)Tip Do not overbake—the centers should remain fudgy.
- Finish with Sea SaltRemove from the oven and immediately sprinkle with flaky sea salt. Let cool in the pan for 5 minutes, then transfer to a wire rack to cool completely.Look for The salt will glisten on the warm tops.Tip Cooling on a rack prevents soggy bottoms.
- Serve and EnjoyOnce cooled, gently lift the brookie cups out of the muffin tin. Serve warm or at room temperature. For a gooey finish, warm them in the microwave for 10 seconds before serving.Look for The cups will have a crisp edge and a soft, fudgy center.Tip Use a butter knife to loosen edges if needed.
The edges will be caramelized and golden brown, and the tops will have a matte finish. The centers will look slightly puffed but will sink as they cool. The aroma of browned butter and chocolate will fill the kitchen. After sprinkling with sea salt, the cups will glisten. They should be firm enough to lift out of the pan without breaking.
Common mistakes
Overbaking is the most common mistake—it will dry out the centers and make the cups tough. Keep a close eye on them at the 15-minute mark. Another pitfall is overmixing the brownie batter, which can develop gluten and make it cakey instead of fudgy.
Mix just until the flour disappears. Finally, don't skip the flaky sea salt—it's not just garnish; it balances the sweetness and enhances the chocolate flavor.
How to tell it’s done
The brookie cups are done when the edges are deep golden brown and caramelized, and the tops look set but still slightly soft to the touch. A toothpick inserted into the center should come out with a few moist crumbs, not wet batter.
The internal temperature of the egg-containing brownie layer should reach 160°F (71°C). Let them cool in the pan for 5 minutes before removing—they will continue to set as they cool.
- Egg dishes: 160°F (71°C) in the thickest part
Up next · Part 3 of 3
4 variations · storage & make-ahead · 5 answers · printable card
Tips, FAQ & printable recipe (Part 3)← Back to the ingredients (Part 1)