Desserts · Part 2 of 3: Instructions
Brown Butter Brookie Cups with Fudgy Brownie Centers Step-by-step instructions
- Prep
- Cook
- Total
- Serves
- 12
Before you start
Preheat the oven to 350°F (175°C) and lightly grease a 12-cup muffin tin. Gather all ingredients: butter, cocoa powder, sugars, egg, vanilla, flour, chocolate chips, and flaky sea salt. Ensure the egg is at room temperature for best incorporation.
Measure the flour and cocoa, and have the chocolate chips ready. If using a kitchen scale, weigh the butter and sugars for precision. The batter comes together quickly, so having everything prepped ensures a smooth process.
Ingredients at a glance (9)
- 1/2 cup unsalted butter
- 1/4 cup unsweetened cocoa powder
- 1/2 cup light brown sugar, packed
- 1/4 cup granulated sugar
- 1 large egg
- 1 tsp vanilla extract
- 1/2 cup all-purpose flour
- 1/2 cup semisweet chocolate chips
- 1/2 tsp flaky sea salt, for topping
Instructions
Phase 1: Prepare the Batter
- Brown the ButterIn a small saucepan over medium heat, melt the butter. Continue cooking, swirling the pan occasionally, until the butter turns golden brown and smells nutty, about 3-4 minutes. Remove from heat immediately to prevent burning.Look for The butter will foam, then the foam subsides and brown specks form at the bottom; the aroma turns nutty.Tip Watch closely – the butter can go from browned to burnt quickly. Use a light-colored pan to see the color change.
- Mix the Wet IngredientsPour the browned butter into a mixing bowl. Let it cool for 2 minutes, then whisk in the cocoa powder, brown sugar, and granulated sugar until well combined. Add the egg and vanilla extract, whisking vigorously until the mixture is glossy and smooth.Look for The mixture becomes thick and shiny, with the sugars dissolved into the butter.Tip Whisking the egg in thoroughly helps create a crackly top on the brownies.
- Add the Dry IngredientsSprinkle the flour over the wet mixture and fold it in with a rubber spatula until just combined. Fold in the chocolate chips, reserving a few for the tops if desired. The batter will be thick and fudgy.Look for The batter is thick, glossy, and holds its shape when scooped.Tip Do not overmix once the flour is added; overmixing can develop gluten and make the cups tough.
At this stage, the butter is browned and fragrant, and the wet mixture is glossy and smooth. The flour and chocolate chips are folded in without overmixing, leaving a thick, fudgy batter.
The batter should be uniform in color with chocolate chips distributed evenly. It should look shiny and hold its shape when scooped. If the batter seems too thick, that's correct – it will spread slightly during baking. The aroma is nutty and sweet.
Phase 2: Bake the Cups
- Fill the Muffin TinScoop the batter into a lightly greased muffin tin, filling each cup about two-thirds full. Use a small cookie scoop or spoon for even portions. Smooth the tops slightly.Look for The batter fills each cup evenly, leaving room for spreading.Tip Greasing the tin well ensures easy release; a nonstick spray works well.
- Bake the Brookie CupsPlace the muffin tin in a preheated 350°F (175°C) oven. Bake for 15 minutes, or until the edges are deep golden brown and the centers look set but are still soft. The tops may crack slightly.Look for The edges caramelize and pull away from the sides; the centers are slightly puffed and glossy.Safe temperature 160°F (71°C) internal temperature (egg dishes)Tip Bake time may vary; start checking at 12 minutes. The centers will firm up as they cool.
- Cool and Top with Sea SaltRemove the muffin tin from the oven and let the brookie cups cool in the pan for 5 minutes. While still warm, sprinkle the tops with flaky sea salt. Then transfer to a wire rack to cool completely.Look for The cups are fragrant and the salt glistens on the surface.Tip Cooling in the pan helps them set and makes them easier to remove without breaking.
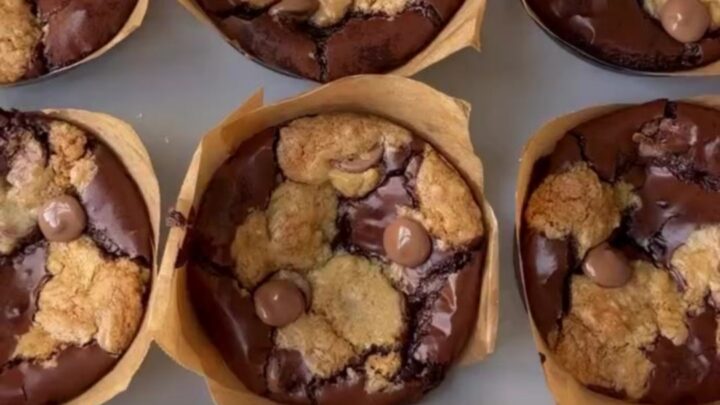
After 15 minutes, the brookie cups are puffed and golden around the edges, with centers that look set but still soft. The kitchen smells of brown butter and chocolate. The tops may have a few cracks, which is normal. The edges have pulled away from the tin slightly. A toothpick inserted in the center should come out with a few moist crumbs. The cups are fragrant and the flaky salt is sprinkled on top.
Phase 3: Cool and Serve
- Serve the Brookie CupsOnce cooled, gently lift the brookie cups out of the muffin tin. Serve warm or at room temperature. For a gooey center, enjoy them within a few hours of baking.Look for The cups release cleanly and show a fudgy interior when broken open.Tip Warm them briefly in the microwave for a molten center if serving later.
The brookie cups have cooled in the pan for 5 minutes and are now firm enough to transfer to a wire rack. The tops are slightly crackled and the sea salt glistens. When broken open, the interior is fudgy and moist, with melted chocolate chips. The edges are crisp and caramelized. They can be served warm for a gooey center or at room temperature for a chewier texture.
Common mistakes
One common mistake is overbaking, which dries out the centers. Start checking at 12 minutes and rely on visual cues: the edges should be caramelized, but the centers should still have a slight jiggle.
Another mistake is overmixing the batter after adding the flour, which develops gluten and makes the cups tough. Also, burning the butter – watch it closely and remove from heat as soon as it turns golden brown. Finally, using cold eggs can cause the butter to seize; bring the egg to room temperature first.
How to tell it’s done
The brookie cups are done when the edges are deep golden brown and have pulled away slightly from the sides of the tin. The centers should look set but still soft – a toothpick inserted into the center should come out with a few moist crumbs, not wet batter.
The internal temperature of the egg-based batter should reach 160°F (71°C) to ensure the eggs are fully cooked. After cooling for 5 minutes in the pan, the tops will firm up slightly. They will continue to set as they cool on the wire rack.
- Egg dishes: 160°F (71°C) in the thickest part
Up next · Part 3 of 3
4 variations · storage & make-ahead · 5 answers · printable card
Tips, FAQ & printable recipe (Part 3)← Back to the ingredients (Part 1)