Dinner · Part 2 of 3: Instructions
Basil Pesto and Burrata Focaccia with Crispy Crust Step-by-step instructions
- Prep
- Cook
- Total
- Serves
- 8
Before you start
Before beginning, ensure the oven is fully preheated to 450 degrees Fahrenheit. If using refrigerated dough, allow it to come to room temperature for about 30 minutes so it is pliable enough to stretch without snapping back.
Prepare your baking surface with a light coating of olive oil to prevent sticking and ensure the bottom of the bread crisps up properly. Have the pesto and pine nuts measured and ready to use.
Ingredients at a glance (4)
- 600 g focaccia dough, store-bought or made ahead
- 4 tbsp Genovese basil pesto
- 2 balls burrata cheese
- 2 tbsp pine nuts, toasted
Instructions
Dough preparation
- Prepare the doughPlace the 600 g of focaccia dough onto a greased baking sheet or into a cast-iron pan. Use your fingers to stretch the dough to fit the pan, then drizzle generously with olive oil to prepare for the pesto.Look for The dough should be well-oiled and spread evenly across the pan.Tip Ensure the dough is at room temperature for easier stretching.
The dough should be stretched to fit the pan, with a generous drizzle of olive oil ensuring that the entire surface is coated.
The dough should look smooth and feel elastic, ready to receive the pesto and take on its final shape during the baking process.
Pesto application
- Add pesto and dimplePour the 4 tablespoons of Genovese basil pesto over the oiled dough. Use your fingers to press deep dimples into the dough, allowing the pesto to swirl into the indentations for maximum flavor distribution.Look for Look for distinct green swirls of pesto within the dimples of the dough.Tip Deep dimples create the signature texture of traditional focaccia.
The pesto should be swirled into the deep dimples created by your fingers. The bread should look textured, with the vibrant green pesto concentrated in the pockets, providing a beautiful contrast against the pale dough before it enters the hot oven.
Baking and finishing
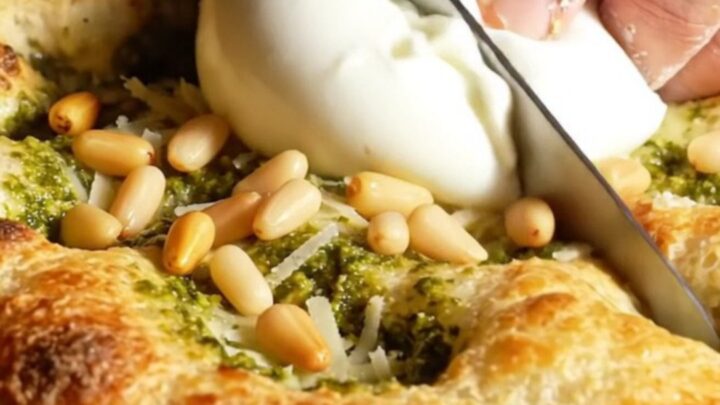
- Bake and finishBake in a preheated oven at 450 degrees Fahrenheit until the crust is golden brown and the edges are crisp. Remove from the oven, tear the fresh burrata over the hot surface, and sprinkle with toasted pine nuts before serving.Look for The bread should be puffed and golden with a crisp exterior.Tip Adding the burrata after baking preserves its creamy, delicate texture.
The crust should be puffed and golden brown, with a fragrant aroma filling the kitchen. After adding the burrata and pine nuts, the final dish should look vibrant, with the creamy cheese contrasting against the crisp, pesto-infused bread surface.
Common mistakes
A common mistake is failing to dimple the dough deeply enough, which prevents the pesto from incorporating properly into the bread. Another error is overcrowding the pan, which can lead to uneven baking and a soggy texture.
Additionally, ensure you do not add the burrata too early, as high heat will cause the delicate cheese to lose its creamy consistency and melt into the bread rather than sitting as a fresh, luxurious topping.
How to tell it’s done
The focaccia is done when the top is deep golden brown and the edges have pulled slightly away from the sides of the pan. The crust should feel firm and crisp to the touch, and the bottom should be nicely browned.
Since no raw meat is involved, the focus is entirely on the bread's texture and color, which should be consistent throughout the surface.
Up next · Part 3 of 3
2 variations · storage & make-ahead · 3 answers · printable card
Tips, FAQ & printable recipe (Part 3)← Back to the ingredients (Part 1)