Desserts · Part 1 of 3: Ingredients
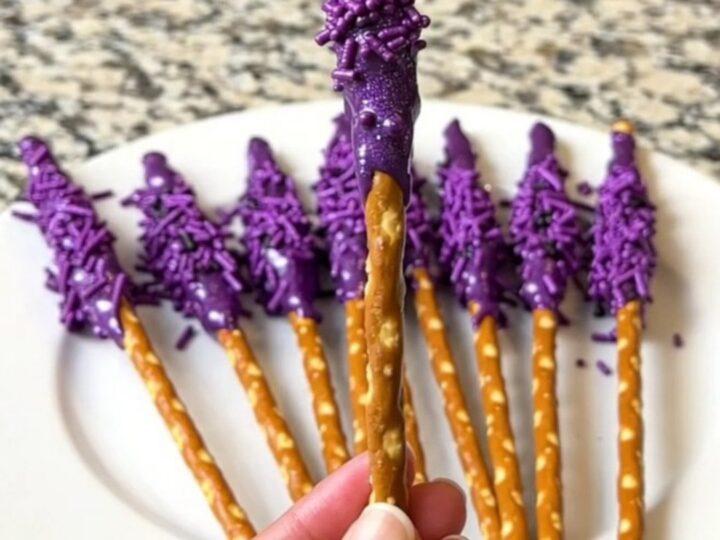
Witch Wand Pretzel Rods
- Prep
- Cook
- Total
- Serves
- 12
Create a magical atmosphere for your next gathering with these easy, vibrant witch wand pretzel rods. They combine the perfect crunch of a salty pretzel with the sweet, smooth finish of colored candy, making them a centerpiece for any festive autumn table.
These treats are designed for simplicity, requiring minimal ingredients and equipment, yet they deliver a visually stunning result that captures the spirit of the season with every single bite.
These witch wand pretzel rods are a quintessential treat for the fall season. By dipping salty, crunchy pretzel rods into a vibrant purple candy coating and finishing them with a festive sprinkle of black and purple, you create a sophisticated yet playful snack.
This recipe focuses on the balance of texture and aesthetics, ensuring that every wand looks professionally finished. Whether you are hosting a party or simply want to add a touch of whimsy to your kitchen, these wands are a reliable and delicious choice that comes together with ease.
Ingredients
- 12 pretzel rods
- 1 cup purple candy melts
- 2 tbsp purple and black sprinkles
Why this recipe works
The method of dipping ensures an even, smooth coating that adheres perfectly to the pretzel surface without causing it to break. By using a deep, narrow bowl for the melted candy, you can submerge the pretzel efficiently, achieving a clean line where the chocolate ends and the handle begins. This technique minimizes waste and provides a consistent appearance across every single wand produced.
Allowing the candy to set on parchment paper is crucial for maintaining the integrity of the coating. The parchment prevents sticking, which keeps the surface of the candy smooth and unblemished when you lift the wands.
This simple step ensures that the final presentation is clean and professional, allowing the vibrant colors of the candy and the texture of the sprinkles to stand out as the primary focus of the snack.
Notes and substitutions
The choice of candy melt is vital for the final texture. Quality candy melts are designed to melt down to a thin, pourable consistency, which is ideal for coating pretzels without making them too heavy or clumpy. If the candy seems too thick, you can add a tiny amount of vegetable shortening to thin it out slightly, which will help it coat the pretzels more evenly and dry to a nice, glossy finish.
When it comes to equipment, a small, deep bowl is superior to a wide, shallow one for this specific task. A deeper container allows for a deeper dip, which provides better coverage and makes it easier to submerge the pretzel without needing a large volume of candy.
Always ensure your bowl is completely dry before adding the candy, as even a small amount of moisture can cause the candy to seize and become grainy.
- purple candy melts: white chocolate tinted with purple food coloring
- purple and black sprinkles: any variety of Halloween-themed colored sugar or sprinkles
Equipment
- baking sheet
- parchment paper
- small white bowl
- spoon
Up next · Part 2 of 3
3 steps · 5 min of cooking · what to look for at each stage
Step-by-step instructions (Part 2)