Desserts · Part 2 of 3: Instructions
Golden Whole Lemon Loaf Cake Step-by-step instructions
- Prep
- Cook
- Total
- Serves
- 10
Before you start
Before starting, preheat the oven to 350°F (175°C) and position a rack in the center. Line a 9x5-inch loaf pan with parchment paper, leaving overhang on the long sides for easy removal.
Measure all ingredients accurately: 1 whole lemon (seeded and chopped), 3 large eggs, 1 cup sugar, 1/2 cup milk, 1/2 cup oil, 2 cups flour, 10 g baking powder, and 1 tsp vanilla. Prepare the glaze ingredients but do not mix them until the cake is cool. Have a blender, a large mixing bowl, a whisk, and a spatula ready.
Ingredients at a glance (10)
- 1 whole organic lemon, seeded and chopped
- 3 large eggs
- 1 cup granulated sugar
- 1/2 cup whole milk
- 1/2 cup vegetable oil
- 2 cups all-purpose flour
- 10 g baking powder
- 1 tsp vanilla extract
- 1 cup confectioners' sugar
- 2 tbsp fresh lemon juice
Instructions
Blend and Mix the Batter
- Blend the Wet IngredientsPreheat the oven to 350°F (175°C). Line a 9x5-inch loaf pan with parchment paper, leaving some overhang on the long sides. In a blender, combine the chopped whole lemon (seeds removed), eggs, sugar, milk, and oil. Blend on high until completely smooth and frothy, about 30 to 45 seconds. The lemon peel should be finely ground and the mixture should look pale and creamy.Look for The mixture is smooth, pale yellow, and slightly frothy with no large pieces of lemon peel.Tip Scrape down the sides of the blender once or twice to ensure the lemon is fully incorporated.
- Combine the Dry IngredientsIn a large mixing bowl, whisk together the all-purpose flour, baking powder, and vanilla extract until evenly distributed. The vanilla may clump slightly; use the whisk to break up any lumps. This step ensures the baking powder is evenly dispersed throughout the flour.Look for The dry mixture looks uniform, with no visible streaks of baking powder or vanilla.Tip If the vanilla forms small clumps, press them against the side of the bowl with a spoon to break them up.
- Make the BatterPour the blended lemon mixture into the bowl with the dry ingredients. Gently whisk until just combined and a smooth, ribbon-like batter forms. Do not overmix; stop as soon as no dry streaks remain. The batter will be thin and pourable, similar to a thick pancake batter.Look for The batter is smooth, glossy, and falls off the whisk in a thick ribbon that briefly holds its shape.Tip Overmixing can make the cake tough; a few small lumps are fine.
After blending, the lemon mixture should be smooth, pale yellow, and slightly frothy. When combined with the dry ingredients, the batter should be glossy and fall off the whisk in a thick ribbon that briefly holds its shape. It should be pourable but not watery. There should be no dry streaks or lumps of flour. The batter will smell fresh and citrusy, with a hint of vanilla.
Bake and Cool
- Bake the LoafPour the batter into the prepared loaf pan and smooth the top with a spatula. Bake at 350°F (175°C) for 42 minutes, or until the top is deep golden brown and a crack has formed down the center. A toothpick inserted into the thickest part should come out clean or with a few moist crumbs attached. The internal temperature of the cake should register 200°F (93°C) in the center.Look for The cake is tall, golden, and cracked; a toothpick comes out clean from the center.Safe temperature 160°F (71°C) internal temperature (egg dishes)Tip If the top browns too quickly, tent loosely with foil during the last 10 minutes.
- Cool the CakeRemove the loaf pan from the oven and place it on a wire rack. Let the cake cool in the pan for 10 minutes. Then, using the parchment overhang, lift the cake out of the pan and transfer it to the wire rack to cool completely. The cake must be completely cool before glazing, otherwise the glaze will melt and soak in.Look for The cake is firm to the touch and has pulled away slightly from the sides of the pan.Tip Cooling completely prevents the glaze from turning translucent and soaking into the crumb.
The loaf should be tall, golden brown, and cracked down the center. The kitchen will smell of sweet lemon and toasted sugar. A toothpick inserted into the center comes out clean or with a few moist crumbs.
The cake should feel firm to the touch and have pulled away slightly from the sides of the pan. After cooling for 10 minutes in the pan, it should lift out easily using the parchment overhang.
Glaze and Serve
- Make the GlazeIn a small bowl, whisk together the confectioners' sugar and fresh lemon juice until smooth and pourable. The glaze should be thick but flow off the whisk in a steady stream. If it is too thick, add a few drops of lemon juice; if too thin, add a little more confectioners' sugar.Look for The glaze is opaque, white, and smooth with no lumps.Tip For a thicker glaze, use 1 1/2 cups confectioners' sugar; for a thinner drizzle, use 3 tablespoons lemon juice.
- Glaze the CakeOnce the cake is completely cool, drizzle the glaze generously over the top in a zigzag pattern, letting it cascade down the sides. Use a spoon or a piping bag for more control. Allow the glaze to set for at least 15 minutes before slicing. The glaze will harden slightly, creating a crisp, sweet crust.Look for The glaze forms a smooth, white layer on top of the cake, with some dripping down the sides.Tip Place a sheet of parchment under the cooling rack to catch drips for easy cleanup.
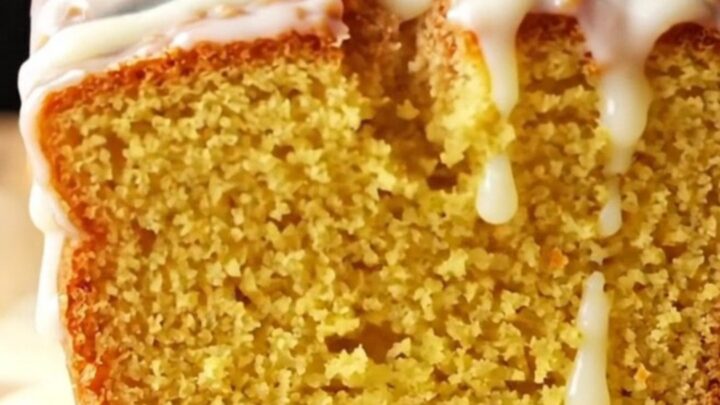
- Slice and ServeUse a serrated knife to slice the loaf into thick, even pieces. The cake should be moist and tender, with a bright yellow crumb and a fragrant lemon aroma. Serve at room temperature. The glaze will have set, but the interior remains soft and moist.Look for Each slice shows a moist, dense crumb with a glossy white glaze on top.Tip For clean slices, wipe the knife between cuts and use a gentle sawing motion.
The glaze should be smooth, opaque white, and pourable. When drizzled over the cooled cake, it should form a thick layer that slowly cascades down the sides. The glaze will set within 15 minutes, becoming slightly crisp. Slices should show a moist, tender crumb with a bright yellow color and a fragrant lemon aroma. The glaze adds a sweet-tart contrast to the rich cake.
Common mistakes
One common mistake is overmixing the batter once the flour is added. This develops gluten and can make the cake tough and dense. Mix only until no dry streaks remain. Another pitfall is not blending the lemon long enough, leaving chunks of peel that are unpleasant to bite into.
Blend until the mixture is completely smooth. Also, be sure to cool the cake completely before glazing. If the cake is still warm, the glaze will melt and soak into the crumb, losing its glossy finish.
How to tell it’s done
The loaf is done when the top is deep golden brown and a crack has formed down the center. Insert a toothpick into the thickest part of the cake; it should come out clean or with only a few moist crumbs attached.
For extra certainty, check the internal temperature with an instant-read thermometer: it should register 200°F (93°C) in the center. If the top browns too quickly, tent loosely with foil for the last 10 minutes of baking. The cake should feel firm to the touch and pull away slightly from the sides of the pan.
- Egg dishes: 160°F (71°C) in the thickest part
Up next · Part 3 of 3
4 variations · storage & make-ahead · 5 answers · printable card
Tips, FAQ & printable recipe (Part 3)← Back to the ingredients (Part 1)