Drinks · Part 1 of 3: Ingredients
Watermelon Hibiscus Strawberry Lychee Slush Cooler with White Chocolate
- Prep
- Cook
- Total
- Serves
- 2
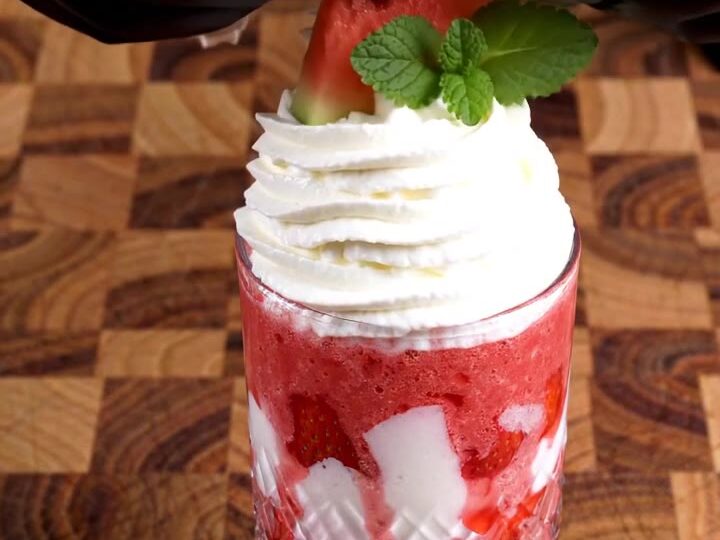
Few drinks look this striking and take so little time. A cold watermelon, strawberry and lychee slush, blended in one jar, rises into a tall swirl of whipped cream and a fine shower of white chocolate. Every spoonful tastes of summer fruit, cooled and lightly sweet, and the whole glass comes together in about twenty minutes.
This slush cooler is built on fruit that is already sweet and juicy, so it needs very little added sugar. Watermelon gives the body and the vivid pink color, strawberries bring a fresh, bright berry note, and lychees add a floral sweetness that sets the drink apart from a plain fruit slush.
A squeeze of lime keeps the flavor lively, while a handful of ice turns everything into a thick, spoonable icy base. The finish is simple: lightly sweetened whipped cream piped high, then covered with grated white chocolate that melts slightly into the cream. Make it for a warm afternoon, a backyard gathering or a dessert-style drink that looks like it took far longer than it did.
Ingredients
Slush
- 2 cups seedless watermelon, cut into small cubes
- 6 fresh strawberries, hulled and halved
- 8 fresh lychees, peeled and pitted
- 1/2 lime, halved
- 1 cup ice cubes
Topping
- 1/2 cup cold heavy cream
- 1 tbsp confectioners' sugar
- 1 oz white chocolate bar, chilled, for grating
Why this recipe works
The method works because the fruit does most of the work. Watermelon is mostly water and sugar, so when it is blended with ice it breaks down into a smooth, cold slush without needing syrup or juice. Cutting the fruit into small cubes first gives the blender an even start, which helps the mixture reach a silky texture quickly and keeps the blades from working too hard.
Ice is the second key element. Adding a handful of cubes to the jar chills the mixture as it blends, so the drink stays cold and thick rather than watery.
Blending in short bursts and then continuously until no large chunks remain produces the even, icy texture that makes a slush cooler feel refreshing. The result is a drink that stays frosty for the whole time you spend with it at the table.
Notes and substitutions
Choose ripe, fragrant watermelon and strawberries with deep color, because they carry most of the flavor in this drink. Fresh lychees are best when they are firm and fragrant; if you can only find canned lychees, drain them well so the slush does not become overly sweet or thin.
Lime juice is small in volume but important, because its acidity balances the sweetness of the fruit and keeps the flavor clean.
The blender is the main piece of equipment, and a sturdy one with a glass jar and a strong motor will crush the ice evenly. A stainless steel box grater makes fine white chocolate shavings that settle nicely over the cream.
For the topping, a piping bag with a star tip creates the tall, ridged swirl that makes the cooler look finished. If you do not have a piping bag, spoon the whipped cream high over the slush and smooth it into a dome with the back of a spoon.
- Fresh lychees: Canned lychees in syrup, drained well
- Heavy cream: Cold whipping cream with the same fat content
- White chocolate bar: White chocolate chips, chilled, shaved with a vegetable peeler
Equipment
- Cutting board
- Chef's knife
- Blender with glass jar
- Stainless steel box grater
- Piping bag with star tip
- Footed crystal-cut glass
Up next · Part 2 of 3
6 steps · 3 min of cooking · what to look for at each stage
Step-by-step instructions (Part 2)