Desserts · Part 2 of 3: Instructions
Viral Chocolate Peanut Butter Date Bark Step-by-step instructions
- Prep
- Cook
- Total
- Serves
- 16
Before you start
Before starting, line an 8-inch square baking dish with parchment paper, leaving overhang on two sides. Make sure the dates are pitted and split. If they are not soft, soak them briefly.
Measure out the peanut butter, peanuts, chocolate chips, and coconut oil. Have a microwave-safe bowl and a spoon ready. The entire process takes about 15 minutes of active time, plus 30 minutes of chilling.
Ingredients at a glance (6)
- 20 Medjool dates, pitted and split
- 1/2 cup creamy all-natural peanut butter
- 1/3 cup roasted chopped peanuts
- 1 cup dark chocolate chips
- 1 tsp coconut oil
- flaky sea salt, for sprinkling, to taste
Instructions
Build the Base
- Press the date baseLine an 8-inch square baking dish with parchment paper, leaving overhang on two sides for easy lifting. Arrange the pitted and split Medjool dates flat on the bottom of the dish, pressing them together tightly to form a solid, sticky layer. Use your fingers or the back of a spoon to flatten any gaps, creating an even base that covers the entire dish.Look for The dates should form a compact, sticky slab with no empty spaces.Tip Wet your fingers slightly to prevent the dates from sticking while pressing.
- Spread the peanut butterSpoon the creamy all-natural peanut butter over the date layer. Using the back of a large spoon, spread it evenly from corner to corner, covering the dates completely. The peanut butter should be smooth and level, but it does not need to be perfectly flat—just a consistent layer.Look for The peanut butter covers the dates entirely with a smooth, even coat.Tip If the peanut butter is stiff, warm it in the microwave for 10 seconds to make spreading easier.
- Add the crunchy peanutsScatter the roasted chopped peanuts evenly over the peanut butter layer. Gently press them into the peanut butter with your fingers or the back of a spoon so they adhere. This adds a crunchy texture that contrasts with the chewy dates and smooth chocolate.Look for The peanuts are evenly distributed and lightly embedded in the peanut butter.Tip Press the peanuts gently so they stay in place without sinking too deep.
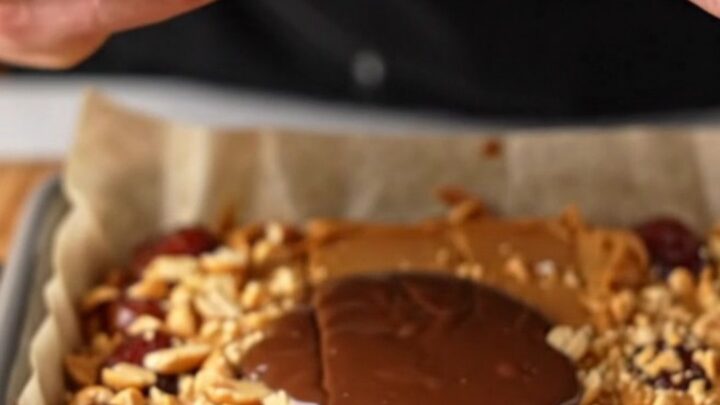
At the end of this phase, the dish should be filled with a sticky date layer, topped with a smooth peanut butter spread, and dotted with chopped peanuts.
The surface should look rustic but even, with the peanuts pressed in. The mixture should hold together when pressed.
Top with Chocolate
- Melt the chocolateCombine the dark chocolate chips and coconut oil in a microwave-safe bowl. Heat in 30-second intervals, stirring between each, until the chocolate is fully melted and smooth. Alternatively, melt in a heatproof bowl set over simmering water, stirring constantly.Look for The chocolate is glossy, fluid, and free of lumps.Tip Do not overheat the chocolate—stop as soon as it is just melted to keep it from seizing.
- Pour and smooth the chocolate layerPour the melted chocolate mixture over the peanut and date layers. Use an offset spatula or the back of a spoon to smooth it into a thin, even layer that reaches all the edges. The chocolate should form a mirror-like glaze over the top.Look for The chocolate covers the entire surface and looks shiny and even.Tip Work quickly before the chocolate sets; if it thickens, reheat briefly.
- Finish with sea saltSprinkle a pinch of flaky sea salt evenly over the melted chocolate. The salt enhances the sweetness and adds a subtle savory contrast. It also gives the bark a professional finish.Look for The salt flakes are visible on the chocolate surface.Tip Use a light hand—too much salt can overpower the dessert.
The chocolate should be melted and poured evenly over the peanut layer. It should be glossy and smooth, covering every bit of the surface. The sea salt should be visible as small flakes. The bark should look shiny and tempting.
Chill and Slice
- Chill until setPlace the baking dish in the freezer and chill for 30 minutes, or until the chocolate is completely firm and the bark is solid to the touch. The bark should be cold and set enough to slice cleanly without crumbling.Look for The chocolate is hard and the bark lifts away from the parchment easily.Tip If the bark is not firm after 30 minutes, chill for an additional 10–15 minutes.
- Slice and serveLift the chilled bark out of the dish using the parchment overhang. Transfer to a cutting board and use a sharp knife to slice into neat squares or rectangles. Serve immediately, or return to the refrigerator until ready to enjoy.Look for The bark slices into clean squares with visible layers of dates, peanut butter, and chocolate.Tip For cleaner cuts, dip the knife in hot water and wipe dry before each slice.
After chilling, the bark should be firm and solid. When lifted from the dish, it should hold its shape. Slicing should produce clean squares with distinct layers and a satisfying snap from the chocolate.
Common mistakes
A common mistake is pressing the dates too thinly, which can cause the bark to fall apart. Press them into a thick, compact layer. Another issue is using runny peanut butter that does not spread well—choose a thick, creamy variety.
When melting chocolate, be careful not to overheat it, as it can seize and become grainy. Also, do not skip the chilling time; without it, the bark will not slice cleanly. Finally, use a sharp knife for cutting to avoid crumbling.
How to tell it’s done
The bark is done when the chocolate is completely firm and the entire slab is cold and solid. When you press the surface, it should feel hard and not leave an indent. The bark should lift easily from the dish using the parchment.
When sliced, the layers should be distinct: a dark chocolate top, a peanut butter and peanut middle, and a chewy date base. The texture should be crunchy, creamy, and chewy in one bite.
Up next · Part 3 of 3
4 variations · storage & make-ahead · 5 answers · printable card
Tips, FAQ & printable recipe (Part 3)← Back to the ingredients (Part 1)