Desserts · Part 2 of 3: Instructions
Espresso Kahlúa Crème Brûlée with Torched Sugar Crust Step-by-step instructions
- Prep
- Cook
- Total
- Serves
- 6
Before you start
Before starting, measure all ingredients and set them nearby. Crush the espresso beans lightly with a rolling pin or the bottom of a skillet. Place the egg yolks in a large bowl and let them come to room temperature for about 15 minutes.
Have a fine-mesh strainer ready for straining the cream. Prepare a roasting pan and a kettle of hot water for the water bath. Gather six 6-ounce ramekins and a kitchen torch.
Ingredients at a glance (7)
- 2 cups heavy cream
- 40 g crushed dark-roast espresso beans
- 5 large egg yolks
- 90 g brown sugar
- 30 ml Kahlúa
- 4 tbsp turbinado sugar, for topping
- 12 roasted chocolate-covered espresso beans, for garnish
Instructions
Infuse and Whisk
- Infuse the CreamIn a medium saucepan, combine the heavy cream and crushed espresso beans. Heat over medium-low until steam rises and small bubbles form around the edges, about 5 minutes. Do not let it boil. Remove from heat, cover, and let steep for 10 minutes. Strain through a fine-mesh strainer, pressing on the beans to extract all the cream. Discard the beans.Look for The cream smells deeply of coffee and is just below a simmer.Tip Crush the beans lightly with a rolling pin or the bottom of a skillet for maximum flavor.
- Whisk the Custard BaseIn a large bowl, whisk the egg yolks and brown sugar together until thick and pale, about 2 minutes. Slowly pour the warm infused cream into the yolk mixture, whisking constantly to prevent curdling. Add the Kahlúa and whisk until fully combined.Look for The mixture is smooth, glossy, and slightly thickened.Tip Pour the cream in a thin stream while whisking to temper the yolks gently.
The cream should be deeply aromatic and slightly colored from the espresso beans. The egg yolk mixture will be pale and thick.
When combined, the custard base should be smooth and glossy, with no lumps or curdled bits. The smell is rich and coffee-forward, with a hint of Kahlúa.
Bake and Chill
- Bake in a Water BathPreheat the oven to 320°F (160°C). Divide the custard evenly among six 6-ounce ramekins. Place the ramekins in a large roasting pan and set the pan on the oven rack. Carefully pour hot water into the pan until it reaches halfway up the sides of the ramekins. Bake for 35 minutes, until the edges are set and the centers are barely set with a slight wobble.Look for The custard is set around the edges and the center trembles like gelatin.Safe temperature 160°F (71°C) internal temperature (egg dishes)Tip Use a kettle of hot water to avoid splashing and to keep the oven temperature steady.
- Chill OvernightRemove the ramekins from the water bath and let them cool on a wire rack for 30 minutes. Cover each ramekin with plastic wrap and refrigerate for at least 6 hours, preferably overnight, until fully chilled and set.Look for The custard is firm to the touch and completely cold.Safe temperature 160°F (71°C) internal temperature (egg dishes)Tip Chilling thoroughly ensures the custard sets properly and the sugar crust will crack cleanly.
After baking, the custards should look set around the edges with a slight wobble in the center. The surface should be smooth and even, with no cracks. Once chilled, they should be completely firm and cold to the touch. The texture will be creamy and dense, not watery or rubbery.
Torch and Serve
- Torch the Sugar CrustJust before serving, sprinkle about 2 teaspoons of turbinado sugar evenly over the surface of each custard. Tilt and tap the ramekin to spread the sugar in an even layer. Use a kitchen torch to caramelize the sugar, moving the flame in a circular motion until the sugar melts and turns deep amber. Let the sugar harden for 1 minute.Look for The sugar bubbles, turns golden brown, and hardens into a brittle shell.Tip Hold the torch about 3 inches away and keep it moving to avoid burning the sugar.
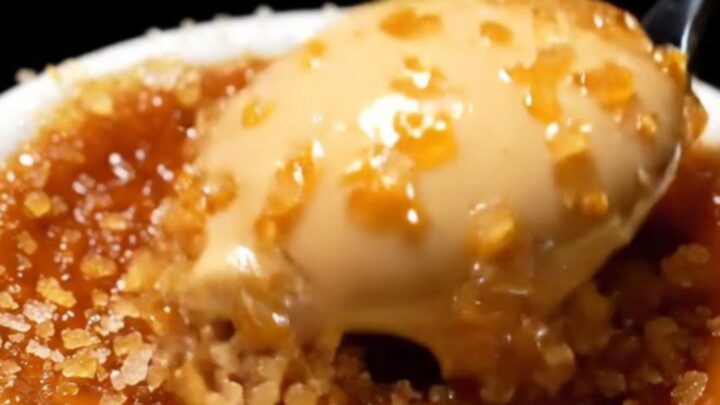
- Garnish and ServePlace three chocolate-covered espresso beans on top of each crème brûlée. Serve immediately, cracking the caramelized crust with the back of a spoon to reveal the velvety custard underneath.Look for The sugar crust shatters with a satisfying crack.Tip Serve right away so the sugar stays crisp and the custard remains cold.
The torched sugar should be a deep amber color, bubbling and then hardening into a shiny, brittle crust. When you tap it with a spoon, it should crack with a clean sound. The custard underneath is cold and velvety, contrasting with the warm, caramelized sugar.
Common mistakes
A common mistake is overheating the cream, which can cause the eggs to curdle when mixed. Always heat the cream just until steam rises, not to a boil. Another issue is not straining the cream thoroughly, leaving gritty coffee grounds in the custard.
Press firmly on the beans to extract all the liquid. Also, avoid overbaking; the custard should still have a slight wobble in the center when removed from the oven, as it will continue to set while chilling.
How to tell it’s done
The custard is done baking when the edges are set and the center jiggles slightly when the ramekin is gently shaken. The internal temperature should reach 160°F (71°C) to ensure the eggs are cooked through.
After chilling, the custard should be completely firm and cold. When torched, the sugar should melt and turn deep amber, forming a hard, glassy crust that cracks when tapped with a spoon.
- Egg dishes: 160°F (71°C) in the thickest part
Up next · Part 3 of 3
4 variations · storage & make-ahead · 5 answers · printable card
Tips, FAQ & printable recipe (Part 3)← Back to the ingredients (Part 1)