Desserts · Part 2 of 3: Instructions
Ultra-Creamy No-Bake Condensed Milk Cheesecake Step-by-step instructions
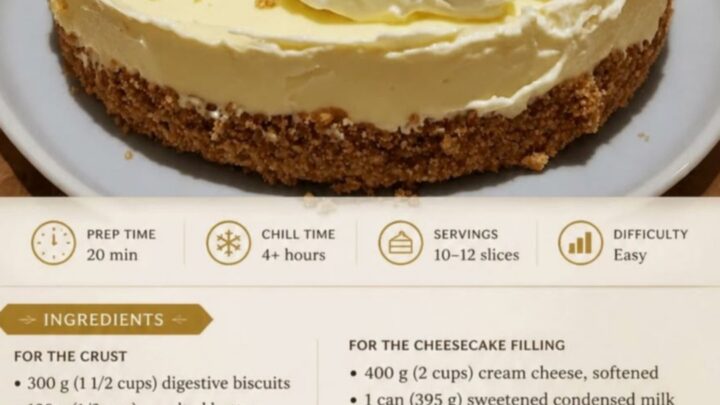
- Prep
- Cook
- Total
- Serves
- 8
Before you start
Ensure that the cream cheese is taken out of the refrigerator at least 30 to 60 minutes before you begin preparation. This is the most crucial step for achieving a smooth, velvety filling.
Prepare your springform pan by lightly greasing the sides if desired, though the fat content in the crust usually helps with release. Have all ingredients measured and ready, and clear adequate space in your refrigerator for the pan to sit on a level surface while it chills.
Ingredients at a glance (5)
- 2 cups crushed graham crackers
- 1/2 cup melted unsalted butter
- 16 oz softened cream cheese
- 12 oz sweetened condensed milk
- 1 cup heavy whipped cream
Instructions
Crust formation
- Prepare the crustCombine the crushed biscuits with the melted butter in a medium bowl until the mixture resembles wet sand. Press the crumbs firmly into the bottom and sides of a 9-inch springform pan. Place the pan in the refrigerator while preparing the filling.Look for The mixture should hold its shape when pressed together.Tip Use the flat bottom of a measuring cup to pack the crumbs tightly for a stable base.
The crust should look uniform and feel solid. When you press it, it should stay in place and not break apart. Ensure it covers the bottom evenly and reaches slightly up the sides of the pan to create a secure container for the creamy filling.
Filling preparation
- Create the fillingIn a large mixing bowl, beat the softened cream cheese until smooth and creamy. Gradually pour in the sweetened condensed milk while continuing to beat the mixture. Ensure there are no lumps remaining in the cream cheese, and scrape down the sides of the bowl as needed to combine thoroughly.Look for The filling should be thick, smooth, and completely uniform in texture.Tip Use room temperature cream cheese to ensure a lump-free filling that blends easily.
The filling must look completely smooth with no visible white streaks or lumps of cream cheese. It should be thick and glossy, with a consistency similar to a heavy, pourable batter. Check that the bottom of the bowl is scraped clean to ensure everything is incorporated.
Final chilling
- Assemble and chillPour the filling over the prepared crust and smooth the top with a spatula. Refrigerate for at least 4 hours, or until the cheesecake is fully set. Before serving, pipe swirls of whipped cream over the top and sprinkle with reserved biscuit crumbs for texture.Look for The center should be firm to the touch after the chilling time.Tip Chill the cheesecake for longer if a firmer texture is desired.
The cheesecake should look set and firm. The whipped cream swirls on top should hold their shape clearly without sagging.
Before serving, the entire dessert should feel cool and stable, ready to be released from the springform pan and sliced into clean, professional portions.
Common mistakes
A common mistake is using cold cream cheese, which leads to a lumpy filling that never fully smooths out. Always allow the cream cheese to soften properly. Another error is failing to press the crust firmly enough; if the base is loose, it will crumble when sliced.
Finally, do not rush the chilling process. If the cheesecake is removed from the refrigerator too early, it will not have the structure required to hold its shape upon cutting.
How to tell it’s done
The cheesecake is done when the center is firm to the touch and does not wobble when the pan is gently shaken. It should look set and smooth on the surface.
Because this recipe does not involve cooking with proteins like eggs or meat, there is no internal temperature to monitor. Simply rely on the visual cues and the required chilling time to ensure the dessert is ready to be sliced and served.
Up next · Part 3 of 3
2 variations · storage & make-ahead · 3 answers · printable card
Tips, FAQ & printable recipe (Part 3)← Back to the ingredients (Part 1)