Dinner · Part 2 of 3: Instructions
Ultra-Creamy Garlic Parmesan Chicken Skillet Step-by-step instructions
- Prep
- Cook
- Total
- Serves
- 4
Before you start
Before starting, pat the chicken cutlets dry with paper towels — this helps them sear properly. Season both sides with salt and pepper. Mince the garlic and chop the parsley. Grate the Parmesan cheese if you're using a block.
Have all your ingredients measured and ready to go, as the cooking process moves quickly. Heat your skillet over medium-high heat for a couple of minutes before adding the butter, so it's hot enough to create a good sear. This prep will make the cooking process smooth and enjoyable.
Ingredients at a glance (8)
- 1 1/2 lb boneless, skinless chicken breasts, cut into cutlets
- 1 tsp kosher salt
- 1/2 tsp black pepper
- 2 tbsp unsalted butter
- 4 cloves garlic, minced
- 1 1/2 cups heavy cream
- 1/2 cup grated Parmesan cheese
- 2 tbsp fresh parsley, chopped
Instructions
Sear & Build the Base
- Season and Sear the ChickenPat the chicken cutlets dry with paper towels. Season both sides evenly with kosher salt and black pepper. Heat a large cast iron skillet over medium-high heat. Add the butter and let it melt, swirling to coat the pan. Place the chicken in the skillet in a single layer, being careful not to overcrowd. Sear until golden brown and cooked through, about 3-4 minutes per side. Transfer the chicken to a plate and set aside.Look for The chicken should be deeply golden on both sides and register 165°F in the thickest part.Safe temperature 165°F (74°C) internal temperature (poultry)Tip Don't move the chicken too early; let it develop a crust before flipping.
- Make the Garlic Cream SauceReduce the heat to medium. Add the minced garlic to the same skillet and cook, stirring constantly, until fragrant, about 30 seconds. Pour in the heavy cream and bring to a gentle simmer, scraping up any browned bits from the bottom of the pan. Let the cream bubble and thicken slightly, about 2-3 minutes.Look for The cream should be gently bubbling and starting to coat the back of a spoon.Tip Stir frequently to prevent the cream from scorching on the bottom.
At the end of this phase, the chicken should be golden brown on both sides and cooked through, with a nice crust. The skillet will have browned bits and melted butter. The garlic should be fragrant but not browned. The cream should be just starting to bubble at the edges. This is the foundation of the dish — the chicken is cooked, and the sauce is about to come together.
Creamy & Cheesy Sauce
- Add Parmesan and ParsleySprinkle the grated Parmesan cheese over the simmering cream, stirring constantly until the cheese is fully melted and the sauce is smooth and glossy. Stir in the chopped parsley. Taste and adjust seasoning with additional salt and pepper if needed.Look for The sauce should be thick enough to coat a spoon but still pourable.Tip Add the cheese gradually while stirring to ensure a silky texture without clumps.
- Return Chicken to the SkilletNestle the seared chicken cutlets back into the skillet, turning to coat them in the sauce. Let them warm through for 2-3 minutes, spooning some sauce over the top as they heat. The chicken should be fully coated and the sauce should be bubbling gently around the edges.Look for The sauce should cling to the chicken and look creamy and luxurious.Safe temperature 165°F (74°C) internal temperature (poultry)Tip If the sauce gets too thick, add a splash of chicken broth or water to loosen it.
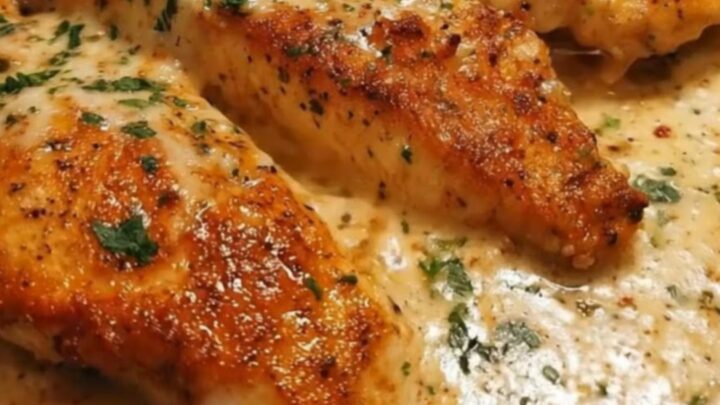
The sauce should be smooth, glossy, and thick enough to coat a spoon. The Parmesan should be fully melted, and the parsley should add flecks of green.
The chicken is back in the skillet, coated in the sauce, and the whole dish is bubbling gently. The aroma is rich and savory, with a hint of garlic. This is the moment the dish comes together into a cohesive, beautiful skillet.
Finish & Serve
- Serve the ChickenRemove the skillet from the heat. Serve the chicken hot, with extra sauce spooned over each piece. Garnish with additional parsley if desired. This dish pairs well with pasta, rice, or crusty bread to soak up the sauce.Look for The chicken should be juicy and the sauce silky.Tip Let the dish rest for a minute before serving to allow the sauce to settle.
The chicken is hot, the sauce is silky, and everything looks inviting. The sauce should be creamy and cling to the chicken. The dish is ready to be served immediately, with extra sauce spooned over each piece. The skillet should be brought to the table for a rustic presentation, and the flavors should be balanced and indulgent. This is the final, satisfying result.
Common mistakes
One common mistake is overcrowding the skillet, which steams the chicken instead of searing it. Work in batches if necessary. Another is adding the Parmesan too quickly, which can cause it to clump; add it gradually while stirring constantly.
Also, avoid boiling the cream — a gentle simmer is enough to thicken it without curdling. Finally, don't skip the resting time for the chicken; letting it rest for a few minutes before serving helps the juices redistribute, keeping the meat tender and moist.
How to tell it’s done
The chicken is done when it reaches an internal temperature of 165°F (74°C) in the thickest part. The outside should be deeply golden and the juices should run clear. The sauce is ready when it has thickened enough to coat the back of a spoon and the Parmesan is fully melted, creating a smooth and glossy texture.
When you spoon the sauce over the chicken, it should cling nicely rather than run off. The dish is best served hot, straight from the skillet, so the sauce is at its silkiest.
- Poultry: 165°F (74°C) in the thickest part
Up next · Part 3 of 3
4 variations · storage & make-ahead · 5 answers · printable card
Tips, FAQ & printable recipe (Part 3)← Back to the ingredients (Part 1)