Appetizers · Part 2 of 3: Instructions
Ultimate Garlic Bread with Three Cheeses Step-by-step instructions
- Prep
- Cook
- Total
- Serves
- 8
Before you start
Before starting, bring the butter to room temperature so it blends easily with the roasted garlic. Heat the oven to 400°F (200°C) for roasting the garlic. While the garlic roasts, shred the mozzarella and cheddar if you’re using blocks, and chop the parsley.
Line a baking sheet with foil for easy cleanup. Once the garlic is soft and cool enough to handle, squeeze the cloves into a bowl and proceed with making the garlic butter.
Ingredients at a glance (8)
- 1 loaf French bread
- 2 heads garlic
- 1/2 cup unsalted butter, softened
- 2 tbsp fresh parsley, chopped
- 1/4 cup grated parmesan cheese
- 1/2 tsp sea salt
- 3/4 cup shredded mozzarella cheese
- 3/4 cup shredded cheddar cheese
Instructions
Roast and Mix the Garlic Butter
- Roast the GarlicHeat the oven to 400°F (200°C). Cut the top off each garlic head to expose the cloves. Drizzle with a little oil, wrap in foil, and roast until the cloves are soft and golden, about 30 minutes. Let cool slightly, then squeeze the roasted cloves out of their skins into a small bowl.Look for The garlic cloves are soft and easily mashed with a fork.Tip Roasting mellows the garlic, turning it sweet and nutty.
- Make the Garlic ButterAdd the softened butter, chopped parsley, grated parmesan, and sea salt to the roasted garlic. Mash everything together with a fork until you have a thick, fragrant spread. The mixture should be well combined but still slightly textured.Look for The butter is fragrant and spreadable, with visible bits of garlic and parsley.Tip Use room-temperature butter for easy mixing.
The garlic heads are soft and caramelized, with a sweet, mellow aroma. When squeezed, the cloves pop out easily and mash into a smooth paste. The butter mixture is fragrant with roasted garlic and parsley, and the parmesan is evenly distributed. The texture is spreadable but not runny, and the salt is balanced. This is the flavor base that will make the bread irresistible.
Assemble the Bread
- Slice and SlatherSlice the French bread loaf in half lengthwise. Place both halves cut-side up on a baking sheet. Spread the garlic butter evenly over the cut surfaces, reaching edge to edge. Make sure every bit of bread is covered for maximum flavor.Look for The butter covers the entire cut surface of the bread.Tip Use a spatula or the back of a spoon to spread smoothly.
- Top with CheesePile the shredded mozzarella and cheddar evenly over the buttered bread, covering the surface completely. Press the cheese gently so it adheres to the butter.Look for The bread is fully covered with a generous layer of cheese.Tip Use a mix of cheeses for a richer flavor and better melt.
The bread is sliced in half and the garlic butter is spread edge to edge, coating every bit of the cut surface. The cheese is piled on generously, covering the butter completely. The baking sheet is ready for the broiler.
The bread looks inviting, with the butter glistening and the cheese mounded high. The kitchen smells of garlic and butter, and you’re ready to transform it into a golden, bubbly masterpiece.
Broil and Serve
- Broil Until GoldenTurn the oven to broil. Place the baking sheet on the top rack, about 6 inches from the heat. Broil for 8 minutes, watching closely, until the cheese is bubbly, blistered, and has toasted brown spots. The edges of the bread should be crisp and golden.Look for The cheese is bubbling and browned in spots, and the bread is crisp.Tip Keep an eye on it—broilers vary, and it can go from golden to burnt quickly.
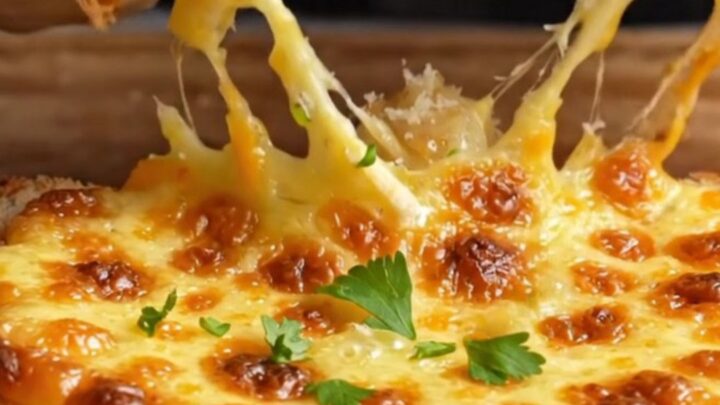
- Pull and ServeRemove the baking sheet from the oven. Let the garlic bread rest for 2 minutes, then slice into thick pieces. Pull apart a slice to show the long cheese stretch. Serve warm, with the cheese pull as the star.Look for The cheese stretches when you pull the bread apart.Tip Serve immediately for the best cheese pull.
The cheese is bubbling and blistered, with beautiful brown spots and a golden crust. The edges of the bread are crisp and dark, and the aroma is intoxicating — roasted garlic, toasted bread, and melted cheese. When you pull a slice apart, the cheese stretches in long, gooey strands. The bread is hot, crunchy on the outside, and soft inside. Serve immediately for the full effect.
Common mistakes
The most common mistake is over-broiling, which can turn the cheese bitter and burn the bread. Watch the garlic bread constantly during the last few minutes of broiling, as ovens vary widely.
Another mistake is under-toasting the bread: if the butter hasn’t soaked into the bread and the cheese is melting but the bread is still pale, the result will be soggy. Make sure the broiler is fully preheated and the baking sheet is placed close enough to the heat to achieve a good crust.
How to tell it’s done
The garlic bread is done when the cheese is fully melted, bubbling, and has developed deep golden-brown blisters and toasted spots. The edges of the bread should be crisp and dark golden, while the center remains soft and chewy.
If you insert a knife into the cheese, it should come out clean and the cheese should stretch when you pull it apart. Let it rest for 2 minutes before slicing to allow the cheese to set slightly, making it easier to handle.
Up next · Part 3 of 3
4 variations · storage & make-ahead · 5 answers · printable card
Tips, FAQ & printable recipe (Part 3)← Back to the ingredients (Part 1)