Dinner · Part 2 of 3: Instructions
Ultimate Crispy Buttermilk Chicken Sandwich Step-by-step instructions
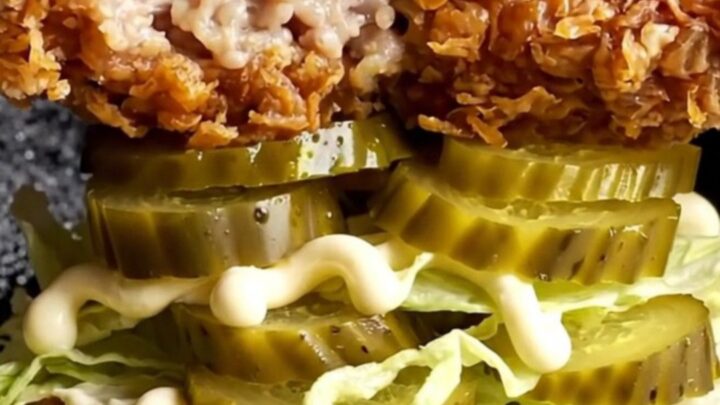
- Prep
- Cook
- Total
- Serves
- 4
Before you start
Before starting, gather all ingredients and equipment. Pound the chicken breasts to an even thickness and season them.
Prepare the buttermilk marinade and let the chicken soak for at least 30 minutes. Set up a dredging station with flour in a shallow dish. Have the frying oil heating while you dredge the chicken.
Ingredients at a glance (13)
- 2 lb boneless, skinless chicken breasts
- Salt to taste
- 1 tbsp smoked paprika
- 1 tbsp garlic powder
- 1 tsp black pepper
- 1 cup buttermilk
- 2 cups all-purpose flour
- 4 cups vegetable oil for frying
- 4 brioche burger buns
- 2 tbsp butter
- 2 tbsp garlic herb mayonnaise
- 1/2 cup crinkle-cut dill pickles
- 1 cup shredded iceberg lettuce
Instructions
Prepare and Marinate
- Pound and Season the ChickenPlace the chicken breasts on a cutting board and cover with plastic wrap. Pound with a meat mallet or rolling pin to an even thickness of about 1/2 inch. Season both sides generously with salt, smoked paprika, garlic powder, and black pepper.Look for The chicken should be evenly thick for uniform cooking.Tip Pounding to even thickness ensures the chicken cooks through without drying out.
- Marinate in ButtermilkPlace the seasoned chicken cutlets in a shallow dish or zip-top bag. Pour the buttermilk over the chicken, turning to coat. Cover and refrigerate for at least 30 minutes, or up to 4 hours.Look for The chicken should be fully submerged in buttermilk.Tip The buttermilk tenderizes the chicken and helps the flour coating adhere.
After pounding and seasoning, the chicken should be evenly thick and well coated with spices. The buttermilk marinade should fully cover the chicken. The chicken should be refrigerated for at least 30 minutes to allow the flavors to meld and the acid to tenderize the meat.
Coat and Fry
- Dredge in Seasoned FlourPlace the flour in a shallow dish. Remove the chicken from the buttermilk, letting excess drip off. Dredge each cutlet in the flour, pressing firmly to create craggy flakes. Shake off excess and set on a wire rack.Look for The coating should look rough and craggy, not smooth.Tip Pressing the flour into the chicken creates those shatteringly crisp flakes.
- Heat the Frying OilPour the vegetable oil into a large, heavy-bottomed skillet or Dutch oven, about 1 inch deep. Heat over medium-high until the oil reaches 365°F (185°C) on a deep-fry thermometer.Look for The oil should shimmer and a small piece of flour sizzles immediately.Tip Maintaining the oil temperature is key for a crispy, non-greasy crust.
- Fry the ChickenCarefully lower the coated chicken into the hot oil in batches, without crowding. Fry for about 5 minutes per side, flipping once, until golden brown and cooked through. The internal temperature should reach 165°F (74°C). Transfer to a wire rack to drain.Look for The crust should be deep golden brown and blistered.Safe temperature 165°F (74°C) internal temperature (poultry)Tip Use a thermometer to check the oil temperature between batches.
The chicken should be dredged in flour until heavily coated with craggy flakes. The oil should be at 365°F (185°C) and the chicken should fry until golden brown and cooked through.
The crust should be deeply golden and blistered, and the internal temperature should reach 165°F (74°C).
Toast and Assemble
- Toast the BunsMelt the butter in a separate skillet over medium heat. Place the brioche buns cut-side down in the skillet and toast until golden brown and fragrant, about 1-2 minutes.Look for The buns should be lightly browned and buttery.Tip Toasting the buns adds flavor and prevents sogginess.
- Assemble the SandwichesSpread the garlic herb mayonnaise on the cut sides of the toasted buns. Layer the bottom buns with crinkle-cut dill pickles and shredded iceberg lettuce. Place a fried chicken cutlet on top and close with the top bun.Look for The sandwich should be tall and packed with toppings.Tip Press down gently to hear that satisfying crunch.
The brioche buns should be toasted until golden brown and fragrant. The sandwiches should be assembled with garlic herb mayo, pickles, lettuce, and the fried chicken. The finished sandwich should be tall, with a crunchy exterior and tender, juicy chicken inside.
Common mistakes
Avoid overcrowding the pan when frying, as this lowers the oil temperature and leads to greasy, soggy chicken. Ensure the oil is at the correct temperature before adding the chicken.
Don't skip the buttermilk marinade, as it tenderizes the chicken and adds flavor. Press the flour firmly onto the chicken to create a thick, craggy crust.
How to tell it’s done
The chicken is done when it is golden brown and crispy, and the internal temperature reaches 165°F (74°C) on an instant-read thermometer inserted into the thickest part.
The crust should be deeply golden and blistered, and the chicken should feel firm to the touch. Let the fried chicken rest on a wire rack for a few minutes before assembling the sandwiches.
- Poultry: 165°F (74°C) in the thickest part
Up next · Part 3 of 3
4 variations · storage & make-ahead · 5 answers · printable card
Tips, FAQ & printable recipe (Part 3)← Back to the ingredients (Part 1)