Desserts · Part 2 of 3: Instructions
Turkish Kazandibi Burnt Milk Pudding with Caramelized Crust Step-by-step instructions
- Prep
- Cook
- Total
- Serves
- 8
Before you start
Before starting, gather all ingredients and equipment. Measure the milk, sugar, rice flour, and cornstarch. Have a heavy-bottomed pot and a whisk ready. Grease the baking tray with butter and dust with powdered sugar just before pouring the pudding.
Make sure the tray fits over your stove burner—if not, use two smaller trays. Clear space in the refrigerator for chilling. Have a spatula and a knife ready for slicing and rolling. The entire process takes about 45 minutes of active time, plus chilling time.
Ingredients at a glance (7)
- 4 cups whole milk
- 1 cup granulated sugar
- 1/2 cup rice flour
- 1/4 cup cornstarch
- 2 tbsp unsalted butter, softened
- 1/2 cup powdered sugar
- 1 tsp ground cinnamon
Instructions
Cook the Pudding Base
- Cook the Pudding BaseIn a heavy-bottomed pot, whisk together the whole milk, granulated sugar, rice flour, and cornstarch until no lumps remain. Place over medium heat and cook, whisking constantly, for about 10 minutes, until the mixture thickens, becomes glossy, and coats the back of a spoon. It should bubble gently.Look for The pudding will thicken noticeably and leave a clear trail when you drag a spoon through it.Tip Whisk continuously to prevent scorching on the bottom. The mixture will go from thin to thick fairly quickly.
- Prepare the TrayGrease a rectangular metal baking tray (about 9x13 inches) with the softened butter, making sure to coat the bottom and sides. Dust the bottom heavily with the powdered sugar, tilting the tray to distribute evenly.Look for The tray should have a thick, even layer of powdered sugar covering the bottom.Tip The powdered sugar will melt and caramelize when heated, creating the signature burnt crust.
- Pour the PuddingLadle the hot pudding into the prepared tray, spreading it evenly with a spatula. Tap the tray gently on the counter to release any air bubbles.Look for The pudding layer should be about 1/2-inch thick and smooth on top.Tip Work quickly while the pudding is hot; it will set as it cools.
After this phase, you should have a thick, glossy pudding that coats the back of a spoon. The mixture will have bubbled and thickened noticeably. The tray is greased and dusted with powdered sugar, ready to receive the hot pudding. The pudding should be smooth and free of lumps, with a silky texture. It should be thick enough that a spoon drawn through leaves a clear path that slowly fills in. The aroma should be sweet and milky, with no burnt smell.
Caramelize the Bottom
- Caramelize the BottomPlace the tray directly over a stove burner on medium heat. Rotate the tray constantly for about 10 minutes, moving it around to ensure even caramelization, until the bottom sugar scorches into a dark brown, fragrant caramel crust. The top of the pudding will remain pale.Look for You'll smell a nutty, caramel aroma and see the bottom turn deep amber to dark brown through the metal tray.Tip Do not walk away; the sugar can burn quickly. Rotate the tray continuously for even color.
- Chill the PuddingAllow the tray to cool to room temperature, then refrigerate for at least 4 hours, or until completely chilled and firm. The pudding should be set enough to slice cleanly.Look for The pudding will be firm to the touch and the caramelized bottom will be hard and crackly.Tip Chilling thoroughly is essential for clean slices. Overnight is even better.
The bottom of the pudding will turn a deep, dark brown, almost mahogany, and the kitchen will fill with a rich, nutty caramel aroma. The top of the pudding remains pale and creamy. The caramelized layer should be crisp and crackly when touched. The tray will be very hot, so handle with care. The sugar should be fully melted and caramelized, with no white spots remaining. The pudding should be firm enough to hold its shape when the tray is tilted.
Slice and Roll
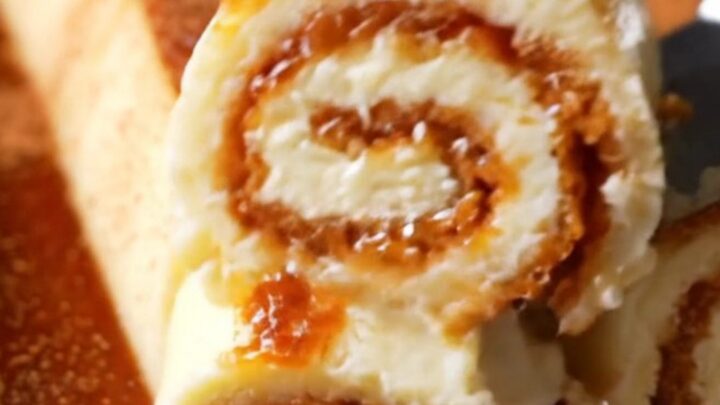
- Slice and RollRun a knife around the edges of the tray to loosen the pudding. Slice the pudding into wide strips, about 2 inches each. Using a spatula, carefully roll each strip, starting from one short end, with the dark burnt caramel side facing up.Look for The rolls should be neat scrolls with the caramelized crust visible on top.Tip If the pudding sticks, dip the knife in hot water and wipe dry before slicing.
- Dust and ServeDust the rolls generously with ground cinnamon. Serve chilled.Look for The cinnamon adds a warm, spicy contrast to the sweet caramel.Tip For a prettier presentation, dust the cinnamon just before serving.
The chilled pudding should be firm and sliceable. The caramelized bottom will be hard and crackly, breaking cleanly when cut. The rolls should be neat and hold their shape, with the dark caramel side facing up.
The cinnamon dusting adds a warm, spicy contrast. The final dessert looks elegant and inviting, with a beautiful contrast between the white pudding and the dark caramel. The texture is creamy and smooth, with a delightful crunch from the caramel.
Common mistakes
One common mistake is not whisking constantly during the cooking phase, which can cause lumps or scorching. Another is using a pan that is too thin, leading to uneven caramelization. Over-caramelizing can make the crust bitter, so watch closely.
Under-chilling the pudding will make it difficult to slice and roll cleanly. If the pudding sticks to the tray, run a knife around the edges and dip it in hot water. Finally, be gentle when rolling the strips to avoid cracking the caramel layer.
How to tell it’s done
The pudding is done when it has thickened to a spoon-coating consistency and bubbles gently around the edges. The caramelization step is complete when the bottom turns a deep dark brown and smells nutty and caramel-like; the top should remain pale.
The chilled pudding should be firm enough to slice cleanly without sticking. If using a thermometer, the pudding should reach at least 160°F (71°C) during cooking to ensure the milk is fully heated and the starches are activated. The final dessert should be served chilled, with the caramelized crust on top.
Up next · Part 3 of 3
4 variations · storage & make-ahead · 5 answers · printable card
Tips, FAQ & printable recipe (Part 3)← Back to the ingredients (Part 1)