Appetizers · Part 2 of 3: Instructions
Turkish Fluffy Fried Dough Pillows (Balon Pişi) Step-by-step instructions
- Prep
- Cook
- Total
- Serves
- 8
Before you start
Before starting, measure all ingredients and ensure the milk and water are warm but not hot (about 110°F/43°C). Set up a frying station with a deep skillet or pot, a slotted spoon, and paper towels for draining. Have the cheese and jam ready for serving. Clear a counter space for kneading and rolling the dough.
Ingredients at a glance (7)
- 1 cup warm milk (200ml)
- 1 cup warm water (200ml)
- 1 packet active dry yeast (10g / 1 tbsp)
- 1 tbsp sugar
- 4 cups all-purpose flour (500g)
- 1 tsp salt
- vegetable oil, for frying, to taste
Instructions
Preparing the Dough
- Activate the YeastIn a large glass bowl, combine the warm milk, warm water, active dry yeast, and sugar. Stir gently until the yeast dissolves. Let the mixture sit for 5–10 minutes until it becomes bubbly and frothy on top, indicating the yeast is active.Look for The mixture should be frothy and slightly foamy, with a pleasant yeast aroma.Tip If the mixture doesn't foam, the yeast may be old or the liquid too hot; start over with fresh yeast and lukewarm liquid.
- Make the DoughAdd the all-purpose flour and salt to the yeast mixture. Stir with a wooden spoon until a shaggy dough forms. Turn the dough out onto a lightly floured surface and knead for 8–10 minutes until smooth and elastic. The dough should be soft and slightly tacky but not sticky.Look for The dough should be smooth, elastic, and spring back when pressed with a finger.Tip If the dough is too sticky, add a little more flour, one tablespoon at a time. If too dry, add a teaspoon of warm water.
- First RisePlace the dough back into the bowl, cover with a kitchen towel, and let it rest in a warm, draft-free spot for 30 minutes, or until it has puffed up and nearly doubled in size.Look for The dough should be visibly puffy and about double its original volume.Tip A warm oven (turned off) or a sunny windowsill works well for rising. Avoid letting it over-rise, which can make the dough sour.
At the end of this phase, you should have a smooth, elastic dough that has risen to about double its size. The yeast mixture should have been frothy before adding the flour, and the dough should be soft and slightly tacky.
The kitchen should smell pleasantly yeasty. The dough is ready to roll out when it springs back when pressed gently.
Frying the Pillows
- Roll and Cut the DoughTurn the risen dough out onto a lightly floured wooden board. Roll it out to about 1.5 cm (1/2 inch) thickness. Use a fluted pastry wheel to cut the dough into neat diamond shapes, about 3–4 inches long. Re-roll scraps and cut again.Look for The dough should be an even thickness, and the diamonds should be cleanly cut with fluted edges.Tip Dust the board and the pastry wheel with flour to prevent sticking. Work with half the dough at a time, keeping the rest covered.
- Heat the OilPour vegetable oil into a large skillet or pot to a depth of about 2 inches. Heat over medium-high heat until the oil reaches 350°F (175°C). To test, drop a small piece of dough into the oil; it should sizzle and rise to the surface immediately.Look for The oil should shimmer and a tiny piece of dough should bubble and float within seconds.Tip Use a deep-fry thermometer for accuracy. If the oil is too hot, the dough will brown too quickly outside and remain raw inside.
- Fry the Dough PillowsCarefully drop a few dough diamonds into the hot oil, being careful not to overcrowd the pan. Fry for 90 seconds per side, flipping with a fork, until the pillows are golden brown and have puffed up into hollow balloons. The dough should inflate dramatically.Look for The dough puffs up into a hollow, balloon-like shape, and the exterior turns deep golden brown.Tip Fry in small batches to maintain oil temperature. Use a fork to flip gently without deflating the puffs.
- Drain the Fried PuffsRemove the fried dough pillows from the oil with a slotted spoon and transfer them to a plate lined with paper towels to drain any excess oil. Repeat with the remaining dough.Look for The pillows should be golden, crisp on the outside, and release steam when torn open.Tip Drain briefly—these are best served warm, while still crisp and airy.
This phase is complete when the dough pillows are golden brown, puffed up, and floating in the oil. They should be crisp on the outside and release a puff of steam when torn.
The oil temperature should remain steady at 350°F (175°C), and the pillows should not be greasy to the touch. The kitchen will be filled with the irresistible aroma of fried bread.
Serving and Enjoying
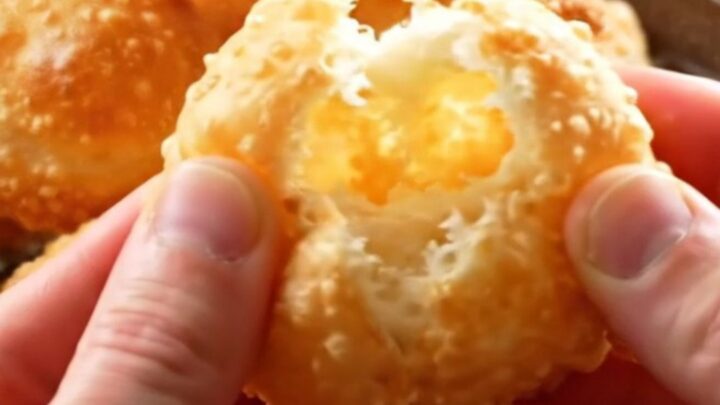
- Serve with Cheese and JamPile the warm fried dough pillows onto a serving platter. Tear one open to reveal the steamy, hollow interior. Serve immediately with cheese and jam on the side, so each person can fill their own pillow.Look for The interior should be airy and steamy, with a crisp golden crust.Tip For an authentic Turkish experience, serve with feta cheese and apricot jam. The contrast of salty and sweet is perfect.
At this final stage, the pillows are piled on a platter, with cheese and jam on the side. The exterior is golden and crisp, while the interior is airy and steamy. The first bite should be a satisfying crunch followed by a soft, tender crumb. Serve immediately while warm for the best texture and flavor.
Common mistakes
A common mistake is not heating the oil enough, resulting in greasy, heavy puffs. Use a thermometer to maintain 350°F (175°C). Overcrowding the pan lowers the oil temperature, so fry in small batches.
Another mistake is overworking the dough, which makes it tough; knead just until smooth. Also, avoid letting the dough rise too long, as it can develop a sour taste and lose its structure.
How to tell it’s done
The dough pillows are done when they are golden brown on both sides and have puffed into hollow, balloon-like shapes. To check, remove one from the oil and tear it open—the interior should be steamy, airy, and fully cooked, with no raw dough.
The crust should be crisp and shatter slightly when bitten. There are no raw proteins in this recipe, so no internal temperature check is needed.
Up next · Part 3 of 3
4 variations · storage & make-ahead · 5 answers · printable card
Tips, FAQ & printable recipe (Part 3)← Back to the ingredients (Part 1)