Desserts · Part 1 of 3: Ingredients
Triple Chocolate Salted Caramel Brownie Bars with Hazelnuts
- Prep
- Cook
- Total
- Serves
- 16
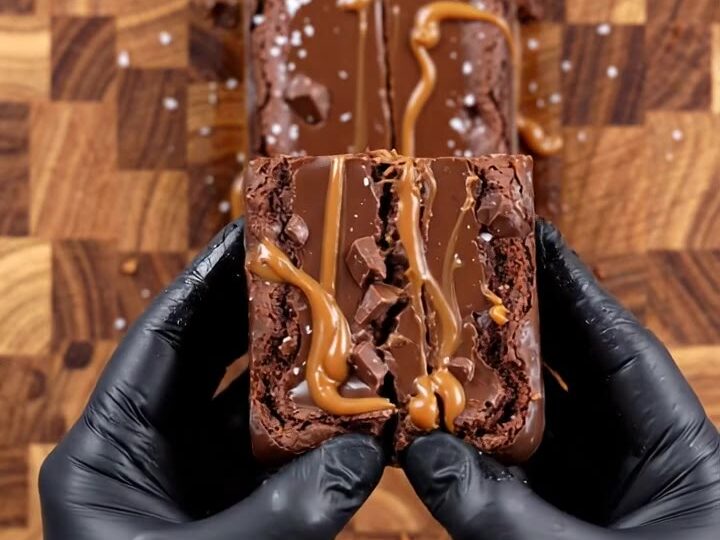
Dense, fudgy and layered with three kinds of chocolate, these brownie bars bring together dark chocolate, grated milk chocolate and gooey caramel. Each square is topped with white chocolate swirls and a light sprinkle of flaky sea salt, so every bite balances sweet and salty. They are a rich, practical dessert for a crowd or a weekend baking session.
These salted caramel brownie bars start with a classic fudgy brownie batter and build from there. Chopped dark chocolate, caramel pieces and hazelnuts are folded through the batter, while a block of milk chocolate is grated directly over the board so it melts into fine shavings.
The batter is spread into a lined metal pan, then topped with chopped white chocolate and caramel sauce that is swirled with a knife for a marbled look.
Extra chopped chocolate and caramel are pressed on top for texture. After baking and a full cool-down, the slab is cut into neat rectangles and finished with caramel drizzle and flaky sea salt. The method is straightforward, but it rewards careful prep: have every mix-in chopped and every pan lined before you mix the batter.
Ingredients
Chocolate and mix-ins
- 4 oz dark chocolate, chopped
- 1/2 cup soft caramel pieces, chopped
- 1/2 cup hazelnuts, chopped
- 2 oz milk chocolate, for grating
Brownie batter
- 1/2 cup unsalted butter, melted
- 1 cup granulated sugar
- 2 large eggs
- 1 tsp vanilla extract
- 1/2 cup all-purpose flour
- 1/3 cup unsweetened cocoa powder
- 1/4 tsp fine salt
Topping
- 2 oz white chocolate, chopped
- 1/3 cup caramel sauce
- flaky sea salt for serving
Why this recipe works
Folding chopped chocolate and grated milk chocolate into the batter creates pockets of melted chocolate throughout the brownie instead of one uniform layer. The grated milk chocolate melts quickly into fine streaks, adding sweetness and a softer, creamier texture, while the chopped dark chocolate holds its shape and keeps the bake deeply chocolatey. Together they give the bars several levels of chocolate flavor in every bite.
Caramel works in two ways here. Caramel pieces folded into the batter soften and turn chewy, while the caramel sauce swirled on top sets into glossy ribbons. The sauce adds moisture and a buttery sweetness that contrasts with the bitter cocoa. Flaky sea salt added at the end makes the caramel taste more pronounced, which is why the finish matters as much as the bake.
Notes and substitutions
Use dark chocolate with a cacao content you enjoy eating on its own, since it sets the bitter backbone of the bars. Milk chocolate for grating should be a good quality bar rather than chips, because bars melt more smoothly and shave more finely.
Soft caramel pieces chop more easily than hard candy and stay tender in the batter. Caramel sauce should be thick enough to hold a streak on the surface; a thin, runny sauce will sink into the batter and disappear.
An 8-inch metal baking pan gives the right depth and bake time for this batter. Glass or ceramic pans bake more slowly and can leave the edges overdone before the center sets, so adjust the time if you use one. Parchment paper with overhang lets you lift the whole slab out for clean cutting.
A box grater is the simplest tool for the milk chocolate shavings, and a long serrated knife cuts through the firm top without crushing the layers. If you do not have hazelnuts, toasted pecans or walnuts work well, and semisweet chocolate can replace the milk chocolate for a less sweet result.
- milk chocolate: semisweet chocolate for grating, which makes a less sweet bar
- hazelnuts: toasted pecans or walnuts, chopped, for a different nut flavor
- caramel sauce: thick dulce de leche, warmed slightly for easier drizzling
Equipment
- 8-inch metal baking pan
- parchment paper
- box grater
- wooden cutting board
- long serrated knife
- offset spatula or knife
- mixing bowls
- whisk
Up next · Part 2 of 3
7 steps · 30 min of cooking · what to look for at each stage
Step-by-step instructions (Part 2)