Desserts · Part 2 of 3: Instructions
Decadent Triple Chocolate Mousse Cake Step-by-step instructions
- Prep
- Cook
- Total
- Serves
- 8
Before you start
Before beginning the assembly, ensure the chocolate cake has cooled completely if it was baked recently. If using a pre-made cake, keep it at room temperature for about 15 minutes to make it easier to handle. Have all your components measured and ready on the counter, as the assembly process moves quickly once you start layering.
Ensure your glass baking dish is clean and dry to prevent any unwanted moisture from affecting the layers. Having a clean workspace will help you maintain the focus needed to create those sharp, professional-looking lines between the cream and the mousse.
Ingredients at a glance (4)
- 1 layer chocolate cake, store-bought or made ahead
- 1 cup whipped cream
- 2 cups chocolate mousse
- 1 tbsp shaved chocolate
Instructions
Foundation Layering
- Layering the basePlace the prepared chocolate cake layer into the bottom of a glass baking dish. Ensure it fits snugly to create a solid foundation for the subsequent creamy layers.Look for The cake should be level and firm.Tip Use a store-bought cake to save significant time.
The cake base should be perfectly flat and cover the bottom of the dish completely. There should be no gaps between the edges of the cake and the glass, as this ensures that the mousse and cream layers remain contained.
If the cake is uneven, trim it gently with a serrated knife until it is level, as a flat foundation is the key to creating those beautiful, straight layers that define this dessert.
Cream and Mousse Application
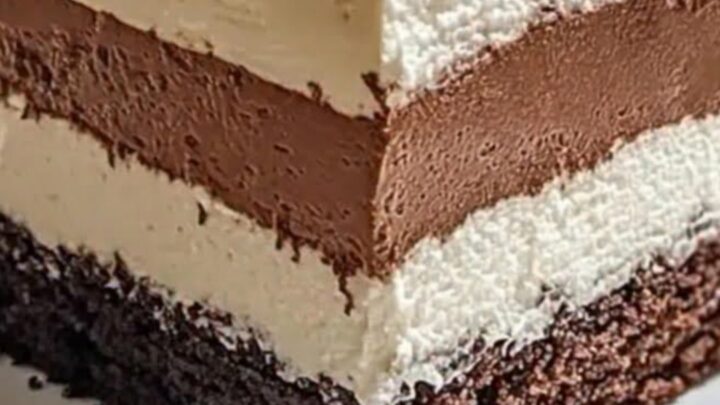
- Adding the cream and mousseSpread the white whipped cream evenly over the chocolate cake layer. Follow this by layering the chocolate mousse on top, smoothing it out with a spatula to create distinct, clean lines.Look for The layers should be visually distinct.Tip Chill the mousse before spreading for better structure.
The cream and mousse should be spread with a light touch to avoid mixing the layers. Use an offset spatula to smooth the surface of the cream before adding the mousse. The mousse should be applied slowly to ensure it fills the corners of the dish without pushing the cream out of place. The result should be a smooth, uniform surface that looks pristine before the final topping is added.
Final Setting
- Final assembly and chillingSprinkle the shaved chocolate over the top of the mousse. Place the dish in the refrigerator to set for at least two hours. Ensure the mousse reaches 160°F (71°C) during its preparation if using raw eggs to ensure they are cooked through.Look for The mousse should feel firm to the touch.Safe temperature 160°F (71°C) internal temperature (egg dishes)Tip Wait until the cake is fully chilled before slicing.
The cake is ready when the mousse feels firm to the touch and the shaved chocolate topping is evenly distributed. The final check is to ensure the edges of the cake are clean and the layers appear distinct through the side of the glass dish. If the cake has been in the fridge for the required time, it will be ready to slice into perfect, clean squares that show off the beautiful, layered design.
Common mistakes
A common mistake is attempting to slice the cake before it has fully set in the refrigerator. This results in the layers sliding against each other and a messy presentation. Always allow the full two hours for the mousse to firm up.
Another error is applying the mousse while the cake is still warm, which will cause the mousse to melt and create a muddy appearance. Ensure the cake is completely cool to the touch before starting to build the layers, as this is vital for maintaining the integrity of the dessert.
How to tell it’s done
The cake is considered done when it has been refrigerated for at least two hours. The mousse should be firm enough that a fork can glide through it without the layers collapsing. If the cake seems too soft, return it to the refrigerator for an additional hour.
The final slice should hold its shape on the ceramic plate, with the distinct layers clearly visible from the side. For safety, ensure any egg-based components have reached 160°F (71°C) during their initial preparation.
- Egg dishes: 160°F (71°C) in the thickest part
Up next · Part 3 of 3
2 variations · storage & make-ahead · 3 answers · printable card
Tips, FAQ & printable recipe (Part 3)← Back to the ingredients (Part 1)