Desserts · Part 1 of 3: Ingredients
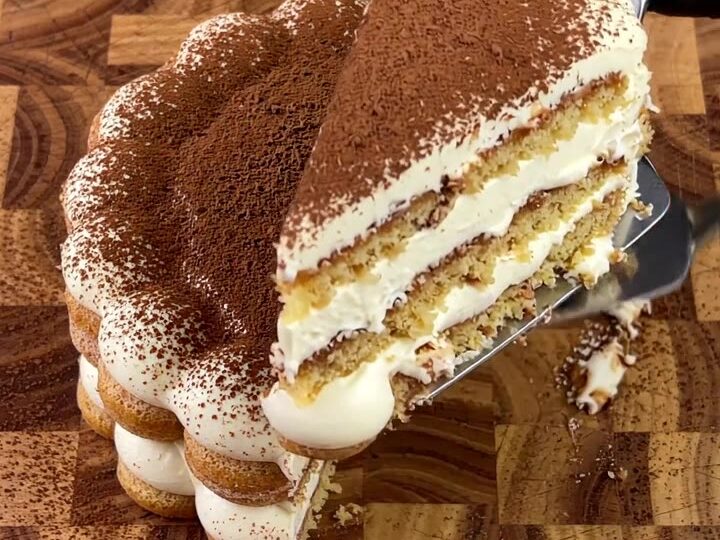
Tiramisu Espresso Mascarpone Ladyfinger Cake
- Prep
- Cook
- Total
- Serves
- 8
This tiramisu-inspired cake takes all the classic flavors—espresso-soaked ladyfingers, creamy mascarpone, and a dusting of cocoa—and bakes them into a warm, bubbling dessert that you slice straight from the pan.
The top turns golden and crispy, the center stays luscious and creamy, and every wedge is a perfect balance of bitter coffee and sweet mascarpone. It’s an impressive dessert for a dinner party or a cozy weekend treat, and it comes together with simple ingredients and minimal fuss.
Forget the classic chilled tiramisu—this version bakes up warm and bubbling, with a crispy golden top and a soft, creamy center. The ladyfingers soak up the espresso and soften as they bake, while the mascarpone filling puffs and sets around them.
The result is a dessert that feels both familiar and new, perfect for serving with a scoop of vanilla gelato or a dollop of whipped cream. Because it’s baked in a pan, it’s easy to slice and serve, and the leftovers (if there are any) are just as delicious cold.
Ingredients
- 24 ladyfingers (savoiardi)
- 1 1/2 cups strong brewed espresso, cooled
- 16 oz mascarpone cheese, at room temperature
- 4 large eggs, separated
- 3/4 cup granulated sugar
- 1 tsp vanilla extract
- 2 tbsp unsweetened cocoa powder, for dusting
- 1/4 tsp kosher salt
Why this recipe works
The method here uses grated mascarpone, which might sound unusual, but it’s a game-changer. Grating the cold mascarpone creates a light, fluffy mound that blends into the egg and sugar mixture without any lumps. This gives the filling a silky-smooth texture that bakes into a creamy, custard-like center. The grated pieces also melt more evenly, so you don’t end up with pockets of dense cheese.
The ladyfingers are dipped briefly in espresso, just enough to soften them without turning them mushy. As the cake bakes, the espresso-soaked cookies absorb the surrounding moisture, creating a tender, cake-like layer that contrasts beautifully with the creamy mascarpone.
Baking the whole thing in a pan allows the edges to caramelize and bubble, giving you that irresistible crispy top and a dessert that’s meant to be eaten warm.
Notes and substitutions
Use high-quality ladyfingers (savoiardi) for the best texture—they should be crisp and light. If you can’t find them, sponge cake slices or pound cake cut into strips work well. For the espresso, brew a strong batch using your favorite beans or instant espresso powder; it should be robust and not too acidic. The coffee flavor is the backbone of the dessert, so don’t skimp.
Mascarpone is essential for the creamy, rich filling. Let it come to room temperature before grating, but if it’s too soft, pop it in the freezer for 15 minutes. You’ll need a box grater and a 9-inch round cake pan or oven-safe skillet.
An electric mixer makes beating the egg whites and yolks easier, but a whisk and some elbow grease work too. Ensure all your ingredients are at room temperature for a smooth emulsion.
- ladyfingers: Use sponge cake slices or pound cake cut into strips if ladyfingers are unavailable.
- espresso: Brew 1 1/2 cups strong coffee using 2 tablespoons instant espresso powder and 1 1/2 cups hot water.
- mascarpone: Substitute an equal amount of full-fat cream cheese blended with 2 tablespoons heavy cream for a similar texture.
- granulated sugar: Use superfine sugar for faster dissolving in the mascarpone mixture.
Equipment
- 9-inch round cake pan or oven-safe skillet
- Box grater
- Electric mixer
- Mixing bowls
- Spatula
- Measuring cups and spoons
Up next · Part 2 of 3
6 steps · 40 min of cooking · what to look for at each stage
Step-by-step instructions (Part 2)