Dinner · Part 2 of 3: Instructions
Thyme Butter Melting Potatoes for a Crispy Side Dish Step-by-step instructions
- Prep
- Cook
- Total
- Serves
- 4
Before you start
Before beginning, ensure the oven is fully preheated to 400°F (200°C) to guarantee the potatoes begin browning immediately upon contact.
Peel the potatoes carefully and use a sharp chef's knife to cut them into consistent, thick rounds.
Having all ingredients measured and ready, including the garlic thyme broth and butter, will make the assembly process seamless and quick, allowing you to focus on the arrangement of the potatoes in the baker.
Ingredients at a glance (3)
- 2 lbs gold potatoes, peeled and sliced into thick rounds
- 1 cup garlic thyme chicken broth
- 4 tbsp unsalted butter, sliced
Instructions
Preparation and Arrangement
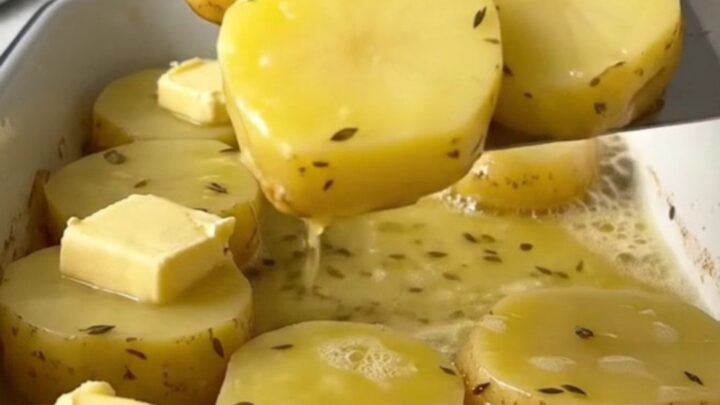
- Prepare the potatoesPreheat the oven to 400°F (200°C). Peel the gold potatoes and slice them into uniform, thick rounds. Arrange the potato rounds in a single layer within a large, white enameled rectangular baker, ensuring they fit snugly without overcrowding.Look for The potatoes are arranged in an even, single layer.Tip Using uniform slices ensures that all the potatoes cook at the same rate for consistent results.
The potatoes are sliced into uniform rounds and arranged neatly in the baker, creating a tidy base ready for the liquid. This phase sets the foundation for even cooking and proper browning later in the process.
Adding Aromatics
- Add liquid and butterPour the garlic thyme chicken broth over the potato rounds until the liquid reaches halfway up the sides of the potatoes. Dot the top of the potatoes evenly with the slices of unsalted butter to provide richness during the baking process.Look for The broth covers the bottom half of the potato slices.Tip Ensure the butter is distributed evenly across the surface to help create a consistent golden crust.
The garlic thyme broth and butter are added, creating a flavorful environment that will infuse the potatoes. The liquid level is properly checked to ensure the potatoes are partially submerged, facilitating the perfect cooking environment.
Baking and Browning
- Bake until goldenTransfer the baker to the preheated oven and bake until the liquid has evaporated and the potatoes are golden brown on top and tender on the inside, approximately 40 to 45 minutes. Remove from the oven and allow the potatoes to rest for 5 minutes before serving.Look for The potatoes are golden brown and bubbling in the remaining butter.Tip If the tops are not sufficiently browned, broil them for an additional minute, watching closely to prevent burning.
The potatoes are baked until they achieve a deep, golden-brown color and the liquid has reduced into a rich sauce. The kitchen smells fragrant with garlic and thyme, and the potatoes are soft and perfectly cooked.
Common mistakes
A common mistake is overcrowding the baker, which prevents the potatoes from browning correctly and creates a steamed texture rather than a crispy one. Ensure the potatoes are in a single layer.
Another error is using too much broth; the liquid should only reach halfway up the potatoes, otherwise they will remain soggy rather than developing their characteristic melting texture.
How to tell it’s done
The potatoes are done when they are fork-tender throughout, offering no resistance when pierced.
The tops should be deeply golden brown and slightly crispy, while the bottom of the dish should be filled with a reduced, flavorful butter sauce. There should be no raw or firm centers remaining within the potato rounds.
Up next · Part 3 of 3
2 variations · storage & make-ahead · 3 answers · printable card
Tips, FAQ & printable recipe (Part 3)← Back to the ingredients (Part 1)