Desserts · Part 2 of 3: Instructions
Three-Ingredient Berry Soda Cobbler Step-by-step instructions
- Prep
- Cook
- Total
- Serves
- 8
Before you start
Before beginning, ensure all ingredients are ready and the oven is fully preheated to 350°F (175°C). Having the baking dish placed on a flat, stable surface will make the assembly process much smoother.
Since this recipe relies on the immediate interaction between the soda and the dry mix, it is best to have everything measured and within reach before starting the assembly phase to ensure the best possible rise and texture in the final baked product.
Ingredients at a glance (3)
- 4 cups frozen mixed berries, such as blueberries, raspberries, and blackberries
- 1 box (approx. 15 oz) white cake mix
- 12 oz lemon-lime soda
Instructions
Fruit Base Assembly
- Prepare the berry basePreheat the oven to 350°F (175°C). Pour the frozen mixed berries into a 9x13-inch baking dish, spreading them out evenly across the bottom to create a uniform layer for the fruit base.Look for Berries should be evenly distributed in the bottom of the pan.Tip Keep the berries frozen until the moment they go into the pan to ensure they bake properly.
The berries should cover the bottom of the pan in a single, even layer. There is no need to thaw the berries beforehand, as the heat of the oven will thaw them and release their juices during the baking process.
Ensure the dish is large enough to contain the berries without them piling up too high in the center, as this ensures even baking and consistent results across the entire dessert.
Cake Layer Application
- Add the cake layerSprinkle the dry white cake mix directly over the frozen berries. Use a spoon or your hands to ensure the powder is spread in an even, consistent layer covering all the fruit.Look for The cake mix should completely cover the berries in a powdery layer.Tip Avoid packing the cake mix down; keep it light and airy to ensure a better crust texture.
The cake mix must be distributed evenly over the berries. Look for a uniform dusting that hides the fruit underneath. Avoid creating thick mounds of cake mix in one area and thin spots in another, as this will lead to uneven baking. A gentle shake of the pan can help to level out the powder if it looks uneven after the initial scattering, ensuring a balanced topping for the final dish.
Baking and Caramelization
- Pour soda and bakeSlowly pour the lemon-lime soda over the cake mix layer. Ensure the soda reaches all areas to moisten the dry mix. Place the dish in the preheated oven and bake for 45 minutes, or until the top is golden brown and the berry juices are bubbling around the edges.Look for The top should be golden brown and the fruit juice should be bubbling.Tip Check the cobbler at 40 minutes to ensure the top is not browning too quickly.
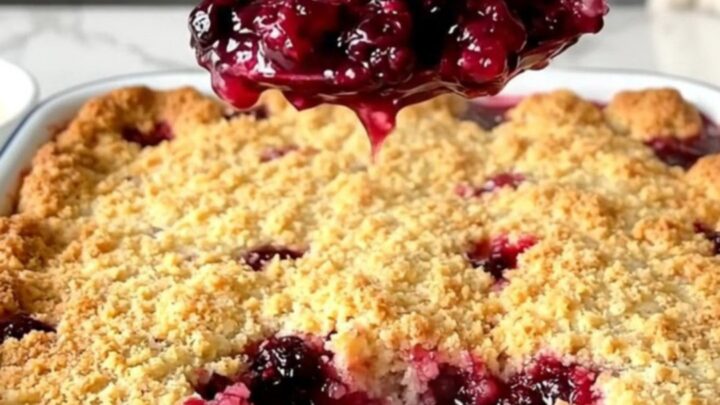
At the end of the baking phase, the surface should be golden and slightly crusty. The edges of the baking dish should show bubbling fruit juice that has thickened into a rich, dark purple sauce. If the top is browning too quickly before the fruit is bubbling, a loose tent of foil can be placed over the dish for the final few minutes of baking to prevent the crust from burning.
Common mistakes
A common mistake is over-mixing or pressing down on the cake mix layer. It is crucial to leave the dry mix in a loose, powdery state after scattering it over the berries. Packing it down can result in a dense, gummy crust rather than a light and cake-like topping.
Additionally, ensure the soda is poured evenly across the entire surface; missing spots can leave dry patches of cake mix that will not bake through properly, affecting the final texture.
How to tell it’s done
The cobbler is done when the top has achieved a deep, golden-brown color and feels firm to the touch. The most important indicator of doneness is the bubbling of the fruit juices around the edges of the baking dish.
These juices should be thick and syrupy rather than thin and watery. Remove the cobbler from the oven and allow it to rest for about 10 minutes, which allows the juices to thicken further and makes serving much easier.
Up next · Part 3 of 3
2 variations · storage & make-ahead · 3 answers · printable card
Tips, FAQ & printable recipe (Part 3)← Back to the ingredients (Part 1)