Dinner · Part 2 of 3: Instructions
Thai Crispy Minced Pork Omelet Step-by-step instructions
- Prep
- Cook
- Total
- Serves
- 2
Before you start
Ensure all ingredients are measured and ready before starting, as the frying process happens very quickly.
Have the minced pork ready to fold into the egg mixture and keep a slotted spoon and a plate with paper towels nearby to drain any excess oil. Working in a wok is recommended for the best heat distribution and to contain the splattering oil safely.
Ingredients at a glance (7)
- 3 large eggs
- 1 tbsp fish sauce
- 1 tsp fresh lime juice
- 2 tsp rice flour
- 3 oz minced pork
- 1/2 cup neutral frying oil
- sriracha chili sauce, for serving
Instructions
Mixing the egg base
- Prepare the egg mixtureIn a medium mixing bowl, combine the eggs, fish sauce, lime juice, and rice flour. Whisk the mixture vigorously until it becomes light and frothy. Gently fold in the minced pork until well incorporated. Ensuring the pork is finely minced helps it cook through evenly alongside the eggs.Look for The mixture should be very frothy with visible air bubbles.Tip Whisking thoroughly incorporates air which is essential for that signature puffy, cloud-like texture.
The egg mixture should be pale, light, and clearly frothy from the vigorous whisking. The minced pork should be evenly distributed throughout the liquid. If the mixture looks too thick, ensure the rice flour is fully dissolved without any lumps before proceeding to the heat.
Frying to golden lace
- Fry the omeletHeat the oil in a wok until it reaches 390°F. Hold the egg mixture about 12 inches above the wok and pour it in one steady stream. The high drop creates the beautiful, lacy, crackling edges as the egg hits the hot oil. Fry for 60 seconds until the omelet is golden brown and the pork is cooked through to 160°F (71°C).Look for The eggs should puff up immediately upon hitting the oil with a loud sizzle.Safe temperature 160°F (71°C) internal temperature (ground meat)Tip Do not crowd the wok; fry one omelet at a time to maintain the oil temperature.
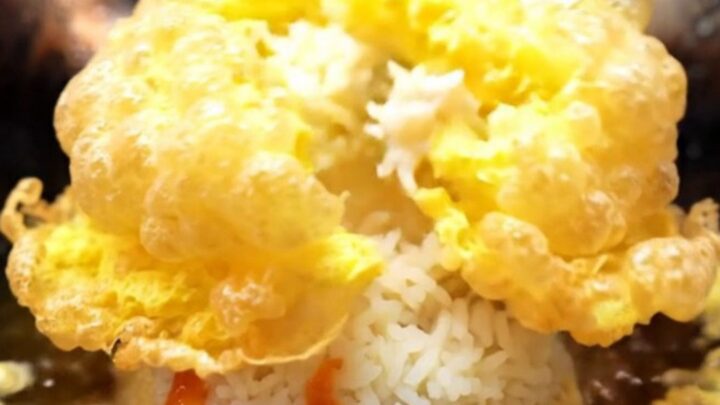
The omelet should expand rapidly into a cloud-like shape with thin, dark golden edges. It should sound like a vigorous sizzle as it cooks. If the omelet stays flat, the oil temperature is likely too low or the pouring height was insufficient to create the necessary thin-stream effect.
Draining and serving
- Drain and serveUsing a slotted spoon, carefully lift the crispy omelet from the oil and let any excess oil drain back into the wok for a few seconds. Transfer the omelet immediately to a plate over a bed of warm jasmine rice. Drizzle with sriracha chili sauce to taste while the omelet is still hot and crackling.Look for The edges should be dark golden brown and crispy.Tip Serve immediately to ensure the omelet retains its airy, crispy texture before the steam from the rice softens it.
The finished omelet should be golden brown and dry to the touch once drained. It should be served immediately while the edges are still crackling.
If the omelet sits too long, the steam from the hot jasmine rice underneath will soften the crispy texture, which is a hallmark of this dish.
Common mistakes
Avoid overcrowding the wok, as this will drop the oil temperature, resulting in a greasy, soggy omelet rather than a crispy one.
Do not skip the resting step if you are unsure about the pork doneness; however, for this thin style of omelet, the high heat typically cooks the meat quickly. Ensure the oil is truly hot before pouring; if it is not smoking or shimmering, the eggs will fail to puff.
How to tell it’s done
The omelet is done when the edges are deep golden brown and appear crisp and lacy. The center should be set and the minced pork must reach an internal temperature of 160°F (71°C) to ensure it is fully cooked.
The overall structure should feel light and airy to the touch, with no raw egg remaining in the center of the puff.
- Ground meat: 160°F (71°C) in the thickest part
- Egg dishes: 160°F (71°C) in the thickest part
Up next · Part 3 of 3
2 variations · storage & make-ahead · 3 answers · printable card
Tips, FAQ & printable recipe (Part 3)← Back to the ingredients (Part 1)