Dinner · Part 2 of 3: Instructions
Tex-Mex Ground Beef and Cauliflower Rice Casserole Step-by-step instructions
- Prep
- Cook
- Total
- Serves
- 4
Before you start
Before starting, ensure all ingredients are measured and ready to go. Chop or pulse your cauliflower into rice-sized pieces if you are not using pre-packaged cauliflower rice.
Preheat your oven to 400°F (200°C) so it is ready for the baking phase. Have your baking dish nearby and ensure your spatula is clean and ready for stirring the meat during the browning process.
Ingredients at a glance (4)
- 1 lb ground beef
- 4 cups cauliflower rice
- 2 cups shredded cheddar cheese
- 2 tbsp taco seasoning
Instructions
Browning the base
- Brown the meatHeat a large skillet over medium-high heat. Add the ground beef and cook, breaking it apart with a spatula, until browned and cooked through. Ensure the meat reaches an internal temperature of 160°F (71°C).Look for The beef should be deeply browned and no longer pink.Safe temperature 160°F (71°C) internal temperature (ground meat)Tip Drain any excess fat from the skillet if desired before adding the spices.
The ground beef should be deeply browned and fragrant. Ensure all pink color is gone and the internal temperature has reached 160°F (71°C) before proceeding to add the spices and cauliflower.
Seasoning and simmering
- Season and combineStir the taco seasoning into the browned beef until well combined. Add the cauliflower rice to the skillet and cook for another five minutes, stirring frequently, until the cauliflower has softened and absorbed the flavors.Look for The mixture should be fragrant and the cauliflower tender.Tip If the mixture seems too dry, add a splash of water or beef broth to help steam the cauliflower.
The cauliflower should be tender but not mushy. The mixture should look cohesive, with the spices evenly distributed throughout the beef and cauliflower. If it seems too dry, add a tiny splash of broth.
Baking to perfection
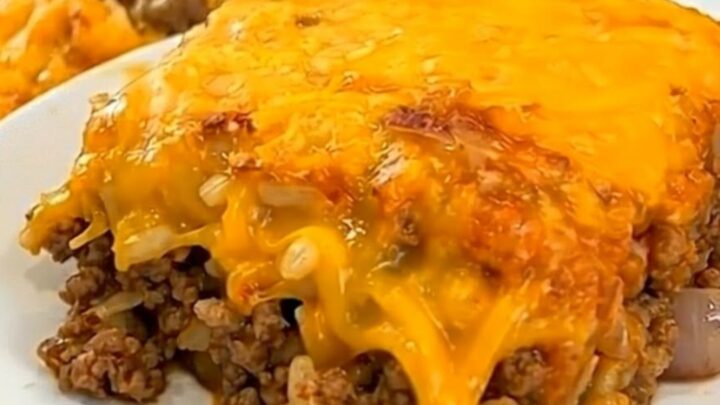
- Bake the casseroleTransfer the beef and cauliflower mixture into a baking dish. Spread it into an even layer and top generously with the shredded cheddar cheese. Place the dish in a preheated oven at 400°F (200°C) and bake for 10 minutes until the cheese is melted, bubbling, and golden brown.Look for The cheese should be completely melted and bubbling.Tip Place the baking dish under the broiler for the last minute if a darker, crispier cheese crust is preferred.
The cheese should be completely melted and bubbling across the entire surface. A light golden color indicates it is ready. Ensure the dish is hot throughout before removing it from the oven.
Common mistakes
Avoid overcrowding the skillet when browning the meat, as this can cause it to steam rather than brown, which reduces the depth of flavor.
Another common mistake is adding too much liquid to the cauliflower, which can lead to a soupy casserole. Keep an eye on the oven during the final bake to ensure the cheese browns without burning.
How to tell it’s done
The casserole is done when the cheese is fully melted, bubbling, and displays a light golden-brown color on top.
Because the ground beef was fully cooked in the skillet to 160°F (71°C) before baking, the time in the oven is primarily to melt the cheese and marry the flavors.
Let the dish rest for about 5 minutes before serving to allow the layers to settle.
- Ground meat: 160°F (71°C) in the thickest part
Up next · Part 3 of 3
2 variations · storage & make-ahead · 3 answers · printable card
Tips, FAQ & printable recipe (Part 3)← Back to the ingredients (Part 1)