Dinner · Part 2 of 3: Instructions
Teriyaki Chicken Sushi Bake with Crispy Onions Step-by-step instructions
- Prep
- Cook
- Total
- Serves
- 6
Before you start
Preheat the oven to 390°F (199°C). Have all the ingredients ready: cooked sushi rice, furikake, shredded rotisserie chicken, teriyaki glaze, Kewpie mayo, mozzarella, crispy onions, and sesame seeds.
If the chicken is cold, let it sit at room temperature for up to 30 minutes before shredding. Lightly grease the baking dish or line it with parchment for easier cleanup.
Ingredients at a glance (9)
- 3 cups cooked sushi rice
- 2 tbsp furikake seasoning
- 350 g rotisserie chicken thigh, shredded
- 60 ml thick teriyaki glaze
- 50 ml Kewpie mayo
- 100 g mozzarella, shredded
- 40 g crispy fried onions
- 1 tbsp toasted sesame seeds
- Roasted seaweed sheets, for serving
Instructions
Phase 1: Rice and Chicken Prep
- Prepare the Rice BasePreheat the oven to 390°F (199°C). Spread the cooked sushi rice evenly in a 9x13-inch baking dish. Sprinkle the furikake seasoning over the rice, then gently press the rice into an even layer with a spatula or your hands.Look for The rice should be evenly distributed and lightly seasoned with furikake.Tip Wetting your hands with water prevents the rice from sticking when pressing it down.
- Shred the ChickenUsing a fork or your fingers, shred the rotisserie chicken thigh meat into bite-sized pieces. Place the shredded chicken in a medium mixing bowl.Look for The chicken should be finely shredded and free of large chunks.Tip Warm chicken shreds more easily than cold, so work while it's still slightly warm.
The rice is seasoned and pressed into the dish, and the chicken is shredded and mixed with the teriyaki mayo. The chicken should be glossy and creamy, and the rice should smell nutty from the furikake. Everything is ready to assemble.
Phase 2: Assemble and Top
- Mix the Chicken FillingAdd the thick teriyaki glaze and Kewpie mayo to the shredded chicken. Stir until the chicken is evenly coated with the sauce and mayo.Look for The chicken should be glossy and creamy, with no dry spots.Tip If the mixture seems too dry, add an extra teaspoon of teriyaki glaze.
- Add the MozzarellaSprinkle the shredded mozzarella over the chicken mixture and stir to combine. The cheese will help bind the filling together as it melts.Look for The mozzarella should be evenly distributed throughout the chicken mixture.Tip Use low-moisture mozzarella for the best melt without excess water.
- Assemble the Sushi BakeSpread the chicken and cheese mixture evenly over the furikake rice in the baking dish, covering the entire surface.Look for The topping should be spread in an even layer, reaching the edges.Tip Use a spatula to smooth the top for even browning.
The chicken mixture is spread evenly over the rice, and the mozzarella is visible throughout. The dish looks colorful, with the golden chicken and white cheese against the seasoned rice. It's ready for the oven.
Phase 3: Bake and Finish
- Bake Until BubblingPlace the baking dish in the preheated oven and bake for 12 minutes, or until the casserole is bubbling hot and the cheese is melted and golden in spots.Look for The edges should be bubbling and the top lightly browned.Tip If the top browns too quickly, loosely cover with foil for the last few minutes.
- Top with Crispy Onions and SesameRemove the dish from the oven and immediately sprinkle the crispy fried onions and toasted sesame seeds over the hot casserole.Look for The onions should be evenly scattered and the sesame seeds add a nutty aroma.Tip Add the onions right after baking so they stay crunchy.
- Serve with SeaweedLet the sushi bake cool for a few minutes, then scoop portions onto roasted seaweed sheets. Serve warm, wrapping the seaweed around the rice and filling for each bite.Look for The bake should hold together when scooped, with a creamy and crunchy texture.Tip Use a large spoon to scoop out neat portions.
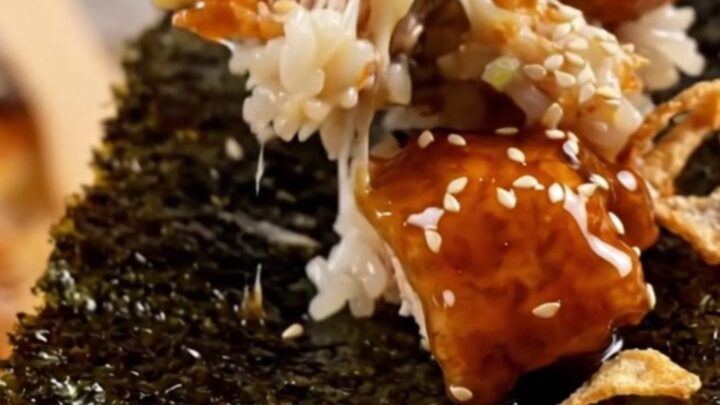
After baking, the casserole is bubbling and golden. The crispy onions and sesame seeds add a fragrant, crunchy topping. The kitchen smells of savory teriyaki and toasted sesame. Let it cool slightly before serving.
Common mistakes
One common mistake is using too much teriyaki glaze, which can make the filling overly sweet and runny. Stick to the measured amount and add more only if needed.
Another mistake is not pressing the rice firmly enough—if the rice layer is too loose, it will fall apart when you scoop it.
Also, don't skip the furikake; it adds essential flavor to the rice. Finally, be careful not to overbake, as that can dry out the chicken.
How to tell it’s done
The sushi bake is done when it's bubbling hot all the way through and the cheese is melted and lightly golden on top. The edges should be visibly bubbling.
Since the chicken is already cooked, you're mainly heating everything through and melting the cheese. If you want a more browned top, you can broil for 1-2 minutes, but watch it closely to avoid burning the onions.
Up next · Part 3 of 3
4 variations · storage & make-ahead · 5 answers · printable card
Tips, FAQ & printable recipe (Part 3)← Back to the ingredients (Part 1)