Dinner · Part 2 of 3: Instructions
Tender Old-Fashioned Crockpot Pot Roast with Rich Gravy Step-by-step instructions
- Prep
- Cook
- Total
- Serves
- 6
Before you start
Before you begin cooking, ensure all your ingredients are properly measured and prepped. Wash the baby potatoes thoroughly and slice them in half so they cook evenly.
Peel the carrots and chop them into thick, uniform two-inch chunks to prevent them from turning mushy during the long simmer. Pat the beef chuck roast dry with paper towels; this helps it sear or cook beautifully. Keep the raw meat refrigerated until you are ready to assemble the dish.
Ingredients at a glance (5)
- 3 lb beef chuck roast
- 1 lb baby potatoes, halved
- 1 lb carrots, cut into 2-inch chunks
- 2 cups brown gravy
- chopped fresh parsley for serving
Instructions
Preparation and Assembly
- Arrange the vegetablesLayer the halved baby potatoes and chopped carrots in the bottom of the slow cooker insert, creating an even bed for the meat to rest on. This ensures the vegetables cook thoroughly in the juices.Look for The vegetables should form a flat, stable layer at the bottom.Tip Cutting the vegetables to a uniform size ensures they all finish cooking at the same time.
- Add the beef and gravyPlace the beef chuck roast directly on top of the vegetables. Pour the brown gravy over the beef and vegetables in the slow cooker, ensuring the roast is well coated.Look for The gravy should settle around the sides and cover the beef.Tip Pouring the gravy directly over the beef helps keep it moist during the initial cooking phase.
At the end of this initial phase, the beef roast rests securely on a colorful bed of fresh baby potatoes and chopped carrots inside the slow cooker insert. The rich brown gravy is poured evenly over the meat and vegetables, settling around the base and sides of the crockpot. The kitchen will begin to fill with a subtle, savory aroma of beef and gravy as the slow cooker starts to heat up.
The Slow Cook
- Slow cook the roastCover the crockpot with the lid and cook on low for 8 hours, allowing the beef to become incredibly tender and the vegetables to soften in the rich gravy.Look for The slow cooker should show gentle bubbling around the edges as it cooks.Tip Resist the urge to open the lid during cooking, as this releases heat and increases the cooking time.
- Check doneness and restCarefully remove the lid. Insert a meat thermometer into the thickest part of the roast to ensure it reaches a safe minimum internal temperature of 145°F (63°C). Transfer the tender beef to a warm serving platter and let it rest for at least 3 minutes.Look for The beef should be tender enough that a fork slides in with absolutely no resistance.Safe temperature 145°F (63°C) internal temperature (steaks, chops and roasts)Tip Letting the meat rest before shredding allows the delicious juices to redistribute throughout the fibers.
After eight hours of slow cooking, the beef roast should be incredibly tender, dark golden-brown, and steaming hot. The potatoes and carrots will look tender and glistening, having absorbed the rich cooking juices.
The liquid in the crockpot should be bubbling gently around the edges, filled with the deep, rich aroma of slow-simmered beef. The meat must easily yield when pierced with a fork, showing it is ready for shredding.
Shredding and Serving
- Shred the beefUse two forks to shred the rested beef into succulent, bite-sized chunks on a cutting board or platter.Look for The meat should pull apart effortlessly into juicy shreds.Tip Shred the beef while it is still warm for the easiest and cleanest separation.
- Assemble and garnishReturn the shredded beef to the slow cooker, bathing it in the rich, glossy gravy. Spoon the gravy and tender vegetables over the beef, and garnish with the chopped fresh parsley right before serving.Look for The dish should look vibrant, with glistening gravy and bright green parsley.Tip Serve the pot roast immediately while steaming hot to enjoy the best texture.
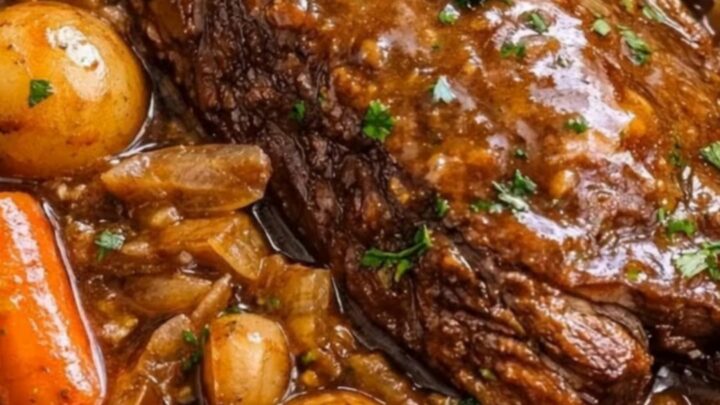
By the end of this final phase, the shredded beef looks incredibly succulent, steaming with warmth and bathed in the rich, glossy gravy. The bright green chopped parsley scattered across the top provides a beautiful, fresh contrast to the warm, glistening tones of the tender potatoes, carrots, and savory beef. The dish is hot, fragrant, and ready to be served immediately to hungry guests.
Common mistakes
One common mistake is cooking the pot roast on the high setting for a shorter duration instead of the low setting. While it may seem like a time-saver, cooking tough cuts of beef on high can cause the muscle fibers to seize up and become tough or stringy.
For the absolute best melt-in-your-mouth texture, always choose the low and slow method. Another mistake is cutting the vegetables too small, which leads to them disintegrating into mush during the long cooking process.
How to tell it’s done
To determine if the pot roast is perfectly cooked, check that the beef reaches a safe minimum internal temperature of 145°F (63°C) using a reliable meat thermometer, followed by a three-minute rest.
However, for the ultimate shreddable texture, the beef is truly done when it is fork-tender. This means you can easily insert a fork into the center of the meat and twist it without meeting any tough resistance, allowing the fibers to separate effortlessly.
- Steaks, chops and roasts: 145°F (63°C) in the thickest part, then a 3-minute rest
Up next · Part 3 of 3
3 variations · storage & make-ahead · 4 answers · printable card
Tips, FAQ & printable recipe (Part 3)← Back to the ingredients (Part 1)