Dinner · Part 2 of 3: Instructions
Ten-Minute Spicy Garlic Chili Oil Ramen Step-by-step instructions
- Prep
- Cook
- Total
- Serves
- 2
Before you start
Before starting, make sure all your ingredients are prepped and within reach. Mince the garlic, chop the chilies, slice the green onions, and chop the cilantro. Have the soy sauce, oyster sauce, and chicken bouillon powder measured and ready.
Bring a large pot of water to a boil. Set a colander in the sink. Have a large skillet or wok nearby. This recipe moves quickly, so having everything ready ensures the noodles don't overcook while you scramble for ingredients.
Ingredients at a glance (11)
- 2 packs ramen noodles (discard seasoning packets)
- 2 tbsp vegetable oil
- 3 cloves garlic, minced
- 2 bird's eye chilies, chopped
- 2 green onions, sliced
- 1/4 cup fresh cilantro, chopped
- 1 tbsp soy sauce
- 1 tbsp oyster sauce
- 1 tsp chicken bouillon powder
- 1/3 cup reserved starchy noodle water
- 1 lime, cut into wedges
Instructions
Boil and Prep
- Boil the noodlesBring a large pot of water to a rolling boil. Add the ramen noodles and cook for 3 minutes, stirring occasionally, until springy and al dente. Scoop out 1/3 cup of the starchy cooking water and set it aside. Drain the noodles in a colander and shake off excess water.Look for The noodles should be tender but still have a slight chew in the center.Tip Don't overcook; they'll finish cooking in the sauce. Reserve the water before draining.
- Prep the aromaticsWhile the noodles boil, mince the garlic, chop the bird's eye chilies, slice the green onions, and chop the cilantro. Keep them separate, as they go into the skillet at different times.Look for The kitchen should smell fresh and pungent from the garlic and chilies.Tip Use a sharp knife to avoid bruising the herbs and to keep the chilies from tearing.
The noodles should be springy and just cooked through, with a slight chew in the center. The reserved starchy water should be cloudy and thick, ready to thicken the sauce. The aromatics should be prepped and within reach, with the garlic minced, chilies chopped, green onions sliced, and cilantro chopped. The kitchen should smell clean and fresh, with the water still steaming. This phase is all about setting up for a quick, seamless cook.
Sizzle and Sauce
- Sizzle the aromaticsHeat the vegetable oil in a large skillet over medium-high heat. Add the minced garlic, chopped chilies, and the white parts of the green onions. Cook for 45 seconds, stirring constantly, until the garlic is fragrant and just starting to turn golden at the edges.Look for The oil should be shimmering and the garlic sizzling but not browned.Tip Keep the heat medium-high to get a quick sizzle without burning the garlic.
- Make the sauceStir in the soy sauce, oyster sauce, chicken bouillon powder, and the reserved starchy noodle water. Bring the mixture to a simmer, scraping up any browned bits from the bottom of the skillet. Let it bubble for about 30 seconds until slightly thickened.Look for The sauce should be glossy and smell deeply savory with a hint of garlic.Tip The starchy water helps the sauce cling to the noodles. Simmer briefly to meld flavors.
- Toss the noodlesAdd the drained ramen noodles to the skillet. Toss them gently with tongs or chopsticks for 1 to 2 minutes, until every strand is coated in the glossy sauce and the noodles are heated through.Look for The noodles should be slick and evenly tinted with the sauce, with no dry spots.Tip Use a folding motion to avoid breaking the noodles. If the sauce seems thick, add a splash of water.
The skillet should be fragrant with garlic and chilies, with the oil shimmering and the garlic just starting to turn golden. After adding the sauces and water, the mixture should be bubbling and slightly thickened, with a glossy sheen.
The aroma should be intensely savory and slightly sweet from the oyster sauce. The noodles should be added and tossed until every strand is coated, with no dry spots. The sauce should cling to the noodles, not pool in the bottom of the skillet.
Finish and Serve
- Finish and serveTurn off the heat. Stir in the remaining green onion tops and most of the cilantro, reserving a little for garnish. Squeeze fresh lime juice over the noodles and toss once more. Serve immediately in warm bowls, topped with the remaining cilantro and extra lime wedges.Look for The noodles should be steaming and aromatic, with bright green herbs and a hint of lime.Tip Add the lime at the end so it stays bright and fresh. Serve right away for the best texture.
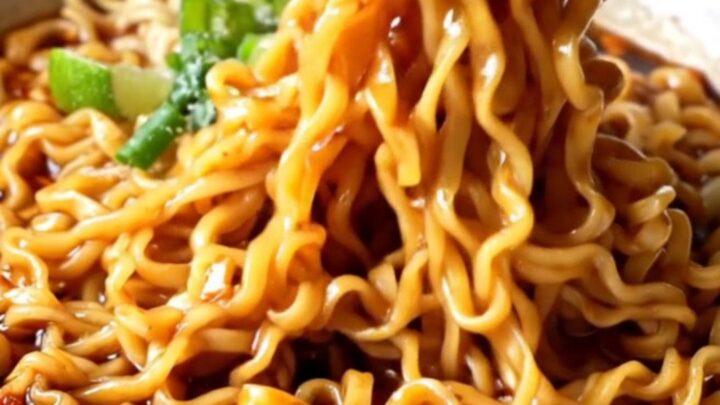
The noodles should be glossy, steaming, and evenly coated with the sauce. The green onions and cilantro should be bright and fresh, and the lime juice should add a citrusy aroma. The dish should look vibrant, with the red chilies and green herbs contrasting against the golden-brown sauce. A quick taste should reveal a balance of heat, saltiness, and a bright finish. Serve immediately, with extra lime wedges on the side.
Common mistakes
A common mistake is overcooking the noodles, which turns them mushy and causes them to break apart during tossing. Stick to the three-minute boil and remember that they'll cook a little more in the sauce.
Another pitfall is burning the garlic; keep the heat at medium-high and stir constantly, pulling the skillet off the heat if it gets too dark. Skipping the reserved starchy water is also a mistake — it's what makes the sauce glossy and clingy. Finally, don't skip the lime; it balances the heat and richness.
How to tell it’s done
The dish is done when the noodles are glossy and evenly coated with the sauce, and the sauce has thickened slightly to cling to the noodles. The garlic should be fragrant and just beginning to brown, and the chilies should be softened.
The lime juice should be added at the very end, so the noodles should be piping hot when you serve. If you're using chicken bouillon powder, it should be fully dissolved into the sauce. Taste a strand of noodle — it should be springy and well seasoned, with a pleasant heat that lingers.
Up next · Part 3 of 3
4 variations · storage & make-ahead · 5 answers · printable card
Tips, FAQ & printable recipe (Part 3)← Back to the ingredients (Part 1)