Dinner · Part 2 of 3: Instructions
Sweet Pepper Butter Beef Brisket: Easy Slow Cooker Step-by-step instructions
- Prep
- Cook
- Total
- Serves
- 8
Before you start
Before you start, trim the brisket if needed so it fits in the slow cooker. Slice the bell peppers into strips and the onion into half-moons. Measure out the salt and pepper. Have your slow cooker ready and set to low.
No need to sear the meat; the slow cooking will develop plenty of flavor. Make sure your hands and surfaces are clean, and keep raw beef refrigerated until you're ready to layer it in the crock. This recipe is truly dump-and-go, but a little prep makes the layering easy and mess-free.
Ingredients at a glance (6)
- 3 1/2 lb beef brisket, trimmed
- 2 large bell peppers (1 red, 1 green), sliced into strips
- 1 large sweet yellow onion, sliced
- 1/2 cup salted butter (1 stick)
- 1 tsp kosher salt
- 1/2 tsp black pepper
Instructions
Layer and Season
- Layer the BrisketPlace the trimmed beef brisket flat in the bottom of a 6-quart slow cooker. Season the top with kosher salt and black pepper.Look for The brisket should sit in a single layer, touching the bottom of the crock.Tip If the brisket is too large, trim it to fit without folding.
- Add Peppers and OnionsScatter the sliced bell peppers and onion over the brisket, covering it evenly.Look for The vegetables should form a thick layer over the meat.Tip Slice vegetables into thick strips so they hold up during long cooking.
- Top with ButterPlace the stick of salted butter on top of the vegetables. No need to melt it first.Look for The butter sits solid on the vegetables.Tip Cutting the butter into a few pieces helps it melt faster.
At the end of this phase, the slow cooker contains a single layer of brisket seasoned with salt and pepper, topped with a thick layer of bell pepper strips and onion slices, and finished with a stick of butter.
The vegetables should completely cover the meat, and the butter sits on top. The raw beef should be cold from the fridge, and everything should look vibrant and fresh. No heat is applied yet, so the scene is still and neat.
Slow Cook and Rest
- Slow CookCover the slow cooker and cook on low for 8 to 10 hours, until the brisket is fork-tender and easily shreds. Let it rest for 3 minutes before slicing.Look for The meat should be deeply browned and the juices bubbling.Safe temperature 145°F (63°C) internal temperature (steaks, chops and roasts)Tip Do not lift the lid during cooking; each peek adds 20 minutes of cook time.
- Rest the MeatTurn off the slow cooker. Using tongs, transfer the brisket to a cutting board. Let it rest for at least 10 minutes before shredding.Look for The meat should be very tender and hold together loosely.Tip Resting allows juices to redistribute, keeping the meat moist.
After 8 to 10 hours on low, the kitchen smells richly of braised beef and sweet peppers. The slow cooker is bubbling gently, and the meat is deeply browned and fork-tender. The butter has melted into the juices, creating a golden, glossy liquid. The peppers and onions are soft and translucent. When you pull the brisket out, it holds together but shreds easily. The meat rests on a cutting board, releasing a little steam.
Shred and Finish
- Shred and ServeUsing two forks, shred the brisket into bite-sized pieces. Return the shredded meat to the slow cooker with the peppers, onions, and buttery juices. Stir to coat. Serve warm. Let it rest for 3 minutes before slicing.Look for The meat should shred easily and look glossy with the jus.Safe temperature 145°F (63°C) internal temperature (steaks, chops and roasts)Tip For extra flavor, let the shredded meat sit in the juices for 10 minutes before serving.
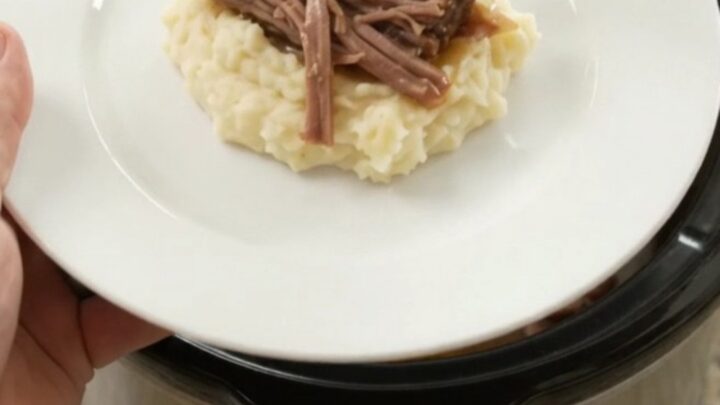
The shredded brisket is returned to the slow cooker, where it mingles with the peppers, onions, and buttery jus. The meat is moist and glistening, and the sauce is thick enough to coat the back of a spoon. A spoonful lifted high shows tender strands of beef and soft vegetables. The dish is ready to serve, with a rich, savory aroma and a glossy, appetizing appearance.
Common mistakes
One common mistake is lifting the lid to check on the meat. Each time you do, heat escapes and adds 20 minutes to the cooking time. Trust the process. Another mistake is not trimming the brisket enough; if it's folded over, it won't cook evenly.
Also, resist the urge to add extra liquid—the beef and vegetables release plenty, and you want the juices concentrated. Finally, don't rush the shredding; let the meat rest, then use two forks for large, nice pieces.
How to tell it’s done
The brisket is done when it is fork-tender and shreds easily. To test, insert a fork into the thickest part of the meat; it should slide in with little resistance. The internal temperature should be at least 145°F (63°C) for food safety, but because of the long cook, it will likely be much higher, which is fine.
The meat should be falling apart and the peppers and onions soft and sweet. The juices should be bubbling and slightly thickened. Let the meat rest for at least 10 minutes before shredding to allow the juices to redistribute.
- Steaks, chops and roasts: 145°F (63°C) in the thickest part, then a 3-minute rest
Up next · Part 3 of 3
4 variations · storage & make-ahead · 5 answers · printable card
Tips, FAQ & printable recipe (Part 3)← Back to the ingredients (Part 1)