Dinner · Part 2 of 3: Instructions
Sweet and Sticky Pineapple Chicken Skillet Step-by-step instructions
- Prep
- Cook
- Total
- Serves
- 4
Before you start
Start by gathering all ingredients and preparing your workstation. Cut the chicken breast into even, bite-sized chunks to ensure uniform cooking. Chop the red bell pepper into pieces of similar size to the pineapple chunks for a cohesive aesthetic.
Have your glaze ready by the stove. Clear your counter space so that you can move efficiently between the cutting board and the skillet. If using fresh pineapple, ensure it is peeled and cored before chopping into bite-sized pieces to save time once the heat is on.
Ingredients at a glance (4)
- 1 1/2 lb boneless skinless chicken breasts, cut into bite-sized pieces
- 1 cup fresh pineapple chunks
- 1 red bell pepper, chopped
- 1/2 cup honey and soy sauce glaze
Instructions
Searing the protein
- Sear the chickenHeat a large skillet over medium-high heat. Add the chicken pieces in a single layer and cook until browned on all sides, ensuring the meat is cooked through to an internal temperature of 165°F (74°C).Look for Chicken is golden brown and opaque throughoutSafe temperature 165°F (74°C) internal temperature (poultry)Tip Do not crowd the pan to ensure even browning.
The chicken should be evenly browned and cooked through. At this stage, the pan may have some flavorful brown bits on the bottom, which will be deglazed later by the sauce.
Ensure the chicken is not sticking and has achieved a deep, appetizing color on all sides before proceeding to add the vegetables.
Adding vegetables and fruit
- Add vegetables and fruitAdd the pineapple chunks and red bell pepper to the skillet with the chicken. Stir frequently and cook for 3 to 4 minutes until the peppers are just tender and the pineapple is slightly caramelized.Look for Peppers soften and pineapple becomes fragrantTip Fresh pineapple works best for the right texture.
The peppers should be vibrant and slightly softened, while the pineapple should be warm and fragrant. The mixture should smell sweet and savory. Check that the vegetables are still firm enough to provide a nice crunch, as they will continue to cook slightly when the sauce is added in the final phase.
Glazing and finishing
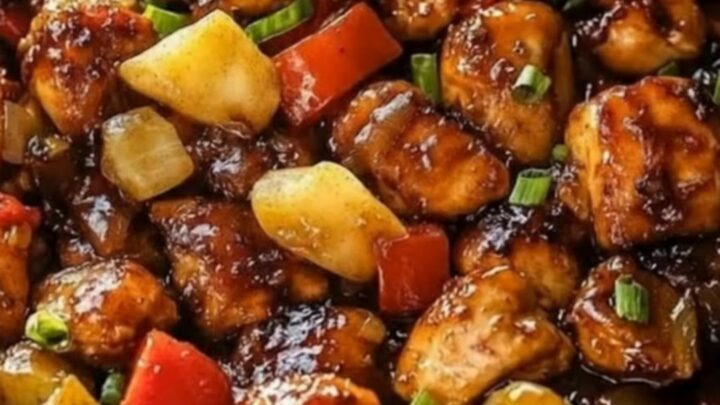
- Glaze and finishPour the glaze over the chicken and fruit mixture. Toss everything well to coat evenly. Continue cooking for another 2 minutes until the sauce bubbles, thickens, and creates a glossy, sticky coating over all ingredients. Remove from heat and let sit for 5 minutes before serving.Look for Sauce bubbles and clings to the chickenTip Watch the heat closely so the sugar in the sauce does not burn.
The sauce should have reduced into a thick, sticky, and glossy glaze that coats every piece of chicken and fruit. The mixture should be bubbling and aromatic. Check that the sauce is not burning and that all ingredients are well-distributed before removing from the heat to rest briefly before serving.
Common mistakes
A common mistake is overcrowding the skillet, which causes the chicken to steam in its own juices rather than searing, leading to a pale and rubbery result. Work in batches if your pan is not large enough.
Another error is adding the sauce too early; the sauce contains sugars that can burn quickly, so it should only be added in the final stage once the chicken and vegetables are already cooked through. Finally, do not skip the resting time, as it allows the sauce to thicken and flavors to meld.
How to tell it’s done
The chicken is perfectly cooked when it is golden brown on the outside and reaches an internal temperature of 165°F (74°C). The sauce should be thick enough to coat the back of a spoon and cling to the chicken, creating a glossy, sticky appearance.
When pierced with a fork, the chicken should be tender and juicy. Ensure the pineapple is warm through and slightly softened, but not falling apart, to maintain a nice textural contrast with the savory chicken.
- Poultry: 165°F (74°C) in the thickest part
Up next · Part 3 of 3
2 variations · storage & make-ahead · 3 answers · printable card
Tips, FAQ & printable recipe (Part 3)← Back to the ingredients (Part 1)