Desserts · Part 2 of 3: Instructions
Sugar-Free No-Bake Blueberry Cheesecake Step-by-step instructions
- Prep
- Cook
- Total
- Serves
- 8
Before you start
Before starting, gather all ingredients and equipment to ensure a smooth preparation process. Place the cream cheese on the counter to soften completely, which usually takes about one hour.
Chill the mixing bowl and beaters in the freezer for ten minutes, as cold equipment helps the heavy cream whip faster and achieve maximum volume. Measure out the graham cracker crumbs, sweeteners, and blueberries. Set aside a nine-inch ruffled pie dish for assembling the dessert.
Ingredients at a glance (6)
- 1 1/2 cups graham cracker crumbs
- 2 cups fresh blueberries
- 1/3 cup granulated sugar-free sweetener
- 1 cup heavy whipping cream
- 16 oz cream cheese, softened
- 1/2 cup powdered sugar-free sweetener
Instructions
Crust and Blueberry Sauce Preparation
- Prepare the Graham Cracker CrustPress the graham cracker crumbs firmly into the bottom and up the sides of a nine-inch ruffled pie dish, reserving a small handful of crumbs for the final topping.Look for The crumbs should be evenly distributed and pressed flat.Tip Use the flat bottom of a measuring cup to press the crumbs.
- Simmer the Blueberry SauceIn a medium saucepan, combine the fresh blueberries and granulated sugar-free sweetener. Simmer over medium heat, stirring occasionally, until the berries burst and release their juices, thickening into a glossy sauce, about 8 to 10 minutes. Remove from heat and let cool completely.Look for The sauce should be thick enough to coat the back of a spoon.Tip Let the sauce cool completely so it does not melt the cream cheese layers.
At the end of this phase, the graham cracker crust should be firmly packed and uniform in the pie dish, showing no loose crumbs.
The blueberry sauce should be glossy, deep purple, and thick enough to coat the back of a spoon, with some berries remaining whole and others burst. It must be completely cool to the touch before proceeding, as warm sauce will melt the delicate cream cheese filling.
Cream Cheese Filling and Whipping
- Whip the Cream and Cream CheeseIn a large bowl, beat the heavy whipping cream with an electric mixer until stiff peaks form, then set aside. In a separate large bowl, beat the softened cream cheese and powdered sugar-free sweetener until the mixture is completely smooth and creamy.Look for The cream cheese mixture must be free of any lumps.Tip Ensure the cream cheese is fully at room temperature before beating.
- Fold the Filling TogetherGently fold the whipped cream into the sweetened cream cheese mixture using a rubber spatula, turning the mixture over slowly until fully combined and fluffy.Look for The filling should be light, airy, and uniform.Tip Use a slow, sweeping motion to avoid deflating the whipped cream.
At this stage, the cream cheese filling should be incredibly light, airy, and uniform in color, with no visible streaks of whipped cream or lumps of cream cheese. The mixture should hold its shape when lifted with a spatula, indicating that the whipped cream was folded in gently enough to preserve its structure. It should smell sweet, tangy, and fragrant.
Assembly and Refrigeration Chilling
- Layer the CheesecakeSpread half of the fluffy cream cheese filling over the prepared graham cracker crust in an even layer. Spoon half of the cooled blueberry sauce over the filling, spreading it gently to the edges.Look for The layers should be distinct and even.Tip Drop the sauce in small dollops before spreading to make it easier.
- Final Assembly and ChillLayer the remaining cream cheese filling on top, smoothing the surface. Drizzle the remaining blueberry sauce over the top, then sprinkle the reserved graham cracker crumbs around the edges. Chill in the refrigerator for at least 4 hours before slicing.Look for The cheesecake should feel firm and set to a gentle touch.Tip Chilling overnight yields the cleanest slices and best texture.
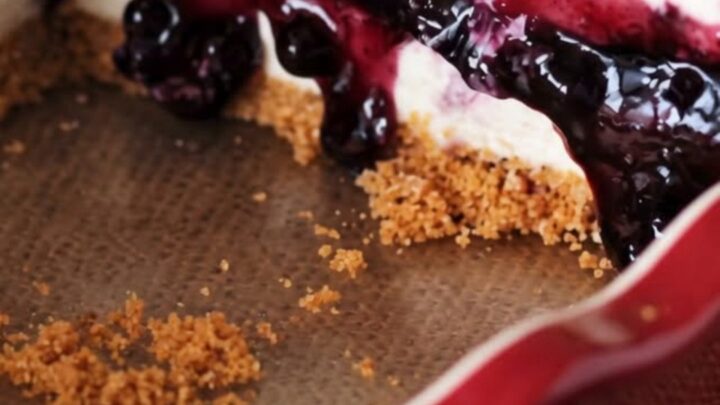
The completed cheesecake should display distinct, beautiful layers of white cream cheese and deep purple blueberry sauce when viewed from the side of the ruffled pie dish. The top surface should be artfully swirled and bordered with a light dusting of golden crumbs. After chilling, the filling must feel firm and set to the touch, ready to be sliced cleanly with a sharp knife.
Common mistakes
One common mistake is using warm blueberry sauce during assembly, which immediately melts the whipped cream in the filling, leading to a runny, collapsed dessert. Always allow the sauce to cool completely to room temperature before layering.
Another error is failing to soften the cream cheese fully, resulting in tiny, stubborn lumps throughout the filling. Lastly, rushing the chilling process will prevent the cheesecake from setting properly; it requires at least four hours, or ideally overnight, to achieve the perfect sliceable texture.
How to tell it’s done
Since this is a no-bake dessert containing no raw eggs or meat, doneness is determined by the texture and temperature after chilling. The cheesecake is ready when the center feels firm and springy to a gentle touch, rather than soft or liquid.
When a sharp knife is inserted and drawn out, it should emerge clean with distinct, sharp layers visible in the cut. Serving the dessert straight from the refrigerator ensures it maintains its structural integrity and delivers the perfect creamy mouthfeel.
Up next · Part 3 of 3
2 variations · storage & make-ahead · 3 answers · printable card
Tips, FAQ & printable recipe (Part 3)← Back to the ingredients (Part 1)