Desserts · Part 2 of 3: Instructions
Sugar-Free German Chocolate Pie with Toasted Coconut Step-by-step instructions
- Prep
- Cook
- Total
- Serves
- 8
Before you start
Before beginning the assembly, gather all your pre-made components and toppings.
Ensure the crumbly crust is fully cooled if you made it ahead, and have your creamy vanilla layer and silky chocolate filling ready at room temperature for easy spreading.
Measure out the toasted coconut flakes, chopped pecans, and pecan halves so you can decorate the pie quickly and efficiently once the layers are assembled.
Ingredients at a glance (6)
- 1 9-inch crumbly crust, store-bought or made ahead
- 1 1/2 cups creamy vanilla layer, store-bought or made ahead
- 1 1/2 cups swirling silky chocolate filling, store-bought or made ahead
- 1/2 cup toasted coconut flakes
- 1/4 cup chopped pecans
- 8 pecan halves
Instructions
Crust and Vanilla Layer
- Spread the Vanilla LayerPlace the pre-made crumbly crust on a flat work surface. Spread the creamy vanilla layer evenly over the bottom of the crust using a spatula to form a smooth, consistent base that covers the entire bottom of the pie.Look for The vanilla layer should be flat and cover the crust completely.Tip Using an offset spatula helps to spread the filling evenly into the edges.
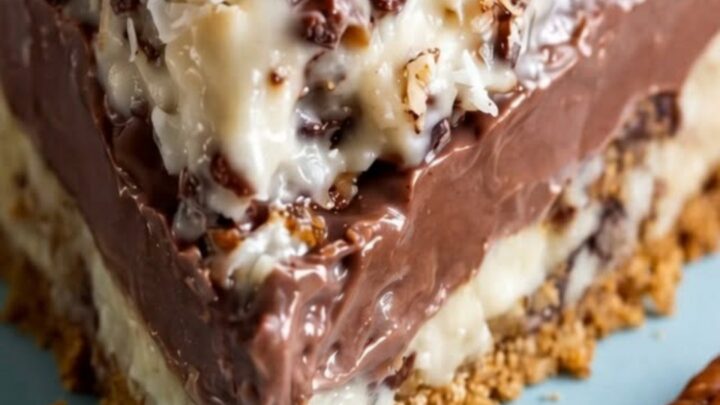
The crumbly crust should be firm and intact in the pie dish, ready to hold the fillings. The creamy vanilla layer must be spread evenly across the bottom of the crust, creating a smooth, white base that is free of gaps and ready for the next layer.
Chocolate Layer Assembly
- Swirl the Chocolate FillingPour the swirling silky chocolate filling gently over the creamy vanilla layer. Use a spoon or spatula to spread it evenly, creating a distinct thick chocolate middle layer without disturbing the vanilla base underneath.Look for The chocolate layer must sit cleanly on top of the vanilla layer.Tip Pouring the chocolate over the back of a spoon prevents it from breaking the vanilla layer.
The silky chocolate filling should be layered gently over the vanilla base, forming a thick, glossy middle layer. The two layers should remain completely separate, with no chocolate bleeding into the vanilla below, presenting a beautiful contrast.
Topping and Chilling
- Scatter the ToppingsScatter the toasted coconut flakes and chopped pecans evenly over the top of the chocolate layer, ensuring a beautiful, rustic coverage that adds texture and flavor to every bite.Look for The toppings should cover the chocolate layer evenly.Tip Press the toppings very gently into the chocolate so they adhere well.
- Crown with Pecan HalvesArrange the pecan halves symmetrically around the top of the pie to create a beautiful crown. Chill the assembled pie in the refrigerator for at least 2 hours to let the layers set before slicing and serving.Look for The pie must feel firm and cold throughout before slicing.Tip Wipe the knife blade clean with a warm, damp cloth between slices for clean cuts.
The pie is fully decorated with toasted coconut flakes, chopped pecans, and pecan halves arranged beautifully on top. After chilling, the entire pie should feel firm and cold, ready to be sliced cleanly with a sharp knife.
Common mistakes
A common mistake is assembling the pie with warm fillings, which can cause the creamy vanilla layer and the silky chocolate filling to blend together instead of remaining distinct.
To avoid this, ensure all fillings are cool or slightly chilled before spreading. Another error is rushing the chilling process; the pie needs at least two hours in the fridge to set properly for clean slicing.
How to tell it’s done
Since this is an assembled pie using pre-made fillings, traditional baking doneness tests do not apply. Instead, the pie is ready when the layers are completely set and firm to the touch after chilling in the refrigerator.
Slicing through the pie should reveal clean, distinct layers of vanilla and chocolate that hold their shape perfectly without running or collapsing onto the plate.
Up next · Part 3 of 3
2 variations · storage & make-ahead · 4 answers · printable card
Tips, FAQ & printable recipe (Part 3)← Back to the ingredients (Part 1)