Desserts · Part 2 of 3: Instructions
Sugar-Free Chocolate Mug Brownie: Fudgy and Quick Step-by-step instructions
- Prep
- Cook
- Total
- Serves
- 1
Before you start
Before you begin, gather your microwave-safe ceramic mug, sugar-free batter, chocolate chips, and chocolate chunks. Ensure the mug is clean and completely dry inside. Having your ingredients measured and ready next to the microwave allows you to assemble the dessert quickly and efficiently, ensuring the brownie cooks evenly.
Ingredients at a glance (3)
- 1/2 cup sugar-free dark chocolate brownie batter, store-bought or made ahead
- 2 tbsp sugar-free chocolate chips
- 1 tbsp sugar-free chocolate chunks
Instructions
Preparing the Mug
- Prepare the batter in the mugPour the sugar-free dark chocolate brownie batter into a microwave-safe mug. Use a small spoon or spatula to smooth the surface of the batter and ensure it is evenly distributed at the bottom of the mug.Look for The batter should sit evenly in the bottom of the mug.Tip Using a wide, shallow mug helps the brownie cook more evenly.
At the end of this phase, the sugar-free dark chocolate brownie batter should be smoothly spread in the bottom of your mug. There should be no large air pockets, and the batter should have a consistent, glossy appearance. The mixture will smell intensely of rich cocoa, ready for the chocolate toppings.
Microwaving and Rising
- Add the chocolate toppingsStir the sugar-free chocolate chips directly into the dark chocolate batter in the mug. Scatter the sugar-free chocolate chunks evenly across the top of the batter so they melt beautifully during the microwave process.Look for The chocolate chunks should sit clearly on top of the batter.Tip Pressing a few chunks slightly into the batter ensures they melt beautifully.
- Microwave the browniePlace the mug in the center of the microwave. Cook on high power for 55 to 65 seconds. Watch the brownie closely as it rises rapidly inside the mug during the last few seconds of cooking, then shut off the microwave.Look for The brownie should rise up and the center should look just barely set.Tip Microwave strengths vary, so start checking at 50 seconds to avoid overcooking.
As the microwave finishes, the brownie will have risen rapidly, filling about two-thirds of the mug.
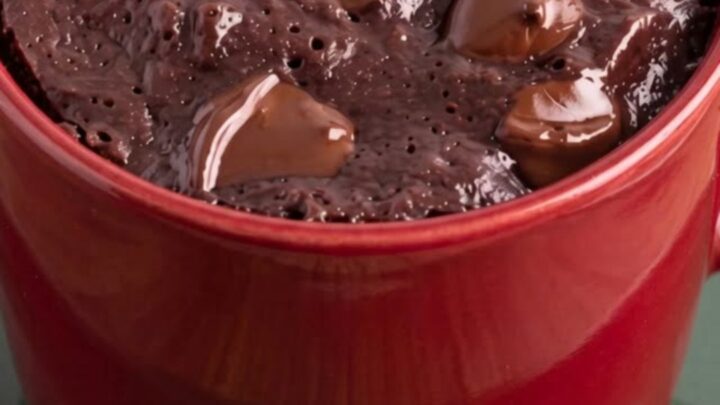
The surface will look slightly cracked and dull, but the scattered chocolate chips and chunks on top will be glossy, soft, and beautifully melted. The center should look just barely set and no longer wet or liquid when you gently nudge the mug.
Resting and Setting
- Let the brownie restRemove the mug carefully from the microwave as it will be hot. Place the mug on a heat-safe saucer and let the brownie rest for 1 to 2 minutes before serving. This allows the heat to distribute evenly and the texture to become dense and fudgy.Look for The surface will crack slightly and the chocolate chips will look glossy and melted.Tip Do not skip the rest, as the brownie continues to cook and set during this time.
After resting on the counter for a couple of minutes, the brownie will deflate slightly, settling into a dense, fudgy cake.
The steam will have subsided, and the melted chocolate chunks on top will form a glossy, rich pool. When you press a spoon into the center, you should feel a soft, dense resistance rather than a spongy cake texture.
Common mistakes
The most common mistake when making a microwave mug brownie is overcooking it. Because microwaves cook so rapidly, even an extra ten seconds can turn a fudgy brownie into a dry, rubbery sponge.
Another frequent error is failing to distribute the chocolate chips evenly, which can lead to dry pockets in some bites and overly wet spots in others.
How to tell it’s done
To determine if your mug brownie is perfectly done, look closely at the surface as the microwave timer ends. The edges should look firm and set, while the very center should still appear slightly soft and moist, but not liquid.
If you insert a toothpick into the edge, it should come out clean, but a toothpick inserted into the center should have a few moist crumbs attached to it.
Up next · Part 3 of 3
2 variations · storage & make-ahead · 3 answers · printable card
Tips, FAQ & printable recipe (Part 3)← Back to the ingredients (Part 1)