Desserts · Part 2 of 3: Instructions
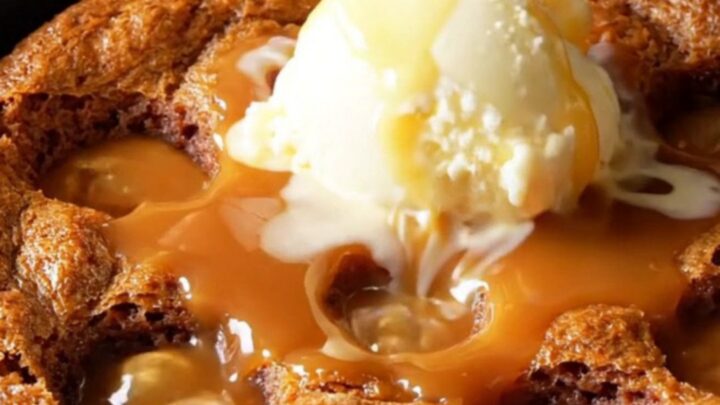
Sticky Toffee Date Pudding Skillet with Warm Molten Caramel Sauce Step-by-step instructions
- Prep
- Cook
- Total
- Serves
- 6
Before you start
Before starting, measure all ingredients and have them ready. Soften the butter if not already at room temperature. Chop the dates and set them in a bowl. Preheat the oven to 350°F (180°C) and butter the skillet.
Have the boiling water ready. Prepare the toffee sauce ingredients in a small saucepan. This recipe moves quickly once you begin, so having everything measured and within reach makes the process smooth.
Ingredients at a glance (12)
- 200 g pitted Medjool dates, chopped
- 1 tsp baking soda
- 1 cup boiling water
- 60 g butter, softened
- 100 g dark brown sugar
- 2 large eggs
- 1 tsp vanilla extract
- 150 g all-purpose flour
- 100 g butter
- 150 g brown sugar
- 150 ml heavy cream
- vanilla bean ice cream, for serving
Instructions
Soak and Mix
- Soak the DatesPlace the chopped dates in a medium bowl. Sprinkle with baking soda, then pour the boiling water over. Stir briefly and let sit for 10 minutes, until the dates are completely soft and easily mashed with a fork. Mash them into a jammy puree and set aside.Look for The dates should be very soft and almost paste-like, with no large chunks.Tip If your dates are extra dry, soak for an extra 2-3 minutes.
- Cream Butter and SugarIn a large bowl, beat the softened butter and dark brown sugar together until light and fluffy. Add the eggs one at a time, beating well after each addition. Mix in the vanilla extract.Look for The mixture should look pale and creamy, with no visible butter lumps.Tip Use room-temperature eggs for a smoother batter.
- Combine Dry and WetFold the flour into the butter mixture until just combined. Then fold in the date puree (including any liquid) until the batter is smooth and glossy. Do not overmix.Look for The batter should be a dark caramel color and drop easily from a spoon.Tip Fold gently to keep the pudding tender.
- Prepare the SkilletButter an 8-inch cast-iron skillet generously. Pour the batter into the skillet and smooth the top.Look for The skillet is coated with butter to prevent sticking.Tip Use a pastry brush to coat the sides too.
The dates should be soft and jammy, and the batter should be smooth and dark. The mixture should smell sweet and buttery. Before moving on, ensure the dates are fully mashed and there are no lumps in the batter.
Bake and Simmer
- Bake the PuddingPreheat the oven to 350°F (180°C). Bake the pudding for 25 minutes, until a skewer inserted in the center comes out mostly clean with a few moist crumbs.Look for The top will be deep golden brown and the edges will pull away slightly from the skillet.Tip Check at 20 minutes; ovens vary.
- Make the Toffee SauceWhile the pudding bakes, combine the butter, brown sugar, and heavy cream in a small saucepan. Bring to a simmer over medium heat, stirring constantly. Let it bubble gently for 3-4 minutes until thickened and glossy.Look for The sauce should coat the back of a spoon and smell deeply caramelized.Safe temperature 160°F (71°C) internal temperature (egg dishes)Tip Do not boil too hard or the sauce may separate.
The pudding will rise slightly and become golden on top. The toffee sauce should be bubbling and thick. The kitchen will smell like caramel and butter. Check that the cake is cooked through and the sauce has thickened.
Soak and Serve
- Poke Holes and SoakRemove the pudding from the oven. Immediately poke holes all over the top with a skewer or fork. Pour about half of the warm toffee sauce over the hot pudding, letting it soak in.Look for The sauce will bubble as it hits the hot pudding.Tip Make deep holes to let the sauce penetrate.
- Serve with Ice CreamScoop vanilla bean ice cream onto the warm pudding. Drizzle with remaining toffee sauce and serve immediately.Look for The ice cream begins to melt into the warm sauce.Tip Serve right away for the best contrast of hot and cold.
The pudding should be soaked with sauce, and the ice cream should start to melt on top. The dessert should look glossy and inviting. Serve immediately for the best texture and temperature contrast.
Common mistakes
One common mistake is overmixing the batter after adding the flour, which can make the pudding tough. Mix just until no streaks of flour remain. Another is not soaking the dates long enough – they should be completely soft and mashable.
If the sauce seems too thin, simmer it a few minutes longer, but don't let it boil too hard or it may separate. Also, be sure to poke plenty of holes in the pudding before pouring the sauce, so it really soaks in.
How to tell it’s done
The pudding is done when a skewer inserted into the center comes out with a few moist crumbs, not wet batter. The top should be deep golden brown and the edges may pull away from the skillet slightly.
The internal temperature of the cake should read around 200°F (93°C) if you use an instant-read thermometer.
The toffee sauce is ready when it coats the back of a spoon and has thickened slightly; it will continue to thicken as it cools.
- Egg dishes: 160°F (71°C) in the thickest part
Up next · Part 3 of 3
4 variations · storage & make-ahead · 5 answers · printable card
Tips, FAQ & printable recipe (Part 3)← Back to the ingredients (Part 1)