Dinner · Part 1 of 3: Ingredients
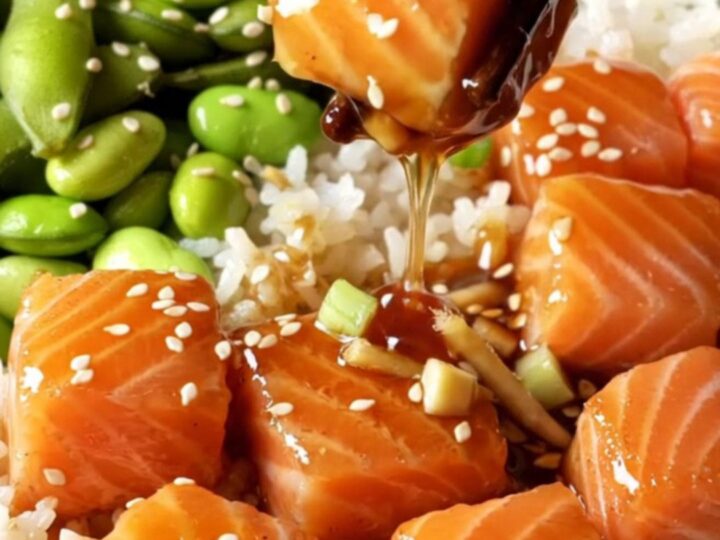
Sticky Teriyaki Salmon Bites with Rice and Edamame
- Prep
- Cook
- Total
- Serves
- 4
This teriyaki salmon bites recipe delivers tender, caramelized cubes of salmon in a glossy, sweet-savory glaze that clings to every piece. Served over steamed jasmine rice with edamame, it's a complete meal that looks and tastes like it came from a high-end Japanese restaurant, yet comes together in one skillet in about 20 minutes.
The secret is a light cornstarch dusting that creates a delicate crisp crust, and a homemade teriyaki sauce that reduces to a shiny, sticky coating.
This teriyaki salmon bites recipe is all about texture and flavor. The salmon cubes are seared until golden and crisp on the outside, then tossed in a homemade teriyaki glaze made with soy sauce, mirin, brown sugar, honey, ginger, and garlic.
The glaze bubbles and thickens into a glossy, sticky coating that clings to each piece. Served over fluffy jasmine rice with steamed edamame, it's a balanced, satisfying meal that feels indulgent but comes together quickly. The recipe uses simple, accessible ingredients and a single skillet, making cleanup a breeze.
Ingredients
- 1 1/4 lb skinless salmon fillets, cut into 1-inch cubes
- 1 tbsp cornstarch
- 1 tbsp olive oil
Teriyaki Glaze
- 1/4 cup soy sauce
- 3 tbsp mirin
- 2 tbsp brown sugar
- 1 tbsp honey
- 1 tsp fresh ginger, grated
- 2 cloves garlic, minced
For Serving
- 2 cups steamed jasmine rice
- 3/4 cup steamed edamame
- 1 tbsp sesame seeds
Why this recipe works
The cornstarch coating on the salmon is the key to achieving a crisp, golden exterior without deep-frying. When the cubes hit the hot skillet, the cornstarch forms a thin, crunchy crust that contrasts beautifully with the tender, flaky interior.
This texture holds up even when the salmon is tossed in the glaze, so every bite has a satisfying crunch followed by juicy salmon.
The teriyaki glaze is made from scratch, which means you control the sweetness and saltiness. Simmering soy sauce, mirin, brown sugar, and honey together creates a thick, glossy sauce that clings to the salmon rather than pooling on the plate.
The addition of fresh ginger and garlic adds aromatic depth, making the glaze taste vibrant and complex, far superior to bottled versions.
Notes and substitutions
Use skinless salmon fillets for the easiest prep. If using skin-on, simply remove the skin before cutting into cubes. Fresh salmon is ideal, but frozen and thawed works well too; just pat it dry thoroughly to ensure a good sear. For best results, cut the cubes into uniform 1-inch pieces so they cook evenly.
Mirin is a sweet Japanese rice wine that adds a mild sweetness and glossy finish. If you don't have it, a mix of dry sherry and a pinch of sugar works as a substitute. The brown sugar and honey can be adjusted to taste, but keep the balance of sweet and salty in mind. For a gluten-free version, use tamari instead of soy sauce.
- mirin: Dry sherry or white wine mixed with 1/2 teaspoon sugar (use 3 tablespoons total).
- brown sugar: Coconut sugar or maple syrup (use 2 tablespoons, and reduce honey to 1 teaspoon).
- soy sauce: Tamari or coconut aminos for a gluten-free option (use the same amount).
- jasmine rice: Sushi rice, basmati rice, or cauliflower rice for a lighter base.
Equipment
- Large skillet (12-inch)
- Cutting board
- Chef's knife
- Mixing bowl
- Measuring spoons
- Measuring cups
- Wooden spoon or spatula
- Serving bowls
Up next · Part 2 of 3
5 steps · 12 min of cooking · what to look for at each stage
Step-by-step instructions (Part 2)