Dinner · Part 2 of 3: Instructions
Sticky Honey Garlic Roasted Chicken Thighs Step-by-step instructions
- Prep
- Cook
- Total
- Serves
- 4
Before you start
Before beginning, ensure the oven is fully preheated to 400°F (200°C). Prepare all vegetables by washing, peeling, and chopping them into uniform, bite-sized pieces to ensure even cooking. Mince the garlic finely to ensure its flavor permeates the entire glaze.
Have your tongs and a small mixing bowl ready for the glaze preparation. Pat the chicken thighs dry with paper towels; this is a crucial step for achieving crispy skin, as excess moisture prevents the skin from browning effectively in the oven.
Ingredients at a glance (5)
- 4 lbs chicken thighs, bone-in and skin-on
- 1 lb carrots, peeled and sliced into chunks
- 1 lb baby potatoes, halved
- 1/3 cup honey
- 3 cloves garlic, minced
Instructions
Preparation and assembly
- Prepare vegetables and chickenPreheat the oven to 400°F (200°C). Place the chicken thighs, peeled carrot chunks, and halved baby potatoes into a large ceramic baking dish. Arrange them in a single layer to ensure even roasting and consistent browning across all ingredients.Look for Vegetables are chopped and chicken is arranged in the dish.Tip Pat the chicken skin dry with paper towels before placing in the dish for extra crispiness.
At the end of this phase, the chicken and vegetables should be arranged in a single layer in the baking dish. The ingredients should be dry and ready for the glaze. Ensure the oven has reached the target temperature so that the roasting process begins immediately upon placing the dish inside.
Glazing the ingredients
- Prepare and apply glazeIn a small bowl, whisk together the honey and minced garlic until smooth. Pour this mixture evenly over the chicken thighs and vegetables in the baking dish, ensuring everything is well coated with the glaze.Look for The glaze is thick and well combined.Tip Use a silicone brush if needed to reach under the chicken thighs for better coverage.
The glaze should be smooth, thick, and well-distributed over all items in the dish. Ensure every piece of chicken and vegetable is coated, as this is what will caramelize during the roasting process. The kitchen should smell like aromatic garlic and sweet honey at this stage.
Roasting and finishing
- Roast and servePlace the dish in the oven and roast for 40 minutes, or until the chicken reaches an internal temperature of 165°F (74°C). Remove from the oven and let the chicken rest for at least 5 minutes before serving to allow the juices to redistribute.Look for Chicken skin is golden and crispy, and vegetables are fork-tender.Safe temperature 165°F (74°C) internal temperature (poultry)Tip Baste the chicken with the pan juices halfway through the roasting time.
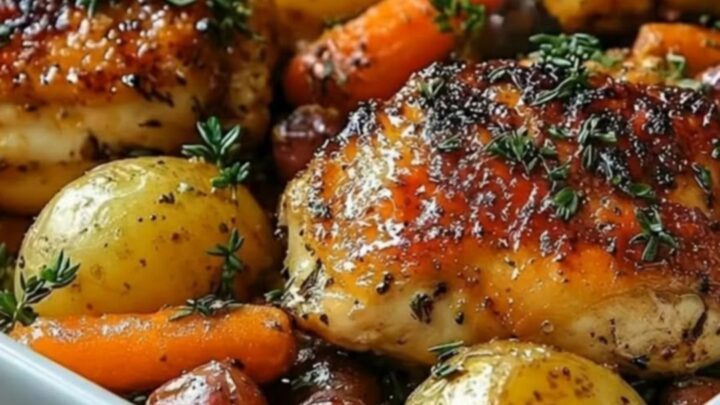
The final result should feature deeply caramelized chicken skin and tender, soft vegetables. The glaze in the bottom of the dish should be thickened and glossy. Check for the internal temperature of 165°F (74°C) to ensure the chicken is safe and perfectly cooked before serving.
Common mistakes
Avoid overcrowding the baking dish, as this causes the ingredients to steam in their own juices rather than roasting, which results in soggy skin and undercooked vegetables.
Do not skip the resting time, as cutting into the chicken immediately causes the juices to spill out, resulting in dry meat.
Another common error is using high-heat settings that burn the honey-based glaze before the chicken is cooked through; keep the oven temperature at the recommended level for consistent results.
How to tell it’s done
The chicken is done when the skin is deep golden brown and the meat pulls away slightly from the bone. Use a meat thermometer to check the thickest part of the thigh, ensuring it reaches an internal temperature of 165°F (74°C).
The vegetables should be fork-tender, meaning they offer no resistance when pierced with a knife. Always allow the chicken to rest for 5 minutes after removing it from the oven to ensure the juices remain inside the meat.
- Poultry: 165°F (74°C) in the thickest part
Up next · Part 3 of 3
2 variations · storage & make-ahead · 3 answers · printable card
Tips, FAQ & printable recipe (Part 3)← Back to the ingredients (Part 1)