Dinner · Part 2 of 3: Instructions
Sticky Honey Garlic Glazed Pot Roast Step-by-step instructions
- Prep
- Cook
- Total
- Serves
- 6
Before you start
Before starting, ensure the beef roast is brought to room temperature for about 30 minutes to facilitate even cooking. Have all glaze ingredients measured and ready, with the garlic minced and the soy sauce and honey combined.
Clear your workspace and ensure your cast iron skillet is clean and ready for high-heat searing. Having everything prepared in advance allows you to focus on the searing process, which is the most critical step for developing the flavor and texture of the final dish.
Ingredients at a glance (4)
- 3 lb beef chuck roast
- 1/2 cup honey
- 6 cloves garlic, minced
- 1/4 cup soy sauce
Instructions
Searing the Beef
- Sear the beefHeat a large cast iron skillet over medium-high heat. Place the beef roast into the hot pan and sear it on all sides until a deep brown crust forms. This process locks in the juices and creates the foundation for the final flavor profile.Look for The beef should be deeply browned and caramelized on the outside.Tip Ensure the skillet is hot enough before adding the meat to achieve a proper sear.
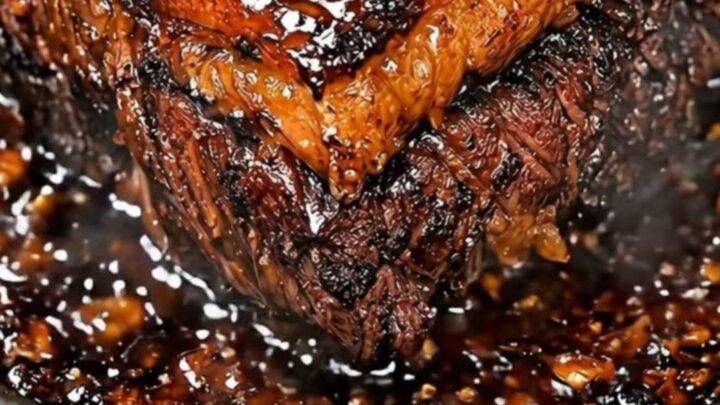
The beef should be deeply browned on all sides, with a dark, caramelized crust forming. The skillet will be very hot, and you will hear a loud, consistent sizzle when the meat touches the pan. This stage is complete once the entire exterior of the roast has achieved a uniform, rich brown color.
Developing the Glaze
- Prepare the glazeWhisk together the honey, minced garlic, and soy sauce in a small bowl. Pour this mixture over the seared roast in the skillet. Allow the liquid to begin bubbling vigorously around the meat, ensuring the sauce coats the entire surface of the roast as it cooks.Look for The sauce should be bubbling and thick, beginning to glaze the beef.Tip Keep the heat at a steady medium to prevent the honey from burning too quickly.
The glaze should be bubbling vigorously around the roast, with a thick, syrupy consistency. The aroma of garlic and caramelized honey will be prominent.
Check that the sauce is coating the meat evenly as it bubbles, ensuring that the flavors are penetrating the surface of the roast as it continues to cook.
Final Cooking and Resting
- Finish cooking and restContinue to cook the roast until it is tender and reaches an internal temperature of 145°F (63°C). Once finished, remove the skillet from the heat. Let the beef rest for at least 3 minutes before slicing to ensure the meat remains juicy and tender.Look for The meat should be tender and the glaze should be thick and glossy.Safe temperature 145°F (63°C) internal temperature (steaks, chops and roasts)Tip Use a meat thermometer to ensure the roast reaches the correct temperature for safety and texture.
The meat should be tender and reach an internal temperature of 145°F (63°C). The glaze will have reduced to a deep, glossy coating that clings to the beef. After resting for 3 minutes, the roast should be juicy and easy to slice, with the glaze remaining tacky and flavorful on the surface.
Common mistakes
A common mistake is overcrowding the skillet, which lowers the pan temperature and causes the beef to steam rather than sear. Work in batches if necessary to maintain high heat.
Another error is failing to let the meat rest; slicing too early causes the juices to escape, leading to dry meat. Finally, do not ignore the heat levels; if the honey begins to smell burnt or the glaze turns very dark, reduce the heat immediately to avoid a bitter taste.
How to tell it’s done
The roast is perfectly cooked when it reaches an internal temperature of 145°F (63°C). At this stage, the meat should be tender enough to be easily pierced with a fork. Using a digital meat thermometer is the most reliable way to check for doneness.
Remember that the meat will continue to cook slightly while it rests, so pulling it from the heat at the target temperature ensures the best possible result for texture and safety.
- Steaks, chops and roasts: 145°F (63°C) in the thickest part, then a 3-minute rest
Up next · Part 3 of 3
2 variations · storage & make-ahead · 3 answers · printable card
Tips, FAQ & printable recipe (Part 3)← Back to the ingredients (Part 1)