Dinner · Part 2 of 3: Instructions
Sticky Honey Garlic Chicken Thighs in One Pan Step-by-step instructions
- Prep
- Cook
- Total
- Serves
- 4
Before you start
Before you start, take the chicken thighs out of the refrigerator and let them sit at room temperature for about 20 minutes. This helps them cook more evenly. Pat them thoroughly dry with paper towels — this is key for getting a good sear. Preheat your oven to 400°F (200°C).
Measure out all the glaze ingredients and have them ready. If you're using a cast-iron skillet, place it in the oven while it preheats, then carefully remove it when ready to sear (this helps the chicken brown even better). Have a small bowl for the glaze and tongs ready.
Ingredients at a glance (8)
- 8 bone-in, skin-on chicken thighs (about 2 1/2 lb)
- 1 tsp kosher salt
- 1/2 tsp black pepper
- 1 tbsp vegetable oil
- 1/3 cup honey
- 1/4 cup low-sodium soy sauce
- 4 cloves garlic, minced
- 1 tbsp apple cider vinegar
Instructions
Sear and Glaze
- Season and Sear the ChickenPat the chicken thighs dry with paper towels. Season both sides with kosher salt and black pepper. Heat the vegetable oil in a large oven-safe skillet over medium-high heat. Place the chicken thighs skin-side down in the hot skillet and cook without moving for 5-7 minutes, until the skin is deeply golden and crisp. Flip and cook for another 3-4 minutes to brown the other side.Look for The skin should be deep golden brown and release easily from the pan.Safe temperature 165°F (74°C) internal temperature (poultry)Tip Don't overcrowd the pan; cook in batches if needed to get a good sear.
- Make the Honey Garlic GlazeIn a small bowl, whisk together the honey, low-sodium soy sauce, minced garlic, and apple cider vinegar until well combined. Set the glaze aside.Look for The glaze should be smooth and slightly thick.Tip Use fresh garlic for the best flavor; pre-minced garlic can be more bitter.
At the end of this phase, the chicken thighs should be golden brown on both sides, with crisp, rendered skin. The glaze should be well combined and ready to pour. The kitchen will smell of garlic and honey. Before moving on, make sure the skillet is hot enough that the chicken sizzles when it goes in — if it doesn't, the skin won't crisp.
Bake to Sticky Perfection
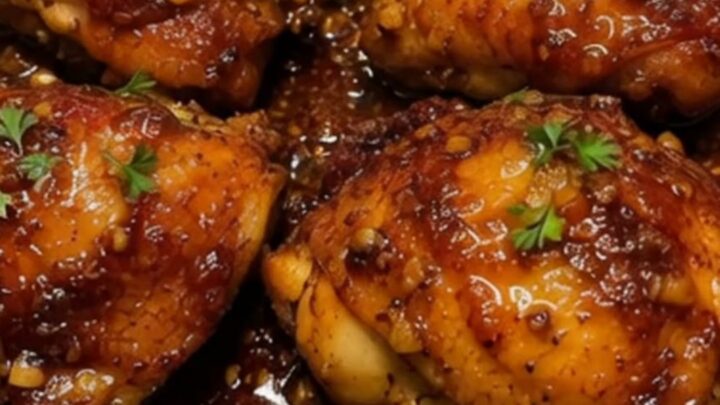
- Glaze and Bake the ChickenPour the glaze over the browned chicken thighs in the skillet, turning each thigh to coat it evenly. Transfer the skillet to a preheated 400°F (200°C) oven. Bake for 15-20 minutes, basting once halfway through, until the chicken is cooked through and the glaze is sticky and caramelized.Look for The glaze should be bubbling and clinging to the chicken; the internal temperature should read 165°F (74°C).Safe temperature 165°F (74°C) internal temperature (poultry)Tip Use an instant-read thermometer to check the thickest part of the thigh, avoiding the bone.
After baking, the glaze should be bubbling and thick, coating the chicken in a sticky, glossy layer. The skin will have darkened to a deep amber, and the edges of the pan will have caramelized bits. The chicken should look shiny and irresistible. Check the internal temperature to ensure it's at least 165°F (74°C).
Rest and Serve
- Rest and ServeRemove the skillet from the oven and let the chicken rest for 5 minutes. The glaze will continue to thicken as it rests. Transfer the chicken thighs to a serving plate and spoon any extra glaze from the pan over the top. Serve hot.Look for The chicken should be glossy and sticky, with tender meat that pulls easily from the bone.Tip Letting the chicken rest helps the juices redistribute, keeping the meat moist.
Once rested, the chicken should be tender enough that a fork slides in easily, and the meat should pull away from the bone. The glaze should have set into a sticky coating that doesn't run off the chicken. When you lift a piece, the glaze should stretch slightly. Serve immediately while warm.
Common mistakes
One common mistake is overcrowding the pan during the sear. If the chicken thighs are too close together, they will steam instead of brown, so you won't get that crispy skin. Cook them in batches if necessary. Another mistake is skipping the drying step — moisture on the skin prevents browning.
Also, be careful not to burn the garlic in the glaze; if you add it to the hot pan too early, it can turn bitter. Stir it into the glaze before pouring it over the chicken, and avoid cooking the glaze on high heat for too long.
Finally, don't skip the resting time — cutting into the chicken immediately will cause the juices to run out, leaving the meat dry.
How to tell it’s done
The chicken is done when an instant-read thermometer inserted into the thickest part of the thigh, without touching the bone, reads 165°F (74°C). The skin should be deeply caramelized and sticky, and the glaze should be bubbling and clinging to the chicken.
If you don't have a thermometer, you can check by piercing the thickest part of the thigh with a knife — the juices should run clear, and the meat should have no pinkness. Letting the chicken rest for 5 minutes after baking allows the juices to redistribute, making the meat even more tender.
- Poultry: 165°F (74°C) in the thickest part
Up next · Part 3 of 3
4 variations · storage & make-ahead · 5 answers · printable card
Tips, FAQ & printable recipe (Part 3)← Back to the ingredients (Part 1)