Dinner · Part 2 of 3: Instructions
Sticky Honey Garlic Chicken Bites Step-by-step instructions
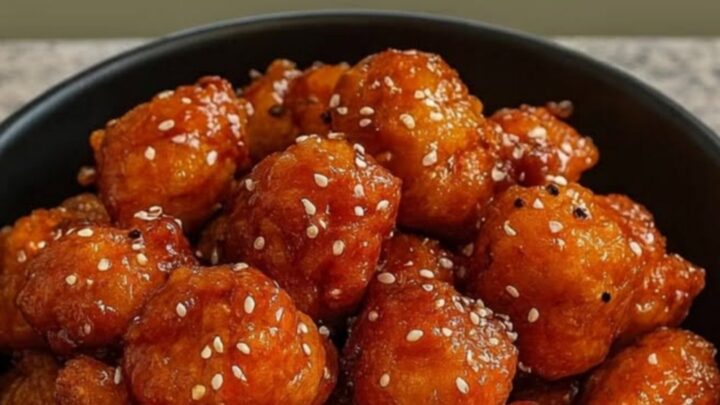
- Prep
- Cook
- Total
- Serves
- 4
Before you start
Before starting, ensure all your ingredients are measured and ready to go, as the cooking process moves quickly once the heat is on. Cut the chicken into uniform, bite-sized pieces to ensure they cook at the same rate.
Prepare your sauce by mixing the honey and minced garlic in a small bowl so you can add it to the pan in one go. Have your tongs and a clean plate ready for transferring the finished chicken. Keep your workspace clear to manage the cooking steps efficiently without any delays.
Ingredients at a glance (4)
- 1.5 lb boneless skinless chicken thighs, cut into bite-sized pieces
- 1/3 cup honey
- 3 cloves garlic, minced
- sesame seeds, for serving
Instructions
Preparing the Chicken
- Prepare ChickenCut the chicken thighs into uniform bite-sized pieces. Ensure the meat is clean and ready for the pan. Keep the chicken refrigerated until you are ready to cook to maintain food safety standards.Look for The chicken pieces should be uniform in size for even cooking.Tip Keep the chicken cold until the last moment.
At the end of this phase, the chicken pieces should be cut into uniform sizes. This preparation is critical for achieving consistent cooking. Ensure the pieces are not clumped together, as this would prevent even browning later. The chicken is now ready for the skillet, having been kept cold until the last possible moment to ensure safety and quality.
Searing for Texture
- Sear the ChickenPlace the chicken pieces in a hot skillet. Cook the chicken, turning occasionally with tongs, until the exterior is golden brown and the meat reaches an internal temperature of 165°F (74°C).Look for The chicken should be golden brown and crispy.Safe temperature 165°F (74°C) internal temperature (poultry)Tip Do not overcrowd the pan to ensure proper browning.
The chicken should now be golden brown and fully cooked through. The pieces will look firm and retain their shape when moved with tongs. The skillet should have some golden browned bits at the bottom, which will add extra depth to the final sauce. The chicken is now ready to be glazed and finished with the aromatic honey mixture.
Glazing and Finishing
- Glaze and ServeAdd the honey and minced garlic to the skillet with the cooked chicken. Toss the pieces continuously until the sauce reduces into a thick, glossy, and sticky coating. Remove from heat and sprinkle with sesame seeds before serving.Look for The sauce should be thick, sticky, and glossy, coating the chicken completely.Tip Watch the honey carefully as it can burn if the heat is too high.
The final dish should feature chicken bites that are glistening with a thick, syrupy honey garlic sauce. The aroma should be sweet and savory, with the garlic fragrance prominent.
The sauce should be reduced enough that it clings to the chicken rather than pooling at the bottom of the pan. Everything is now ready to be plated and garnished with sesame seeds.
Common mistakes
A common mistake is overcrowding the pan, which lowers the temperature and causes the chicken to steam instead of fry, resulting in a soft texture. Always cook in batches if your skillet is not large enough.
Another error is burning the garlic or the honey. Because honey contains high sugar, it can turn bitter if scorched. Keep the heat at medium-high and stir constantly once the glaze is added to ensure it coats the chicken evenly without burning.
How to tell it’s done
The chicken is perfectly done when the exterior is golden brown and the internal temperature reaches 165°F (74°C). Because the pieces are small, they cook very rapidly.
You can test for doneness by cutting into one of the larger pieces to ensure the meat is opaque and no longer pink. The glaze is finished when it has bubbled and thickened sufficiently to coat the back of a spoon, creating a beautiful, glossy shine on the chicken.
- Poultry: 165°F (74°C) in the thickest part
Up next · Part 3 of 3
2 variations · storage & make-ahead · 3 answers · printable card
Tips, FAQ & printable recipe (Part 3)← Back to the ingredients (Part 1)