Dinner · Part 2 of 3: Instructions
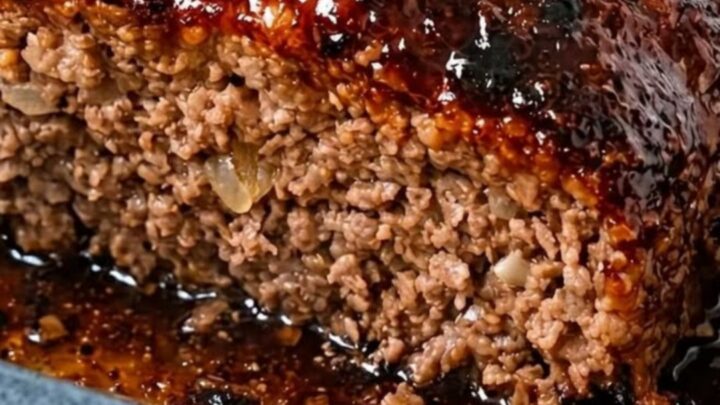
Sticky Glazed Meatloaf for Ultimate Comfort Step-by-step instructions
- Prep
- Cook
- Total
- Serves
- 6
Before you start
Start by gathering all ingredients and measuring them out. Ensure the meatloaf base is fresh and kept chilled until the moment of shaping.
Preheat the oven well in advance to ensure it reaches the target temperature of 375°F (190°C) before the loaf goes in. Prepare the loaf pan by lightly greasing it with oil or lining it with parchment paper to prevent sticking.
Ingredients at a glance (3)
- 2 lb meatloaf base
- 1/2 cup brown sugar glaze
- fresh thyme sprigs, for serving
Instructions
Mixing the Base
- Prepare the MeatloafPreheat the oven to 375°F (190°C). Place the meatloaf base into a 9x5 inch loaf pan, pressing it firmly to ensure it holds its shape during the baking process. Smooth the top to create an even surface for the glaze.Look for The meatloaf mixture should be uniform and fill the pan evenly.Tip Ensure the meat is cold when you begin to help it maintain its structure.
The mixture should feel soft and consistent. When you press it into the pan, it should be level and firm.
If the mixture feels too wet, ensure you are using the correct pan size to allow for proper heat distribution during the initial baking phase.
Glazing and Baking
- Glaze and BakeBrush half of the brown sugar glaze evenly over the top of the meatloaf. Place in the preheated oven and bake for 45 minutes. Remove the pan, brush with the remaining glaze, and return to the oven for an additional 15 minutes, ensuring the internal temperature reaches 160°F (71°C).Look for The glaze should be bubbling and slightly darkened at the edges.Safe temperature 160°F (71°C) internal temperature (ground meat)Tip Basting midway through the cooking process ensures the glaze caramelizes properly.
Check the oven periodically. The glaze should darken slowly. If the top appears to be browning too quickly before the center is cooked, you can loosely tent a piece of foil over the pan for the remainder of the cooking time.
Resting and Serving
- Resting and ServingRemove the meatloaf from the oven and let it rest in the pan for at least 10 minutes before slicing. This allows the juices to redistribute throughout the meat, resulting in a moist slice. Garnish with fresh thyme sprigs before serving.Look for The meatloaf should be firm enough to slice without crumbling.Tip Using a sharp serrated knife will help you get clean, beautiful slices.
The meatloaf should feel slightly firmer after the resting period. It should release easily from the sides of the pan. Ensure the center is stable before attempting to lift the first slice out for serving.
Common mistakes
A common mistake is overworking the meat. When shaping, use a light touch and stop as soon as the base is formed; overworking the mixture leads to a dense, tough texture.
Another error is failing to let the meatloaf rest. Slicing immediately after it comes out of the oven causes the juices to run out, resulting in a dry loaf. Always wait at least 10 minutes for the best results.
How to tell it’s done
The meatloaf is perfectly cooked when it reaches an internal temperature of 160°F (71°C) at the center. Visually, the glaze should be deeply caramelized and bubbling at the edges of the pan.
When you insert a knife to slice it, there should be minimal resistance, and the juices that release should be clear, indicating that the meat is thoroughly cooked and resting properly.
- Ground meat: 160°F (71°C) in the thickest part
Up next · Part 3 of 3
2 variations · storage & make-ahead · 3 answers · printable card
Tips, FAQ & printable recipe (Part 3)← Back to the ingredients (Part 1)