Dinner · Part 2 of 3: Instructions
Sticky Garlic BBQ Ribs for a Tender Meal Step-by-step instructions
- Prep
- Cook
- Total
- Serves
- 4
Before you start
Start by gathering all ingredients and ensuring the ribs are properly trimmed. If the butcher has not already removed the membrane from the back of the ribs, do this first to ensure the meat becomes tender. Prepare the garlic by mincing it finely so it distributes evenly through the sauce.
Preheat the oven well in advance to ensure it reaches the target temperature of 300°F (150°C) before the ribs go in. Having the baking sheet lined with foil makes cleanup much easier once the sticky sauce has baked onto the surface.
Ingredients at a glance (3)
- 2 lbs pork spare ribs, membrane removed
- 1 cup store-bought or made ahead BBQ sauce
- 4 cloves garlic, minced
Instructions
Preparation and Initial Roast
- Prepare the RibsPreheat the oven to 300°F (150°C). Line a large baking sheet with aluminum foil. Place the pork ribs onto the prepared sheet, ensuring they are laid out in a single layer for even cooking.Look for Oven is preheated and ribs are arranged on the baking sheet.Tip Removing the silver skin membrane from the back of the ribs helps the seasoning penetrate and makes them more tender.
At this phase, the ribs should be securely sealed within the foil packet on the baking sheet. The oven environment is low and steady, allowing the pork to slowly cook in its own juices and the garlic-infused sauce.
Ensure the foil is crimped tightly around the edges of the pan to prevent any steam from escaping, as this is the foundation for achieving the desired tenderness. The kitchen will begin to smell faintly of roasted garlic and savory BBQ sauce as the cooking progresses.
Glazing and Caramelization
- Glaze and BakeMix the BBQ sauce and minced garlic together. Brush the sauce generously over the ribs. Cover the baking sheet tightly with more foil and bake in the preheated oven for 2 hours until the meat reaches 145°F (63°C). Let the meat rest for at least 3 minutes.Look for Ribs are tender and internal temperature reaches 145°F.Safe temperature 145°F (63°C) internal temperature (steaks, chops and roasts)Tip Checking the temperature with a probe thermometer ensures the meat is perfectly cooked through.
Once the foil is removed and the oven temperature is increased, the goal is to transform the sauce. The ribs should look soft and tender, with the sauce starting to bubble and thicken on the surface.
As the heat rises, the sugars in the BBQ sauce begin to darken and caramelize, creating a rich, sticky coating. Watch closely during these final minutes to ensure the sauce does not burn, as the high sugar content can transition from perfectly caramelized to burnt very quickly.
Resting and Serving
- Caramelize and ServeRemove the foil and increase the oven heat to 400°F (200°C). Bake for another 10 minutes until the sauce is bubbly and caramelized. Let the ribs rest for at least 10 minutes before serving.Look for Sauce is glistening and slightly charred at the edges.Safe temperature 145°F (63°C) internal temperature (steaks, chops and roasts)Tip Allowing the meat to rest ensures the juices redistribute throughout the ribs for maximum tenderness.
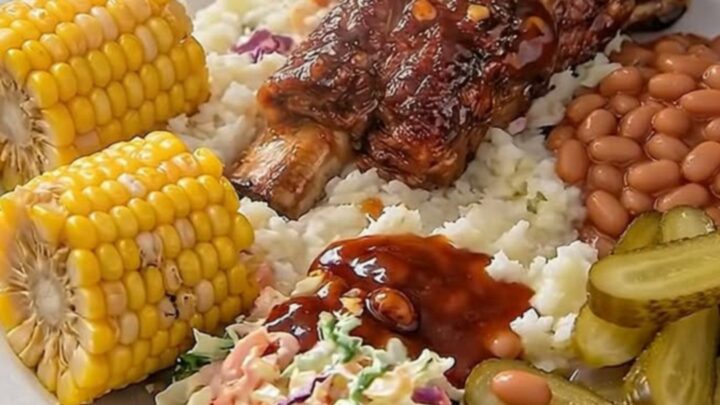
After removing the ribs from the oven, they should appear deep mahogany in color with a glossy, tacky finish. The meat should be visibly pulling away from the ends of the bones. Let the rack rest on a cutting board, which allows the internal temperature to stabilize and the juices to settle. The ribs are ready to be sliced between the bones once the surface is cool enough to handle, revealing tender, juicy meat that is perfectly complemented by the sticky garlic glaze.
Common mistakes
A common mistake is failing to remove the silverskin membrane from the back of the ribs, which can result in a chewy texture that is difficult to eat. Another error is neglecting to seal the foil tightly, which allows moisture to escape and prevents the ribs from becoming tender.
Finally, avoid using too much heat during the initial cooking phase, as this will dry out the meat before the connective tissue has had enough time to break down properly for that signature fall-apart texture.
How to tell it’s done
The ribs are done when the meat is exceptionally tender and begins to pull away from the bone. Use a meat thermometer to check the internal temperature at the thickest part of the rack, ensuring it reaches at least 145°F (63°C). The sauce should be dark, glossy, and slightly charred at the edges without being burnt. Allow the meat to rest for at least 10 minutes before slicing to ensure the juices stay inside the meat rather than running onto the cutting board.
- Steaks, chops and roasts: 145°F (63°C) in the thickest part, then a 3-minute rest
Up next · Part 3 of 3
2 variations · storage & make-ahead · 3 answers · printable card
Tips, FAQ & printable recipe (Part 3)← Back to the ingredients (Part 1)